About the Import Tool
The Salesforce Form Import Tool allows you to quickly create a new web form using Salesforce objects & fields as a template.
This tool creates the web form and automatically configures the Salesforce Connector. In the simplest cases, you can have a working web form that creates new records in Salesforce in just a few minutes.
You can pick from any object available in your Salesforce organization (including custom objects) and for each object, select which fields should be included in the form.
Use Case
Say you'd like to create a Web-To-Lead form. First, you would select the Lead object, select the desired fields (at least First Name, Last Name, Company, and Email Address), and save. The form would be ready to accept data immediately, and Leads would appear in your Salesforce org within a few seconds of a submission.
Step by Step
1. From the Forms List, select Import > Import from Salesforce to access the Form Import tool.

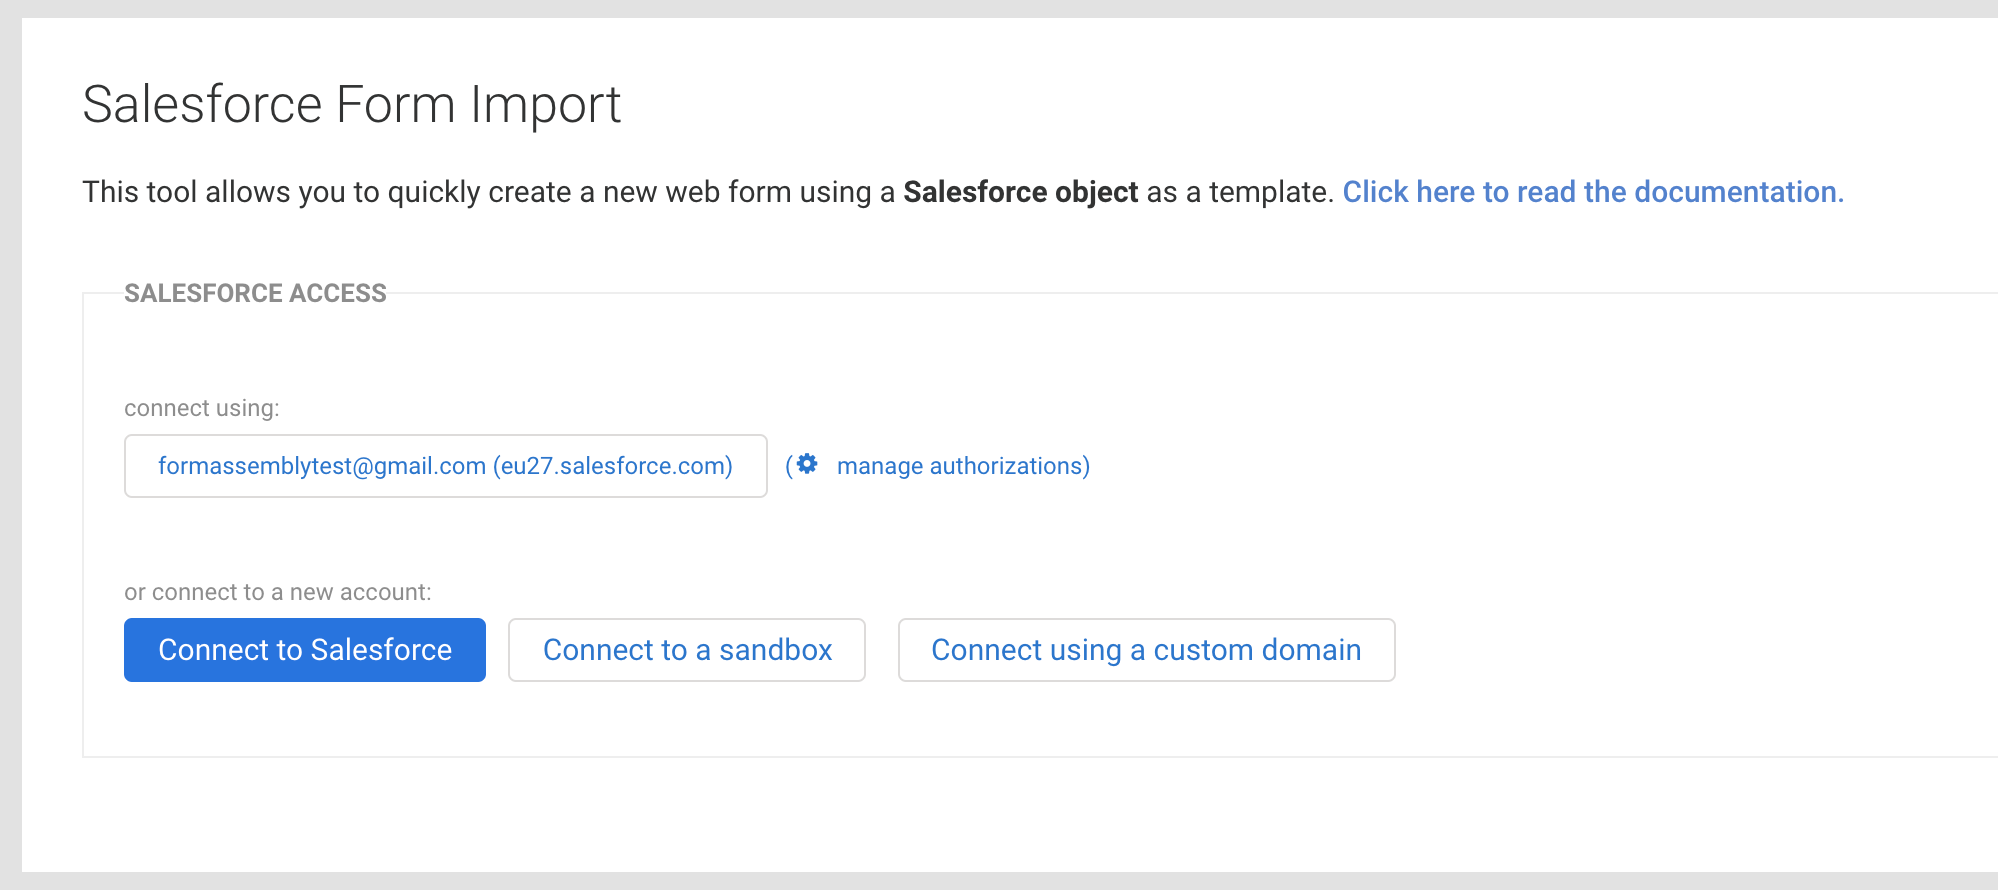
2. Connect with your Salesforce Credentials
Next, you will need to connect with your Salesforce credentials. If you have already authenticated a connector with your credentials, you can click on your username. If this is your first time connecting to Salesforce, or you want to connect with new credentials, click Connect to Salesforce. You can also connect to a Sandbox or custom domain at this point as well.
3. Select your Object & Fields
Once in the Schema Browser, select the object you'd like to work with. It can be a Lead, a Case or any other object. Then select the fields you would like to see in your form.
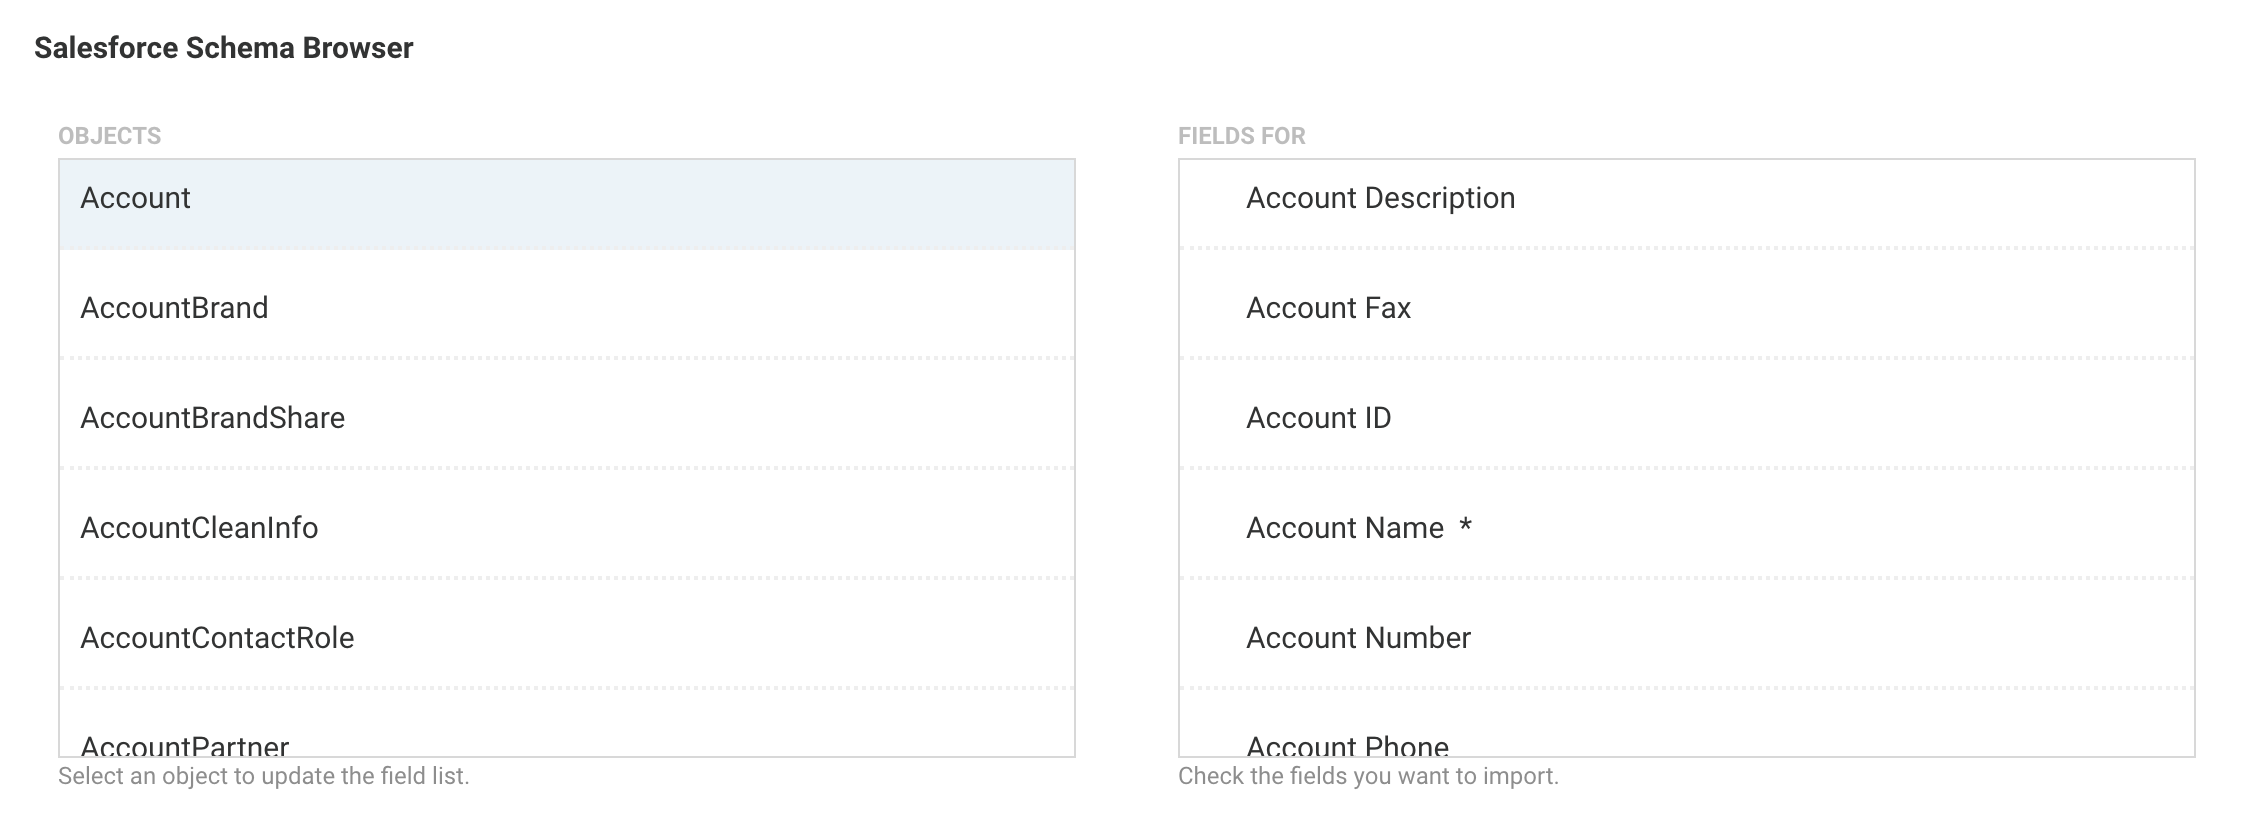
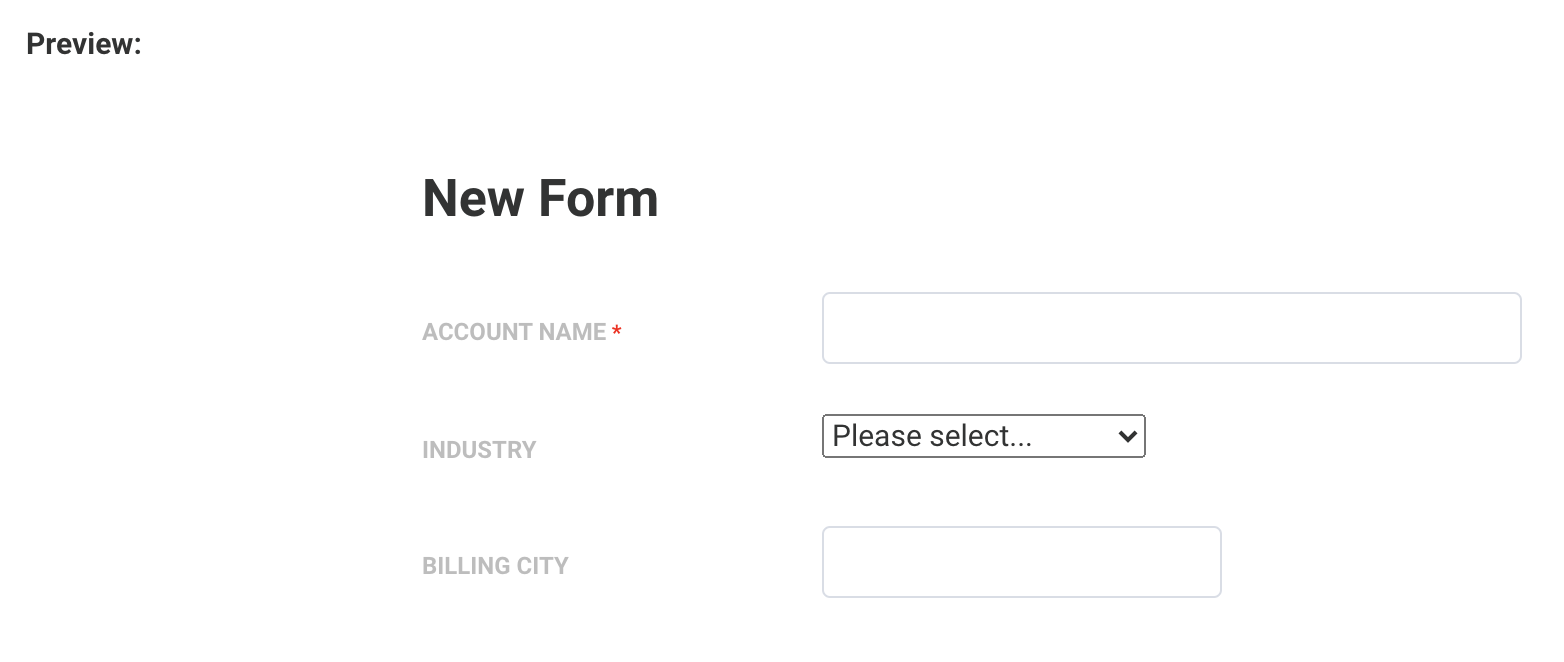
As you select fields, you will see a preview of your form being updated under the schema browser. You can select as many fields as you need simply by clicking on them. To unselect a field and remove it from your form, simply click on it again.
Note that you can reorganize your form, edit field labels, and change the look and feel later on in the Form Builder. At this stage, you only need to select all the desired fields and save your form when you're done.
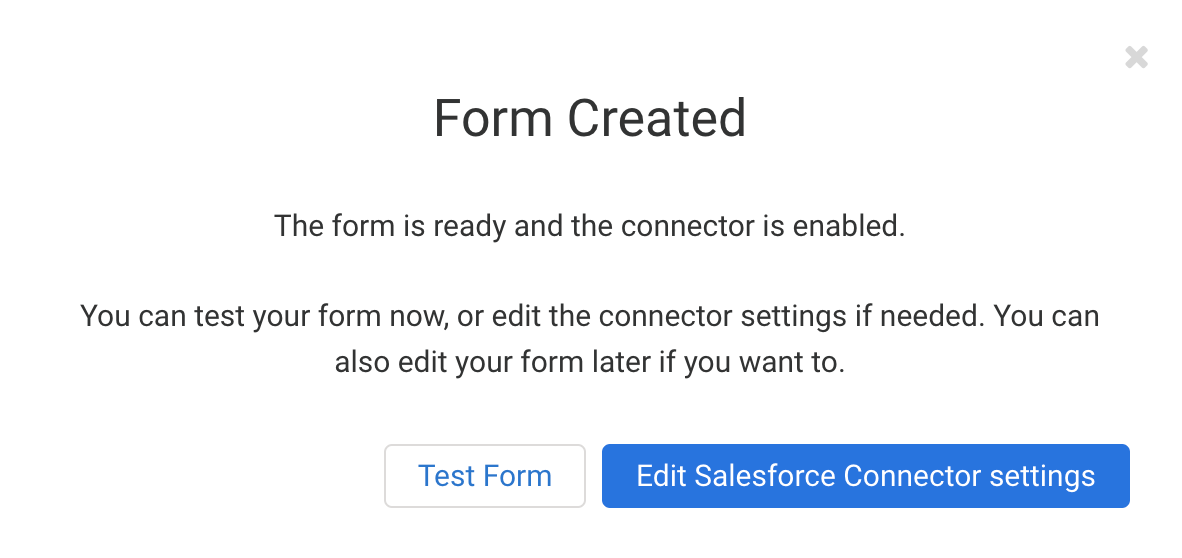
4. Click Save
Working with Multiple Objects
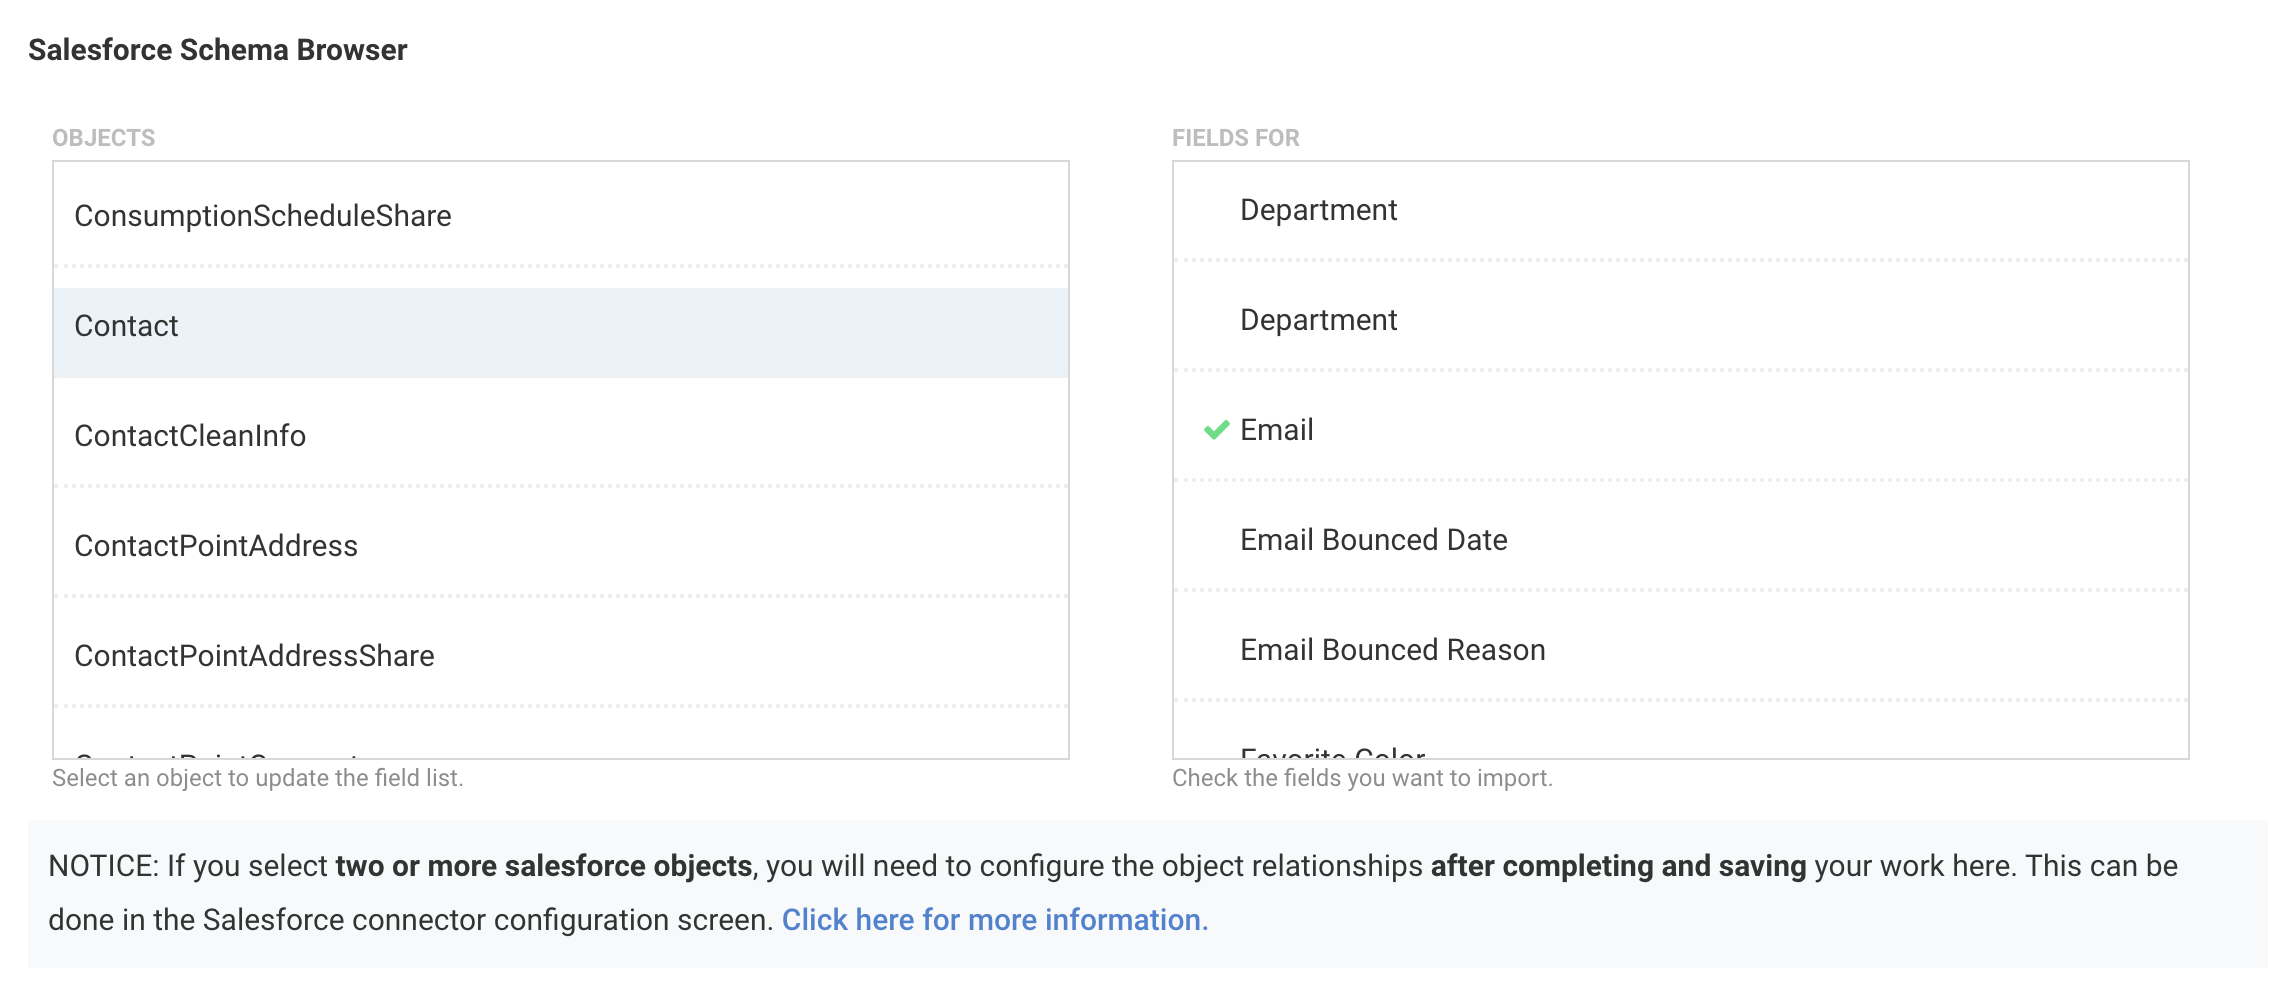
You can create a form that integrates with two or more related objects in Salesforce. However, to keep this tool simple, the Import Tool does not try to handle record relationships (like master/detail or lookup). This means that there is an extra step needed once you're done with this tool. To make sure that you're aware of this, you will see the following notice upon selecting the first field of your second object.
To set the appropriate relationship between your objects, first finish selecting all remaining fields and save your form. On the next dialog box, click Edit Salesforce Connector Settings.
In the connector configuration screen, you will see the object and fields you've selected in the Import Tool. If you're not familiar with the Salesforce connector setup, you can read more about it here.
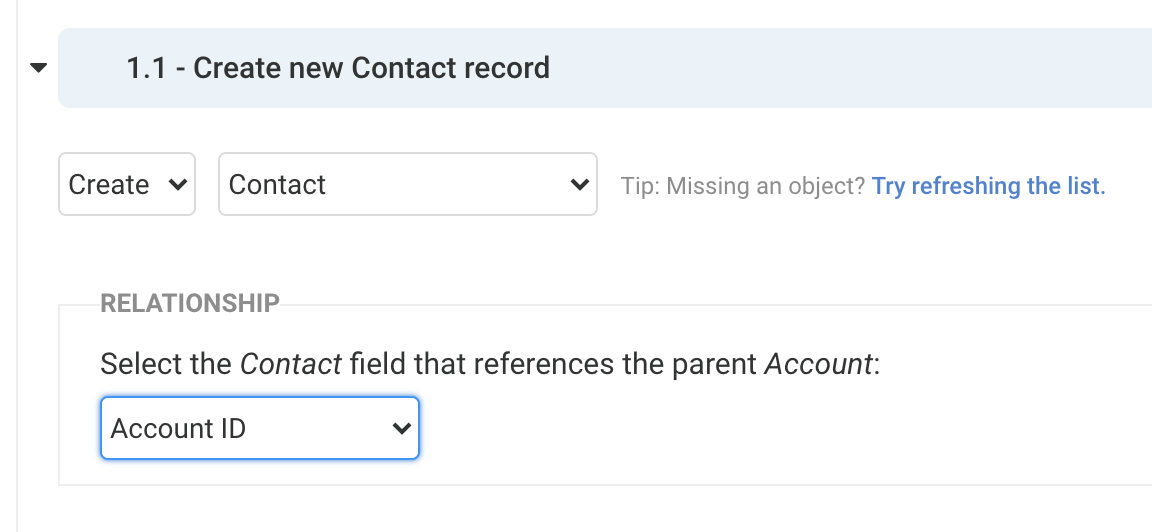
If you selected two or more objects in the Import Tool, click the Edit icon for the second (child) object.

Next, set the correct value for the parent id of the specific object the child object should be linked in the Relationship section.
In the example below, Contact (the child object) has its Account ID field mapped to the ID of the Account (the parent object). This means that every Child record created will be associated with the Account that is created in step 1 of the connector.
When mapping a Parent ID, the value has to come from an object that appears earlier in the connector.
Once you're done with this step, you can save and test your form.
Make Further Modifications to Your Form
Once you've imported your Salesforce form into FormAssembly, you will no longer use the Import Tool to make further changes to the connector or form. Instead, you will use the Form Builder or configure the Salesforce Connector directly. Any updates made on the Salesforce side are not dynamically updated on the FormAssembly form, so you will need to manually update the FormAssembly form to reflect any changes made in Salesforce.