
Introduction
The Workflow Approval feature enables you to map and build approval processes into your workflow, bridging the gap between various business process components. This feature is particularly beneficial when validating data collection processes, ensuring they align with your established guidelines and best practices.
Workflow Approval is accomplished by creating an Approval Step in your workflow, designating what form requires response approval, choosing who will decide whether a response is approved or denied, and what happens next after a decision is made.
Requirements
- FormAssembly Team plan or above
- Approval License (minimum 1)
Approver Permissions Setup (Admin Required)
To set up a user as an Approver, follow these steps.
- Open the Admin Dashboard.
- Under “User Management”, select All Users.
- Locate the user profile for the user(s) you are designating as your Approver.
- Edit the user profile.
- Open the Permissions tab.
- Select the checkbox next to the Approve License.
- Click Save.
Preparing for an Approval Step
- Open an existing workflow or create a new one.
- Add at least one Form Step, if one does not already exist.
- Before adding an Approval Step, you’ll need to use a Page Redirect Step to show the workflow respondent a Thank You page. This is required in order to allow the process to be transferred to an approver.
- After the Page Redirect Step, add a new Approval Step.
Once the Approval Step is added to your workflow, you will be able to configure the step further. We will cover these options below. You will also see two conditional paths appear in your Workflow Builder: Approved and Denied.
Based on whether the response is approved or denied, the workflow will continue down the path in question. You will need to add further steps into these paths after configuring the Approval Step to either collect more data or end the process. If the Approved or Denied paths are left unfinished, the workflow will have an “incomplete” status.
Remember to save your workflow when you’re done!
Approval Step Configuration
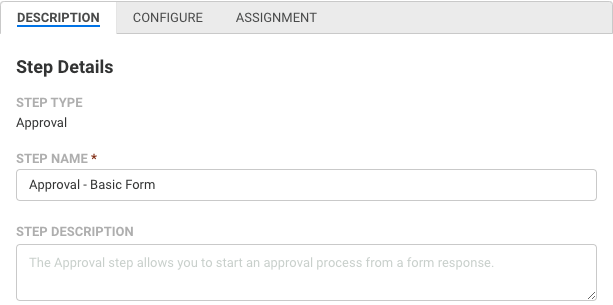
Description Tab
Use the Description tab to add a Step Name and Step Description.
Configure Tab
Select the form that the approver will be completing the review in this tab.

Allow Assignees To Leave Comments - Toggle this option to allow assigned approvers to comment on their completed approvals.
Make Comments Required - If comments are enabled, toggle this option to require an assigned approver to add a comment to an approval.
Assignment Tab
Assign approvers and an approval type within this tab. Add any additional information about the approval task to the notification message your approver(s) will receive.

Select Who Will Approve This Task - Use this section to assign the created approval to one or more users with Approval licenses.
Type of Approval - Select which approval type to use.
First to Respond
- Using the 'First to Respond' approval process, each chosen approver gets an email alert about a pending approval request. The race is on - the first user from the selected group to check the email will have the power to approve or deny the request. Those who check the email later will see a message that their approval is no longer needed.
- Example: You've picked five users as approvers for a certain form. When a response to this form comes in, all five approvers get notified. Only the first user to act gets to decide - they can mark the response as 'Approved' or 'Denied'. Once they submit their decision, the approval process continues along the path the first approver selected.
Approval Threshold
- The Approval Threshold sets a requirement for how many approvers must agree that a response is ‘Approved’ before an approval or denial is finalized for a response. If the approval threshold is not met, the response is set as ‘Denied’. Choose the approval threshold value from the How Many Must Approve dropdown menu.
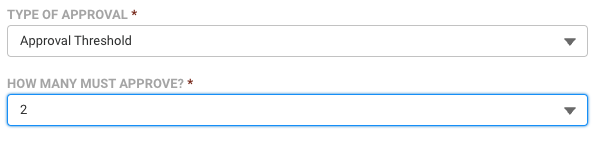
- Example: You’ve picked five users as approvers for a form, and set the approval threshold to 3. When a form response comes in, all five approvers get notified. The moment three out of five approvers select ‘Approved’, the approval process continues down the Approved path. However, if less than 3 approvers select ‘Approved’, the approval process proceeds down the Denied path.
- This option will only appear after adding more than one approver.
- The Approval Threshold sets a requirement for how many approvers must agree that a response is ‘Approved’ before an approval or denial is finalized for a response. If the approval threshold is not met, the response is set as ‘Denied’. Choose the approval threshold value from the How Many Must Approve dropdown menu.

Notification Settings - This section can be used to add details to the request that will be sent to approvers. This additional context will help them understand the information they will be reviewing.
Requester Name
- The name of the person requesting the approval to be made.
Requester Email Address
- The email address of the person requesting the approval to be made.
Reason for Request
- Add any additional details about the reason for the approval request or approval criteria the approver may need.
Completing an Approval
After a response is submitted that requires approval, the assigned Approver(s) will receive an email with a link to the response to review. The Approver must log into their FormAssembly account to access the response.
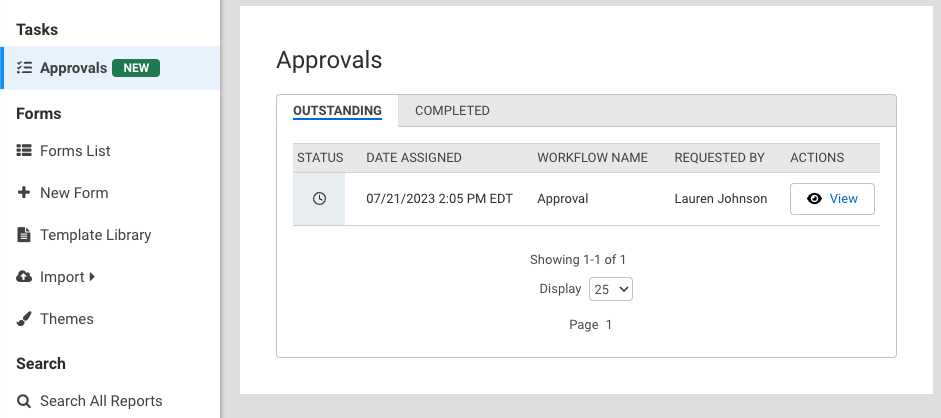
An Approver may also access their Outstanding and Completed Approvals lists by selecting Approvals under Tasks from the left panel.
At the bottom of the received response, the Approver must select either the Approve or Deny buttons.
If enabled, the Approver may also enter a comment about their selection. An asterisk will indicate whether adding a comment is required by the workflow owner.
When finished, the Approver clicks the Submit button to complete the approval task.

Managing Approvals
When reviewing Workflow Responses, a workflow owner may complete several actions.

Approval Override - Select to Approve or Deny an approval directly from the Workflow Responses List or in the expanded Details of an approval.
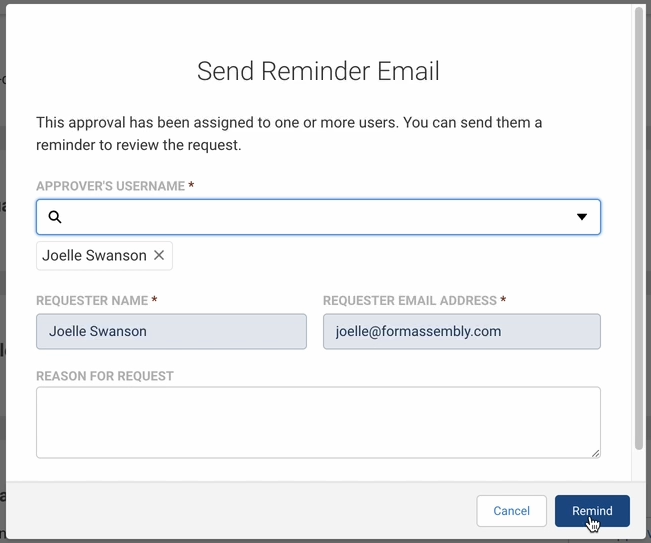
Approval Reminder - Send a reminder email to assigned approvers for approvals “Awaiting Responses”, by selecting the Remind button.
When selected, a modal opens allowing you to select available approvers, and add an optional message to send in your reminder.
Approval Reassignment - Replace approver assignments with different selections with the Ressign button. Reassignment is accessible from both the Workflow Responses List and the Approval Details.
When selected, a modal opens allowing the workflow owner to choose the approver they are replacing, a new approver, and an optional message to the new approver. Select the Reassign button to finish the reassignment.

Review Details and Comments - From the Workflow Responses List, select View Details to review more information available about an approval. Within the Details, any comments added to an approval are listed in the Decision Details section next to the name of the approver who left the comment.
