Overview
If you published your forms with the Copy & Paste method or the REST API, and tracking is otherwise already set up on your site, you don't need to do anything to track your forms.
However, if you use FormAssembly to host your forms, follow these steps to add Google Analytics tracking:
Note: Our Tier 1 Support does not assist with this feature.
Setup the Tracking Code
- Open your form in the Form Builder and add the GA4 Analytics element from Add Content > Predefined Content > Analytics.
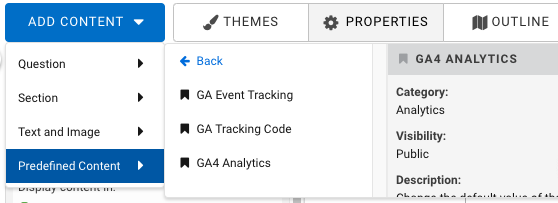
- Locate the newly added GA4 Tracking Code section on your form.
- Configure the newly added "G-tag ID" field.
- Set the Default Value as your G-Tag ID. Visit your Google Analytics account dashboard to obtain this value.
- Save your form.

Enable Cross-Domain Tracking
With the trafficking code set up, we have ensured that traffic to your web form will be reported in the desired Google Analytics profile. However, there is one more thing you need to do to make sure that the Google Analytics session carries on to your form and that all tracking information is correctly measured.
You will need to add your own JavaScript code to enable Cross-Domain tracking.
Note: Our Tier 1 Support does not assist with this feature.
Additional Notes to Consider
- Results can take a day to appear in Google Analytics.
- Results are approximated and do not represent all respondents who have opened the form.
- Ad blockers will prevent Google Analytics from tracking respondents with ad blockers enabled on their browsers.
- If you do not see the GA4 Analytics predefined content, you may add it to your account by following the steps in our provided training guides. You can learn more here.