Overview
The form-native Salesforce Prefill Connector allows you to retrieve data from your Salesforce org and display a prefilled form to your respondents. Once you have set up a prefilled link and a query parameter in your form-native Salesforce Prefill Connector, you will be able to pull information from Salesforce records directly into your form.
You can also learn more by watching the recording of our Salesforce Prefill Connector class on this page.
Requirements
You'll need one of our Essentials plans or above. You will also need to create a prefilled link and set up a query parameter in your connector. You can learn more about prefilled links and query parameters in this help document.
- REST API
- WordPress
- Salesforce Experience Cloud (formerly Community Cloud)
- Hosted by FormAssembly
Configure the Connector
Step 1. Add Your Credentials
To begin, first, choose a Salesforce profile that has API access and read access to the Salesforce objects you intend to retrieve.
In your connector, select the type of Salesforce account you will be connecting to. You can choose a standard account, a sandbox, or an account with a custom domain:
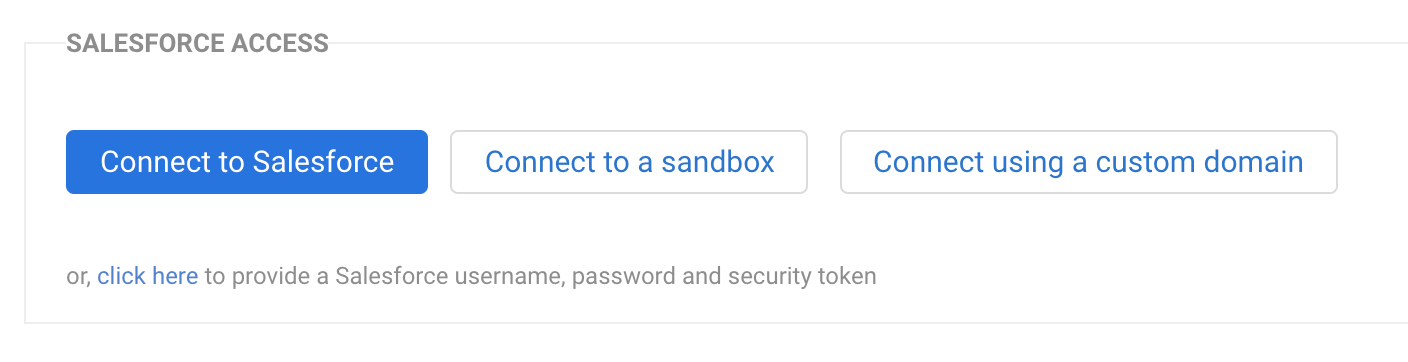
Once you have selected one of the three options, you will be taken to Salesforce and asked to log in. Log into your Salesforce account.
After completing your authentication process, you should now see your Salesforce account listed under "connect using":
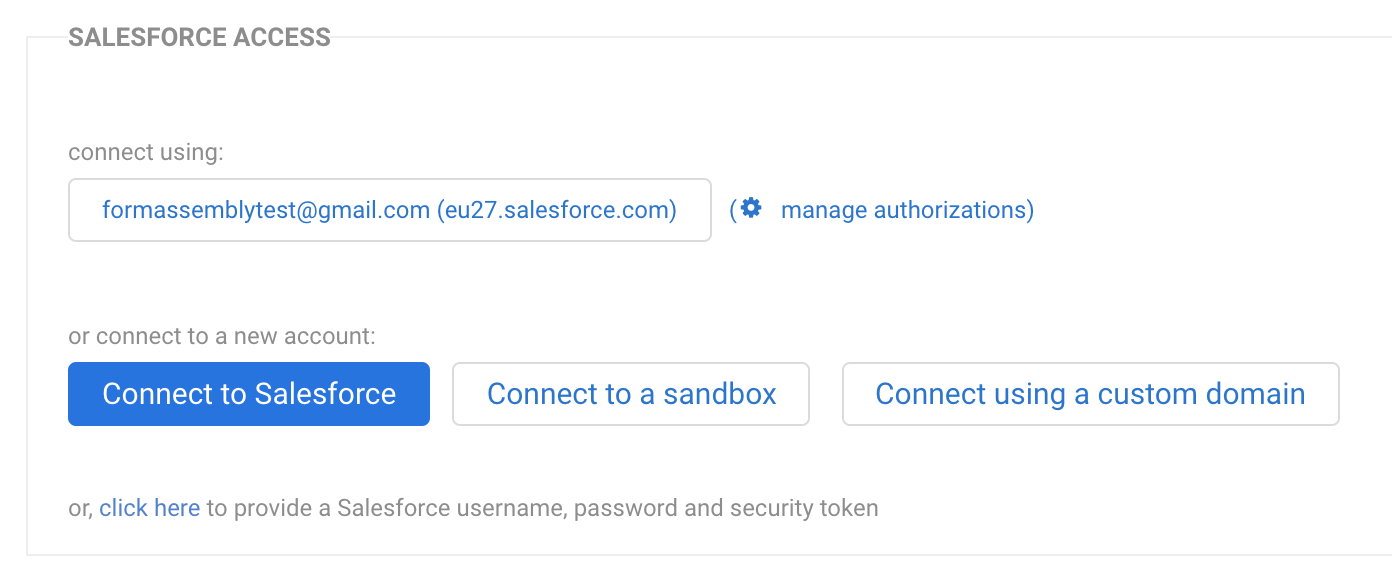
You can now proceed with your connector setup.
Step 2. Set Up a Lookup Query
First, decide:
- Which record do you want to prefill with?
- Which Salesforce field will you use to uniquely identify each record?
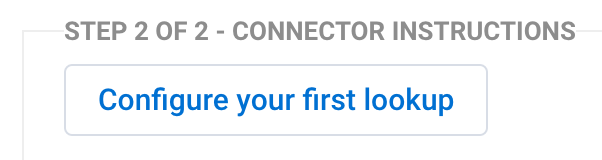
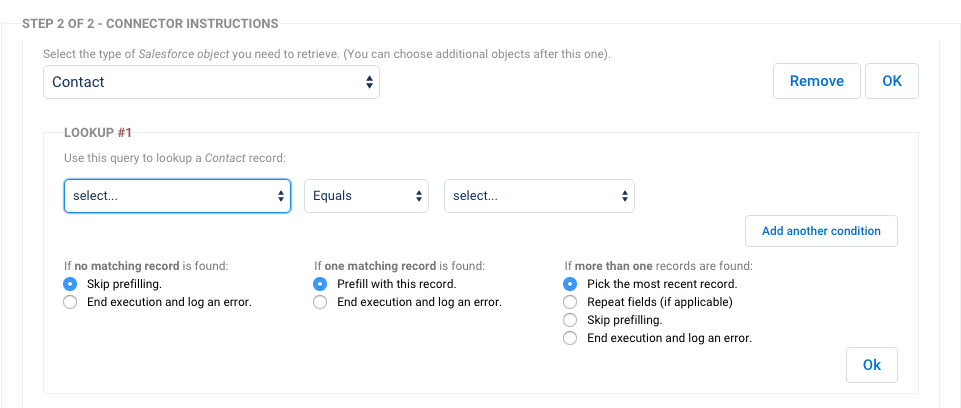
- Click the Configure your First Lookup button to get started.
- In the select an object drop-down menu, choose your object to lookup.
- Click Ok.
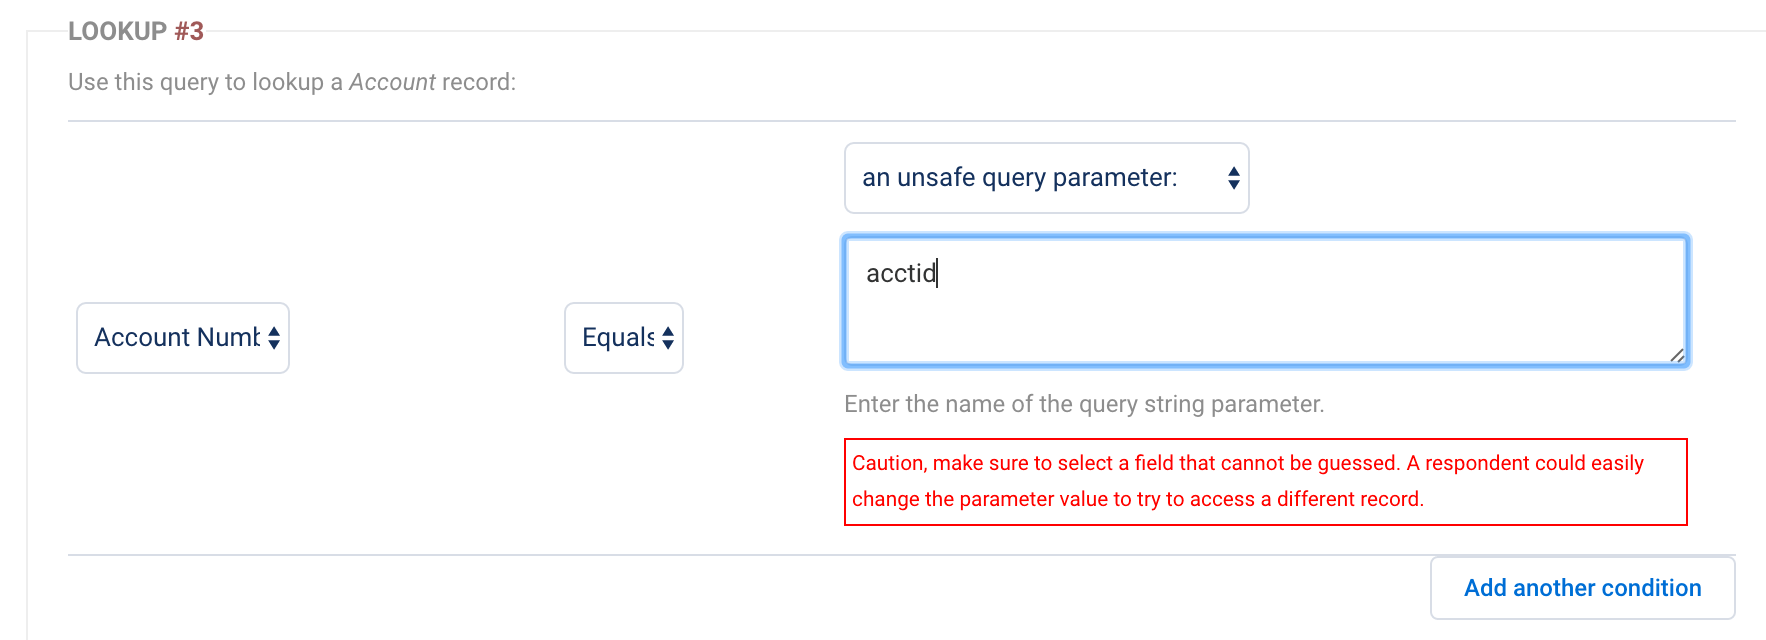
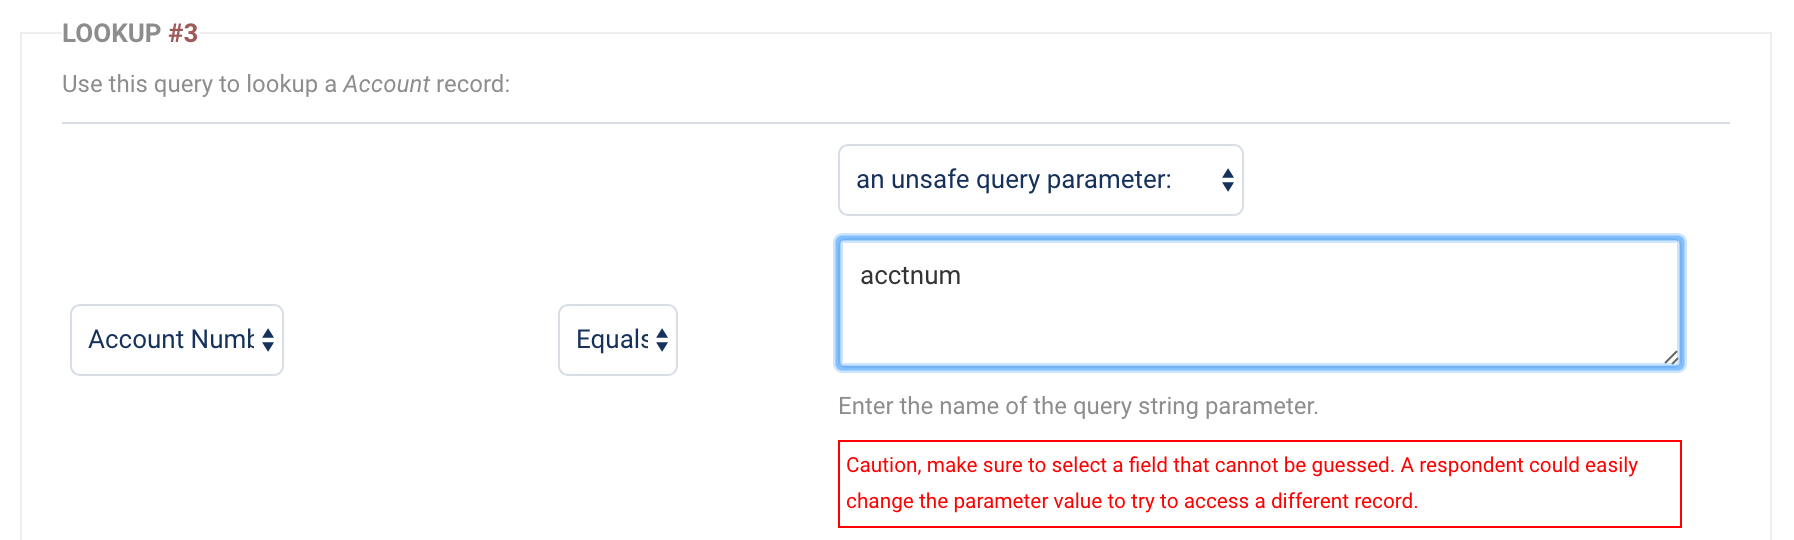
- In the area labeled Lookup #1, choose the Salesforce field which you will query.
- Select the operator in the middle drop-down, i.e., Equals.
- Select an unsafe query parameter. A parameter uniquely defines your query. Please note that these parameters are not truly "unsafe". They are called "unsafe" parameters because they do not have a signature attached.
- Enter a value to represent the parameter. This is very flexible, and it's up to you. In this case, the value is acctid, short for account ID.
Note: This is case-sensitive and you should not use any special characters (i.e. &,_,@) or spaces. In general, it is best to keep this query parameter simple and text-based. - Add additional search conditions, if needed.
- Under each lookup, confirm what to do if/when records are found.


Step 3. Field Mapping
Next, you will need to map the fields you would like to prefill in the form. Select a field from your form on the left, select the matching field in Salesforce on the right, and click Ok.
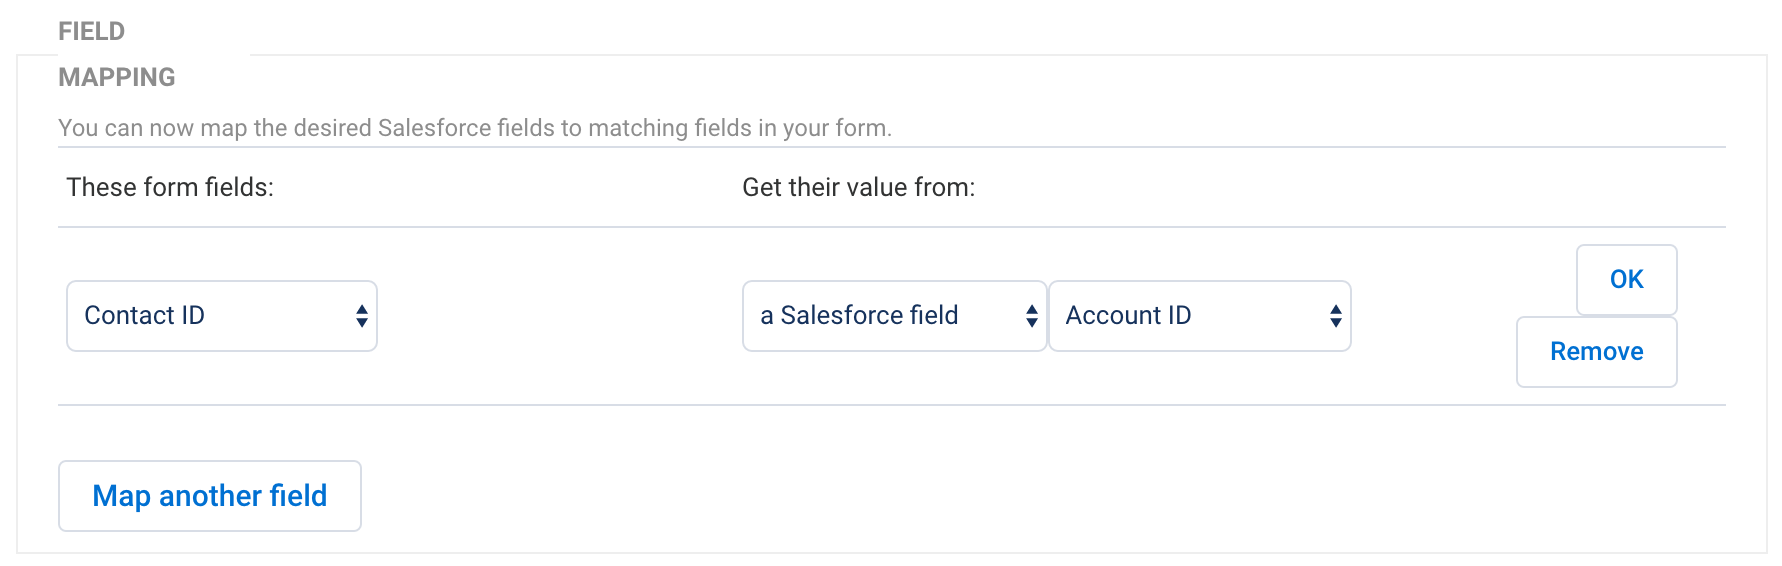
Click Map Another Field for each field in your form that you want to prefill.
Please note that while formulas can be used in field mapping, field aliases cannot be used in the Prefill connector as they have no value prior to the form being completed.
Any time you add a new field to your form it will need to be mapped in your connector, even if it has the same name as a previously deleted field.
When prefilling checkboxes from Salesforce, the connector will automatically detect which Salesforce fields are checkboxes and give you the option of selecting "checked" or "unchecked" for your mappings in the connector. When mapping fields, or prefilling through the URL, you can also use "0" to uncheck a checkbox or "1" to check a checkbox.

When dealing with upload or attachment fields, it is not possible to prefill files of any kind. It is possible to prefill a file name from an attachment into a text field, provided the attachment was created through a FormAssembly connector.
Step 4. Working with Multiple Records
If you need to retrieve more than one record to prefill your form, click Add another lookup or Add an Object dependent on... to set up another query and field mapping set.
On subsequent steps in the connector, you'll find an additional lookup option (a lookup result) to reference a previous lookup.

Direct Your Respondents to a Prefilled Form
To build your prefill link, you'll need:
- The form's address (URL)
- Go to the Publish page and copy the public address under Your form is publicly available at this address. If you've published the form on your own website, you can also use that URL.
- The parameter name you want to fill
- This is the name you gave the parameter in the connector. In this example, it would be acctnum.
Build Your Link
Please make sure to follow all the steps listed below when building your prefilling link. A standard form link will not be able to trigger the prefill connector to run.
You can use a basic text editor to build your link, like Notepad or TextEdit. Here's a form link from the Publish tab, where 283230 is the form ID and "xxxxx" is the FormAssembly instance ID.
If you are not using a custom domain, then your URL will look like www.tfaforms.com/FORM_ID.
http://xxxxx.tfaforms.net/283230Now, copy your form URL from the Publish page, and place a question mark after it. Here's what our example link looks like:
http://xxxxx.tfaforms.net/283230?Next, use the query parameter that you set up in your connector and add that after the question mark. Here, we're using a query parameter that represents the Account Number, acctnum. Add an equals sign after the parameter name.
http://xxxxx.tfaforms.net/283230?acctnum=
After the equals sign, you'll want to enter the data that will prefill the form field. This is called the value. In this example, the value is "1a2b3c4d".
http://xxxxx.tfaforms.net/283230?acctnum=1a2b3c4d
Learn more about building a link to prefill forms.
After you've built the link, you can place it in an email as is, or you can make it dynamic by using a merge field from an email system or Salesforce merge fields. To do this, you would use a merge field in the link in place of the value.
Here's an example of Salesforce merge fields:
http://xxxxx.tfaforms.net/283230?acctnum={!Account.AcctID}
Merge fields are not determined by FormAssembly, so if you have any questions about merge fields you can reach out to your email provider. For Salesforce merge fields, you can check out Salesforce's help documentation.
You can also check out this use case document which covers building dynamically prefilled links in Salesforce email templates and buttons.
Additional Methods to Query the Salesforce Database
Session Parameters
Session parameters are only available if Salesforce Experience Cloud Authentication is enabled for your form.
To use a session parameter, select Formula in the value [2] drop-down menu, and enter one of the following aliases (including the %% signs):
Salesforce Portal Aliases:
| %%SF_PORTAL_USER_ORGID%% | The Organization ID of the portal user |
|---|---|
| %%SF_PORTAL_USER_USERID%% | The User ID of the portal user |
| %%SF_PORTAL_USER_PROFILEID%% | The Profile ID of the portal user |
| %%SF_PORTAL_USER_ROLEID%% | The Role ID of the portal user |
| %%SF_PORTAL_USER_USERNAME%% | The username of the portal user |
| %%SF_PORTAL_USER_EMAIL%% | The email of the portal user |
| %%SF_PORTAL_USER_FULLNAME%% | The full name of the portal user |
| %%SF_PORTAL_USER_LOCALE%% | The locale configured for the portal user |
| %%SF_PORTAL_USER_TIMEZONE%% | The time zone configured for the portal user |
See the Salesforce Developer documentation for a more complete description of each value.
Secure Parameters
You can visit our Prefill Lookups Using Secure Parameters page in our knowledge base to learn more about how to implement this functionality.
Prefill Repeated Fields and/or Sections
You can prefill repeating sections in your form using the Salesforce Prefill Connector. This can be incredibly useful if you are performing a lookup that returns multiple values, and you would like data from all of them to prefill your form.
For example, if you perform a campaign member lookup through the Salesforce Prefill Connector, and 20 different campaign members are found, you can prefill as many fields as you would like from each of those records, and pull that information into repeatable sections in your form.
Step 1. Add a Repeatable Section to Your Form
To map to a repeatable section, you have to first create one in your form. Otherwise, the connector will not display the options you see discussed on this page.
You can add a repeatable section by dragging in a group or fieldset from the Add Content menu. Next, drag any fields into the section that you would like set as repeatable. Finally, select the section and click on Options > Repeat Option, and configure the details as needed.

Step 2. Configure Your Connector
Under the option for If more than one record is found, you will be able to choose Repeat fields (if applicable).
Once you have that option selected, you will see a section below named Multiple Records Setting. This is where you will be able to select the specific repeatable section in your form that you would like to be prefilled.
The section of prefilled data will be sorted by the first field of your form that is in the repeatable section. You may use a hidden field here.

Important Notes
When using this type of setup, there are two important things to keep in mind:
- If you try to prefill multiple values to fields outside of a repeating section, they will appear as a long list of values without any form of separation.
- When only one record is found then no repeated fields will be created. In other words, only the first section will be filled in.
Prefilling Conditional Triggers
At times it may be useful to prefill a checkbox field to use it as a conditional trigger.
You can use a setup like this to have your form take on different looks depending on whether a record exists or doesn't exist on the Salesforce side.
In other words, you can say, "If a contact exists, then check this box in my form." To accomplish this, you can set up your connector like the image below:
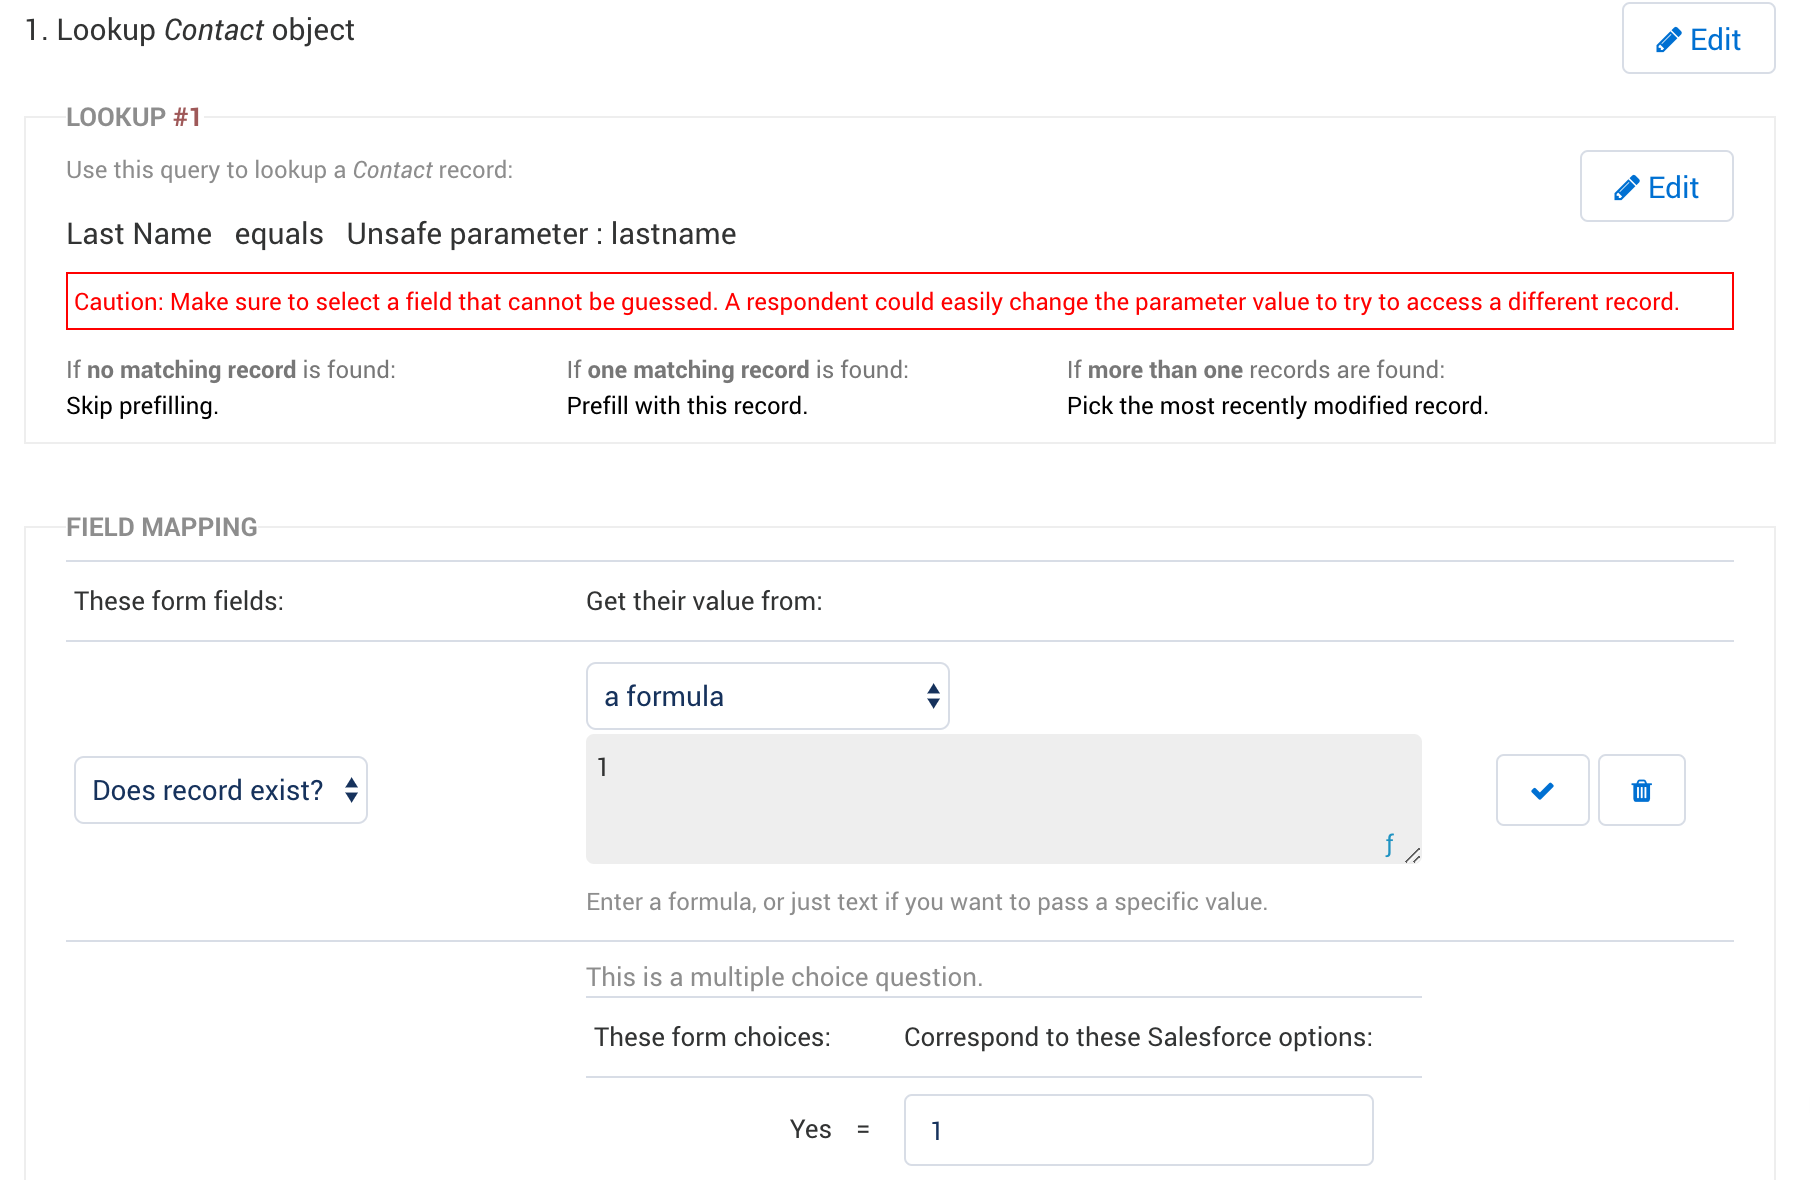
In the example above, if no matching record is found, prefilling will be skipped. However, if a record is found, then the checkbox will be checked because you have a value of 1 mapped to both the formula and the send-as value. Please note that you need to map a value of "1" in both of those locations for a setup like this to work.
From there, you can use the checkbox field in your form as a conditional trigger. Any time a contact record is found, the box will be checked, and any time a contact record is not found, the box will remain unchecked.
Salesforce API Version
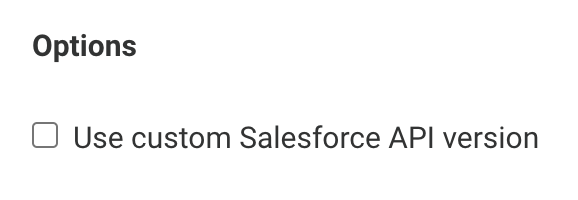
When you initially create your connector and authenticate your Salesforce instance, that connector will be set up based on your current version of the Salesforce API. You can customize the Salesforce API version being used by scrolling to the bottom of the Connector page and adjusting the API checkbox in the "Options" section.
The connector will not be automatically upgraded when a new Salesforce API version is released, regardless of the checkbox status at the bottom of the connector. If the checkbox is unchecked, you are using the most recent version of the Salesforce API:
Once FormAssembly supports a new API version, the box will be automatically checked and the API setting will show the previous API version. Since API changes are not always backward compatible, this ensures that a connector will continue to work after an API update.
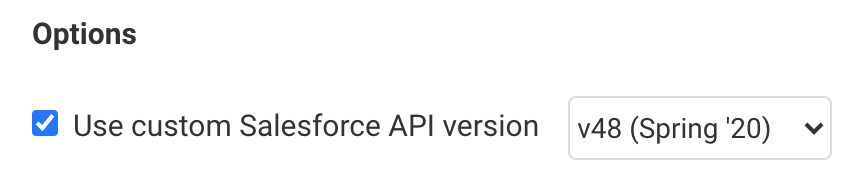
You can uncheck this checkbox and then save your connector to switch to the most recent version of the Salesforce API. Or, you can select a different version of the Salesforce API from the dropdown menu and then save your connector.