Overview
FormAssembly’s HTTPS connector ensures quick delivery of marketing notifications along with accurate and timely scoring and data processing for the Marketing Cloud Account Engagement (previously referred to as Pardot) marketing automation system and Salesforce.
You may want to pass form data through Account Engagement before it's sent to Salesforce, or you may prefer to have data simultaneously sent to both. Regardless of which you prefer, you can customize FormAssembly's connectors to best fit your marketing workflow needs.
The HTTPS Connector is particularly useful as a way to pass leads to Account Engagement drips, automations, and triggers before sending them to Salesforce and setting them as Sales Qualified, rather than having all leads sent straight to Salesforce before qualifying them.
Requirements
You'll need a
- FormAssembly HTTPS Connector
- FormAssembly Essentials plan and higher, or some legacy plans
- Marketing Cloud Account Engagement subscription
Set Up Marketing Cloud Account Engagement Form Handling
1) Add or Select Form Handler
Access the Form Handlers tab in your Account Engagement dashboard by selecting Content > Forms > Form Handlers.

Choose an existing Form Handler from the list or click Add Form Handler to create a new one.
2) Configure Form Handler
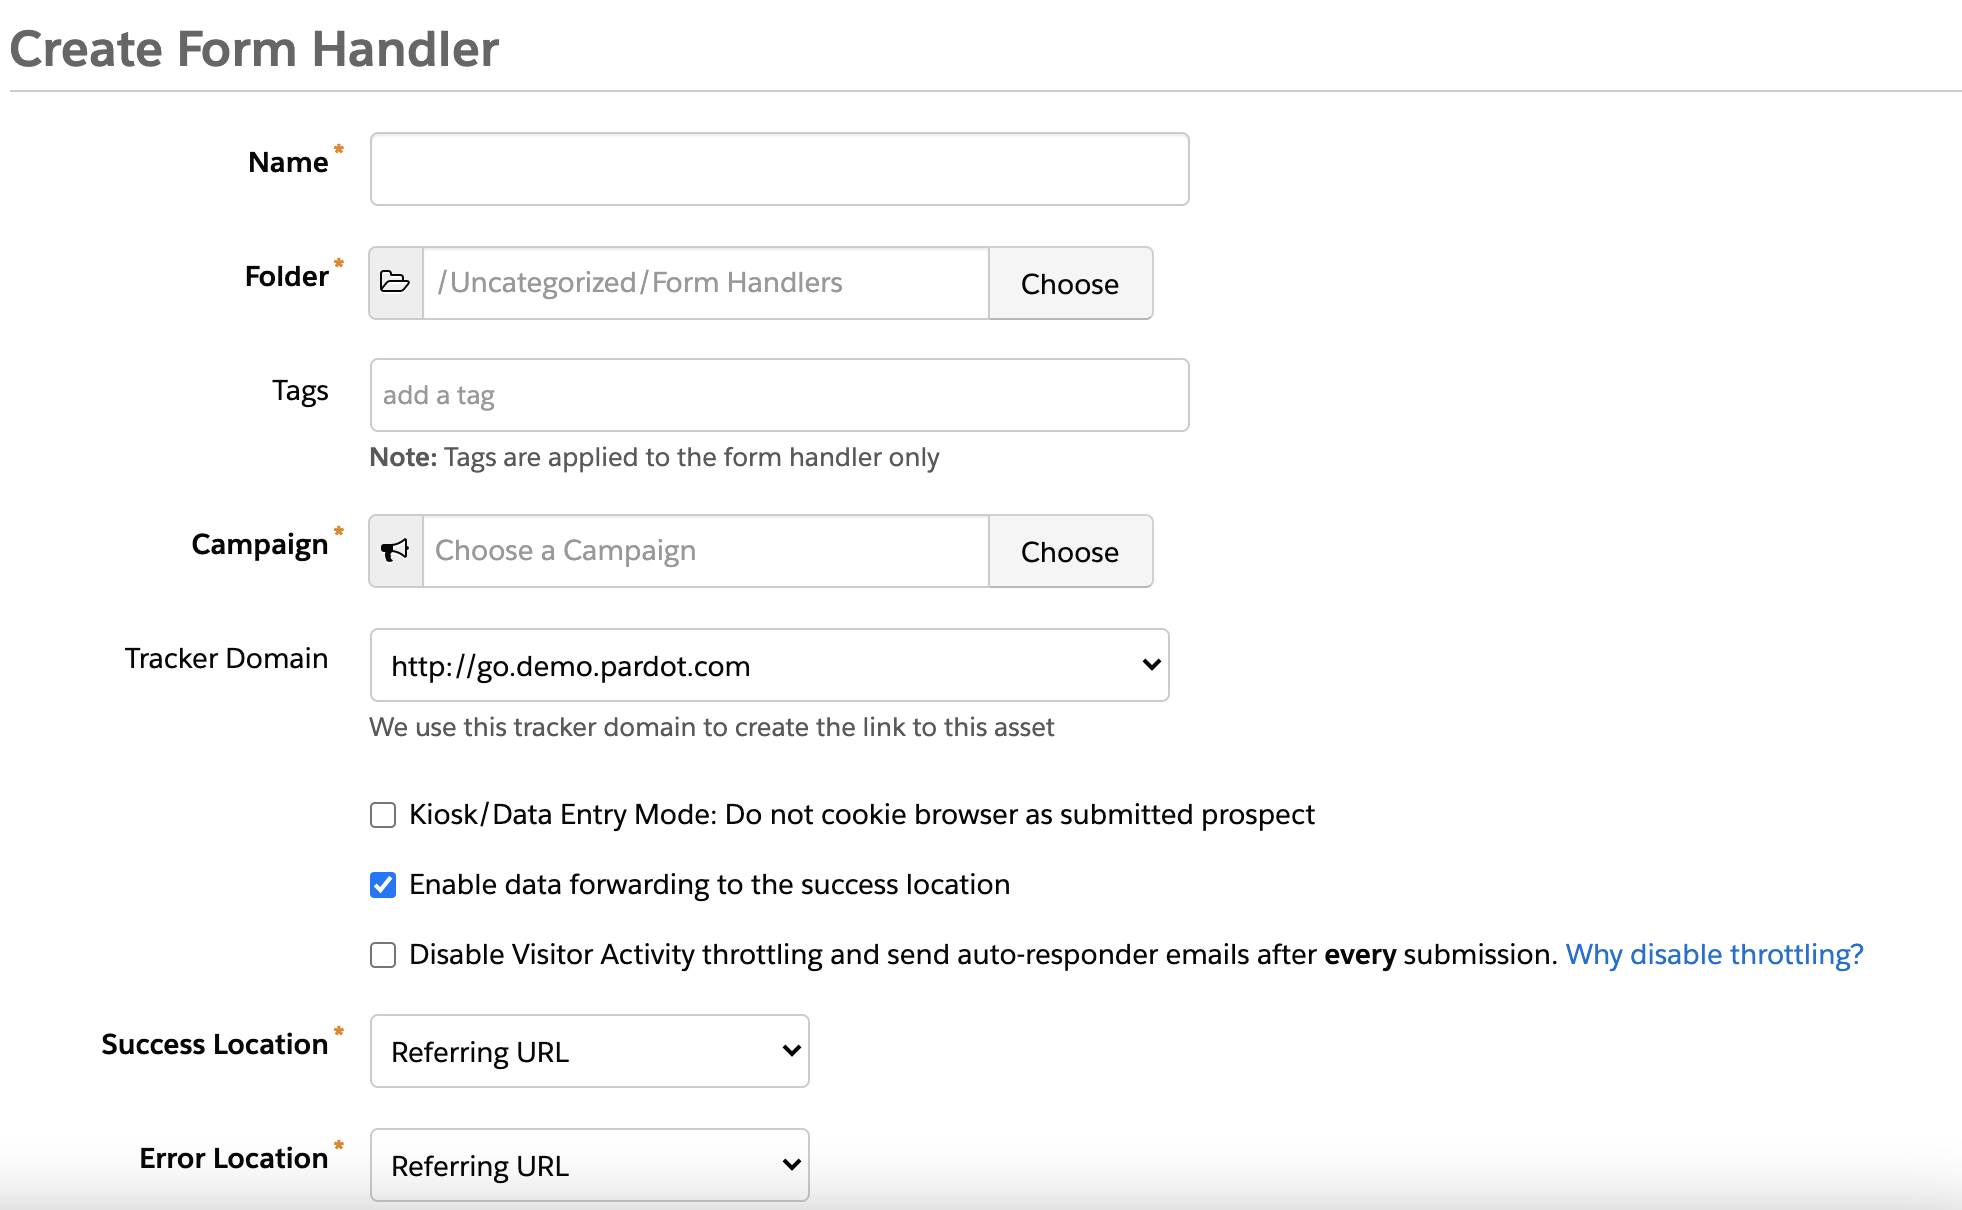
Fill in the required fields (name, folder, and campaign). Check "Enable data forwarding to the success location"—this is required for the connector to function correctly.
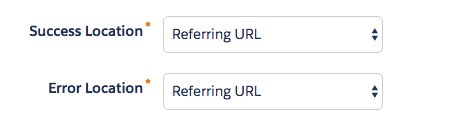
Set both the Success and Error locations to "Referring URL." This will preserve FormAssembly's user experience when redirecting a user from your form or if there are validation errors for a submission.
3) Map Form Fields

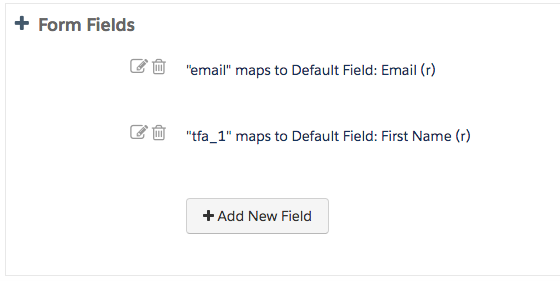
Click Add New Field to map any form fields that you'd like to pass to Account Engagement fields. At a minimum, you'll want to make sure you've mapped "email" to your Account Engagement email field using the following settings. This is a standard field that cannot be changed to take any different value and must remain named "email".

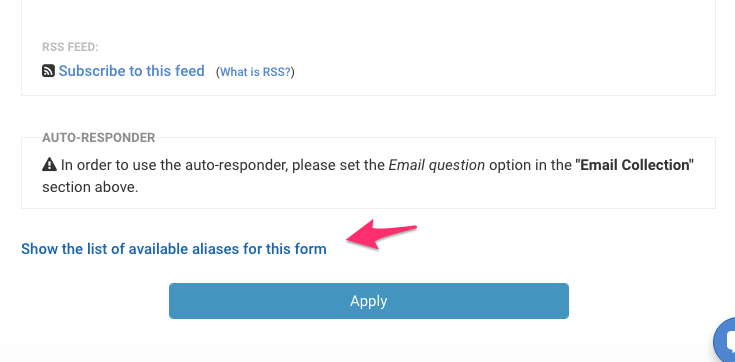
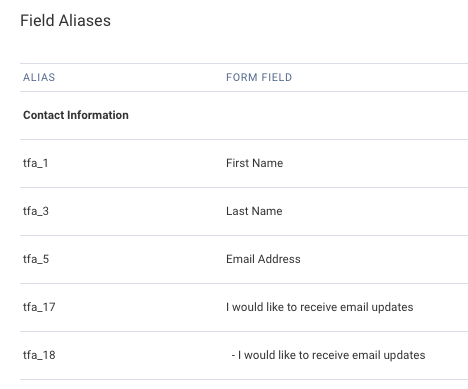
To add the other fields from your form, you'll need to retrieve their field aliases, which will primarily take the form "tfa_xxx." You can view the field aliases for your form via the link at the bottom of the form's Notifications page in FormAssembly.
In Account Engagement, click Add New Field in the Form Handler Setup to add a new field. A pop-up menu will appear with field options:
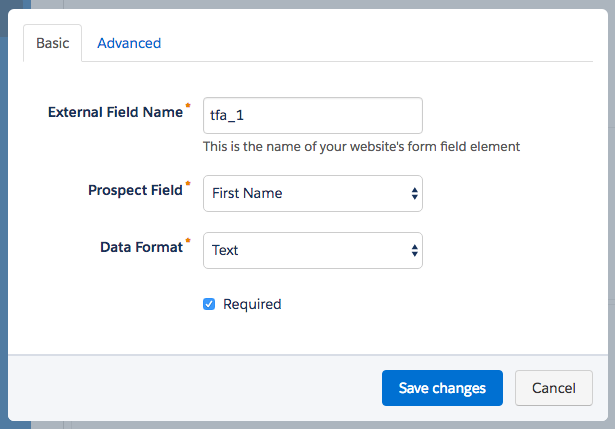
The External Field Name will be the field alias for the FormAssembly form field you're passing to Pardot. The Prospect Field is the Account Engagement field where you want to receive the form field's data. The Data Format will either be "Text," "Number," or "Email."
Click "Save changes" to save a field and add it to your Form Handler.
4) Save and Review Form Handler
Click "Create Form Handler" or "Save Form Handler" once you've finished adding fields.

You'll be taken to the Summary screen, where you can review your configuration. Select and copy the Form Handler’s Endpoint URL from the Summary screen—you'll need it to set up your HTTPS Connector.
Set Up HTTPS Connector
Add the HTTPS Connector
Navigate back to your Forms List in FormAssembly. Select the form you'd like to use with Account Engagement in your Forms List. Click Configure and select Connectors.
Click to add a new connector in the After Form Submitted position of your Connector Timeline and choose HTTPS Connector.
Enable and Configure HTTPS Connector
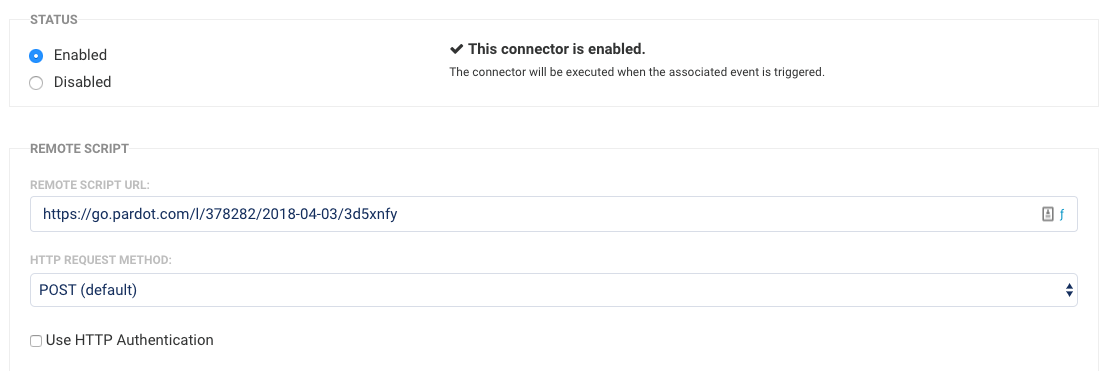
1. Enable the connector
2. Paste the Endpoint URL of the Form Handler you copied from Pardot into the Remote Script URL input field.
3. Leave HTTP Request Method set to POST and HTTP Authentication unchecked
HTTPS Connector Mappings
Map your form fields to match the external field names you set up in your Pardot form handler.
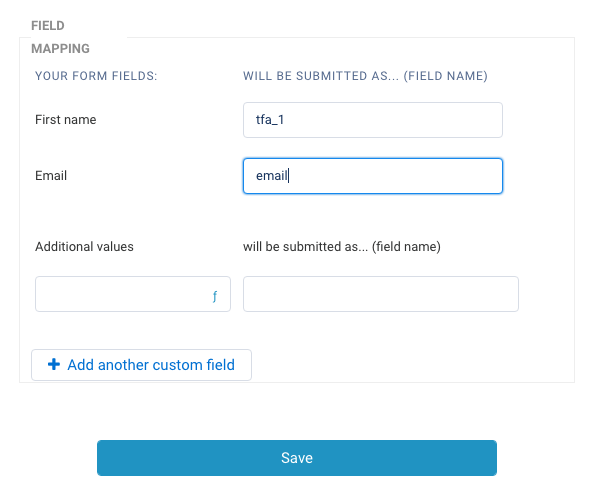
Remember that your email field should be mapped as "email." Click Save at the bottom of the HTTPS connector configuration page to save the connector's settings.
Checkboxes
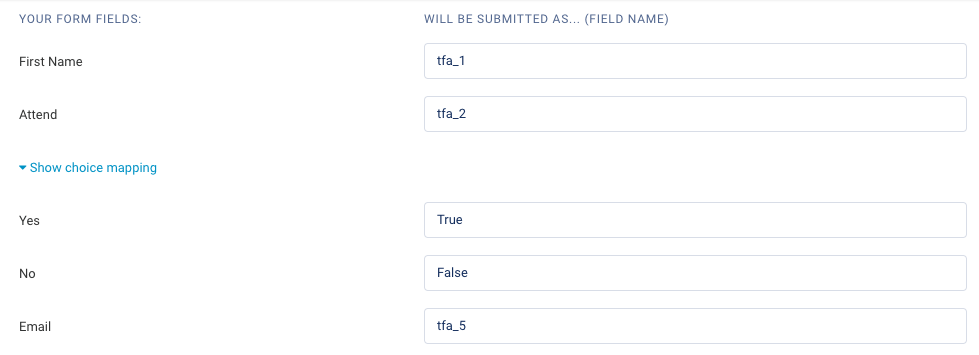
Checkboxes are set up a bit differently when sending data from the HTTPS Connector to Account Engagement.
In this example, tfa_2 is a checkbox field called Attend with two options, "Yes" and "No". You'll need to use either True/False or 1/0 in the connector setup to send this data to a checkbox field in Account Engagement.