Overview
You can populate a form using custom links or buttons created in Salesforce. These links can be added to the Salesforce interface and also included in emails sent from your Salesforce account.
Before you begin, be sure that you have created the necessary fields that you wish to prefill on your FormAssembly form.
Use a Prefilled Link in a Salesforce Email Template
- Log in to your Salesforce application and open your Email Templates in the App Launcher.
- Click New Template.
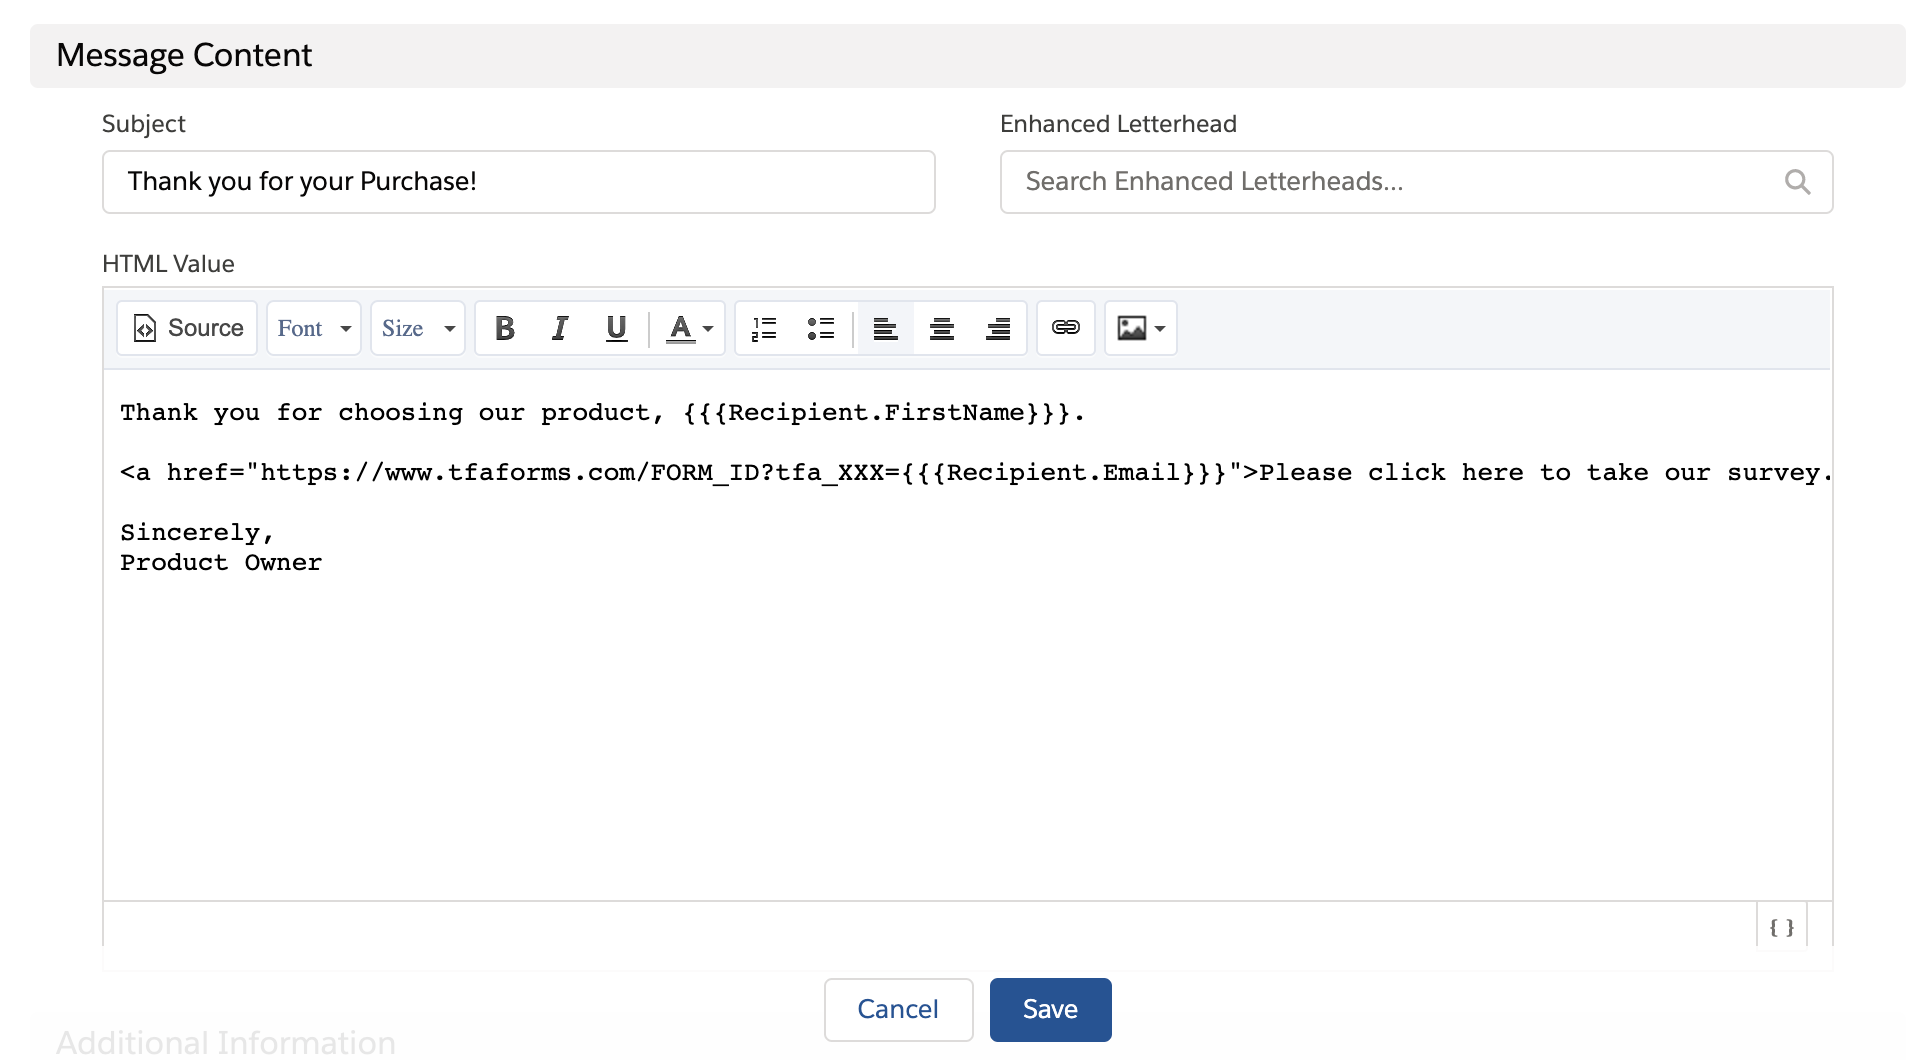
- Provide your template with a unique name, such as "Contact Happiness Survey."
- Create the body of your email template.
- At the point where you wish to create your prefilled FormAssembly form link, type:
<a href="">Please click here to take our survey.</a> - Paste the link to your form into the href attribute, resulting in:
<a href="https://www.tfaforms.com/FORM_ID">Please click here to take our survey.</a> - Add to the link "?tfa_XXX=" with tfa_XXX being replaced with either a field alias or your unsafe query parameter.
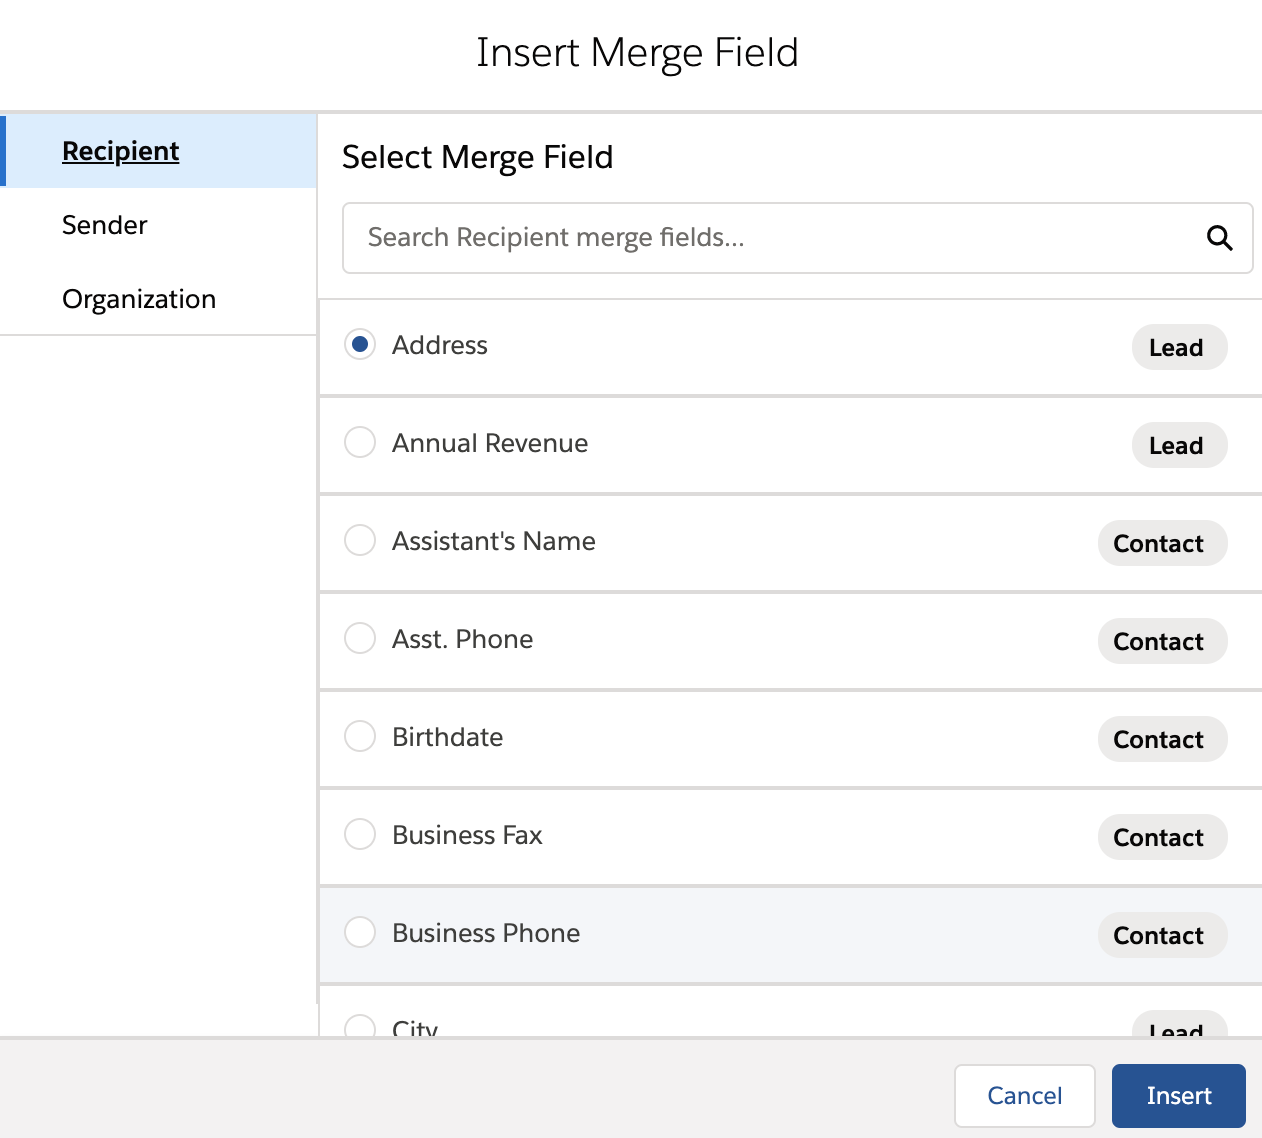
<a href="https://www.tfaforms.com/FORM_ID?tfa_XXX=">Please click here to take our survey.</a>Refer to the documentation to find the exact syntax for each field. - In the lower right corner of the email body, click "Insert merge field".
- Select the field that you would like to prefill and click "Insert" to add it to the end of the prefilled link.
<a href="https://www.tfaforms.com/FORM_ID?tfa_XXX={{{Recipient.Email}}}">Please click here to take our survey.</a> - Save the template.
- Use this template when sending your campaign to your users.


Salesforce will automatically populate each email with the appropriate data. For example:
<a href="https://www.tfaforms.com/FORM_ID?company=SmithCo&leadID=a0370000006d7yAAAQ">Please click here to take our survey.</a>Salesforce does have some limitations when it comes to mail merging. Please see here for more details.
Use a Custom Link in Your Salesforce Console
- Log in to your Salesforce application and click Setup (in the top right corner).
- Open the Object Manager.
- On any object, click Buttons, Links, and Actions, and add New Buttons or Links. You will choose the object where you'd like your custom button or link to appear in the page layout.
- Enter a label such as "Log a Call" and choose your Display Type and Behavior. Leave the Content Source as "URL".
- Paste the link to your form. For instance:
https://www.tfaforms.com/FORM_ID
- Add to the link "?tfa_XXX=" with tfa_XXX being replaced with either a field alias or your unsafe query parameter.
https://www.tfaforms.com/FORM_ID?tfa_XXX=Refer to the documentation to find the exact syntax for each field. - Use the "Select Field Type" and "Insert Field" options to add your mail merge fields:
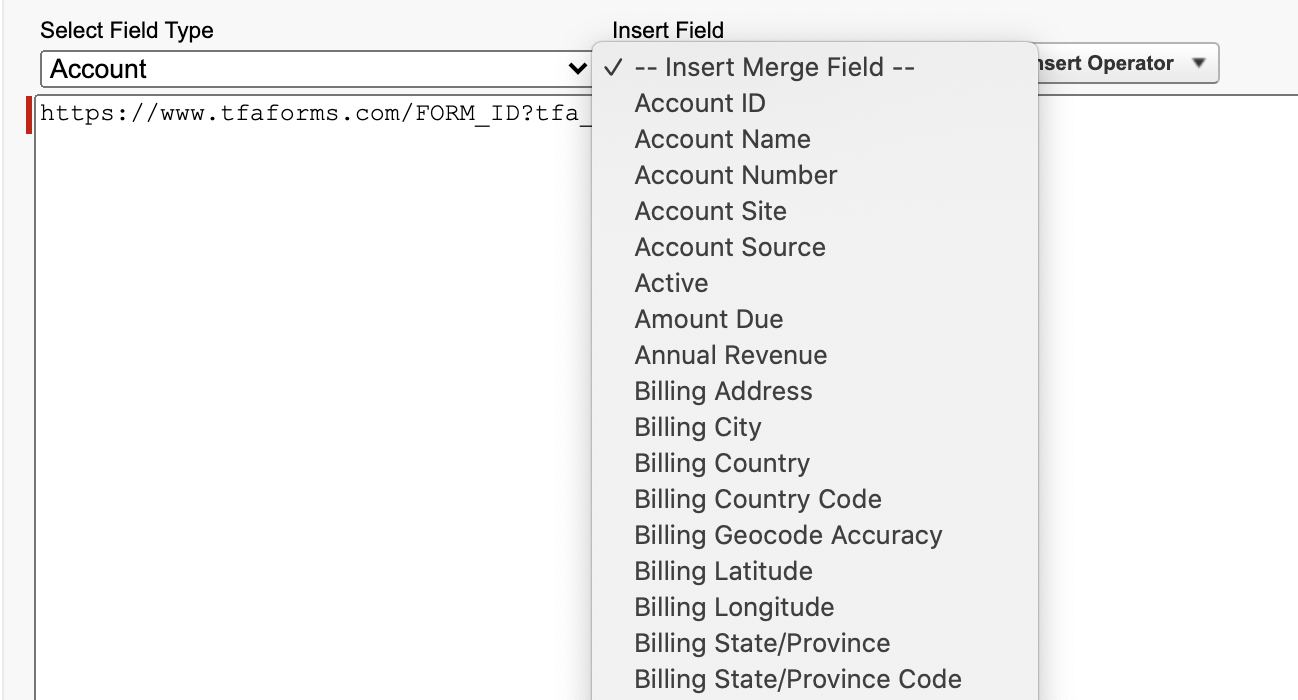
- Your final link should look something like this:
https://www.tfaforms.com/FORM_ID?tfa_XXX={!Account.Id} - Add the link or button to a page layout (refer to the Salesforce documentation for further information).

That's it! When clicking on the link or button from your Salesforce account, the form should open up with the data pre-populated.
Prefilling a Salesforce Checkbox
Checkboxes require a special method of prefilling. Checkboxes prefill simply by having their ID displayed in the query string. For example:
https://www.tfaforms.com/FORM_ID?tfa_4&tfa_6
This link will prefill both checkboxes with IDs tfa_4 and tfa_6 (assuming they are checkboxes). In this case, you will need to use a special formula to prefill them in the URL of a Salesforce email template.
Here is an example of the type of formula that you could use:
https://www.tfaforms.com/FORM_ID?{!IF(Contact.CheckBox_Field__c=True,"tfa_4","")}This will only show the ID tfa_4 if there is a value for the Contact field labeled CheckBox_Field__c.