Email Notifications and the Auto-Responder
FormAssembly offers two distinct ways to send automated emails after a form response is submitted: Notifications and the Auto-Responder. The difference between these two features is their intended audience:
- Notifications are emails sent to the form owner, administrator, or other individuals you designate from inside your organization. They'll alert you every time a respondent submits a form response. The default notification template includes the submission date, completion time, and the full response text. Notifications are customizable to include just the information you need in the format you want as well.
- The Auto-Responder creates emails sent to a user after they submit a form response. To enable the auto-responder, you'll need to have a field in your form with email validation enabled to collect the respondent's email address. Beyond that requirement, auto-responses are flexible: you can provide a respondent with a copy of the data they submitted, a receipt for an order or donation, or just a message thanking them for taking the time to fill out your form.
Common use cases for notifications and the auto-responder include:
- Receive a notification about who is submitting responses to your form and send a copy of a respondent’s submissions to the form owner or manager
- Have your respondents receive a copy of their form responses
- Send any next steps to your respondents
- Send a receipt to your respondents
- Send a thank you to your respondents for submitting the form
Both Notifications and the Auto-Responder are configured on the Notifications page. To get there:
- From the Form List, move your mouse over the Configure button for the form you'd like to modify.
- In the Configure dropdown menu that appears, click on Notifications.
- The To: field is limited to 10 email addresses
- The BCC: field is limited to 15 email addresses
- Sending an email to 10+ addresses exponentially increases the risk that the email gets marked as spam by one of the recipients. This increases the chance that FormAssembly email delivery is flagged as spam by an email provider, which means an increased chance that the form creator’s recipients may not continue receiving FA notifications. The best practice is to create an email group for those users and use that single email address in FA settings.
- FormAssembly requires all custom domains configured in sender emails to have an SPF record with FormAssembly as a supported host. Please see this article for information on configuring an SPF record.
- If you send more than 5,000 emails per day from your domain, including those sent through FormAssembly with a custom sender configuration, consider configuring DKIM. Please see this article for information on DKIM setup in FormAssembly.
- Team plans and higher may customize the Sender Name for emails, however, Basic and Essentials plans will always display a Sender Name of "FormAssembly Notification".
Email Collection Setup
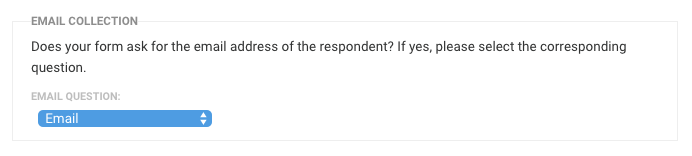
To be able to reply to form respondents, the Email Collection section for your Notifications page must be configured. In some Notification cases, you may not want to send a reply to a respondent and can skip the following steps. Email Collection setup is required if enabling the Auto-Responder.
- In Notification Options, locate the Email Collection section.
- Set the Email Question to a field in your form that collects the respondent’s email address.
Once this is set up, if you reply to an email notification, the reply will go to the form respondent (provided their email was collected in the form).
Notifications Setup
- Find the Your Notifications section.
- Enable the notification with the Your Email Notification dropdown menu, choosing either text or HTML notifications.
- Enter your email address in the Email Responses To: field.
- Multiple addresses may be entered by separating each address with a comma (do not include spaces). Additionally, you can use a field alias if you would like the "Email Responses To:" field to be determined by a field in your form response.
- Add any BCC addresses if applicable.
- If you are not receiving email notifications, please check your spam folder. If you are still unable to receive them, contact our support team for assistance.
- The Notification sender should be listed as report@formassembly.com, and can be used for whitelisting if required.
- For users who are still in their trial period, you can only use your FormAssembly account email address for email notifications.
Notifications - Customized Template Setup
- Set the Email Template option to Customized Template.
- Fill out the additional fields that populate - Sender Email, Sender Name, Email Subject, and Email Content.
- Please note that the Sender fields do not support aliases or formulas. In the case where an alias or formula is needed, please leverage the Email Collection section and the email field collected there, or consider using a workflow.
- For users who are still in their trial period, the Sender Name is locked to "FormAssembly Notification" for the duration of the free trial.
- Team plans and higher may customize the Sender Name for notifications, however, Basic and Essentials plans will always display a Sender Name of "FormAssembly Notification".
- In the EmailSubject and EmailContent fields, you can use the following aliases, which will be replaced by the actual value when the email is sent:
%%FORM_NAME%% | The name of your form. |
|---|---|
%%SUBMITTED_DATE%% | The date and time when the response was submitted. |
%%COMPLETION_TIME%% | The time it took to fill out the form. |
%%RESPONSE_TEXT%% | A plain text, simplified version of the data submitted with the form. You should not use this alias if your form collects sensitive information that should not be sent over an unsecured medium such as email. |
%%RESPONSE_HTML%% | An HTML formatted version of the data submitted with the form. You should not use this alias if your form collects sensitive information that should not be sent over an unsecured medium such as email. |
%%RESPONSE_URL%% | The link to see the response on FormAssembly. A login is required to access responses. |
%%FILE_LIST%% | The list of uploaded files (if any). Login is required to download the files. To specify an individual upload field, use the field alias like so: %%tfa_###_URL%% |
%%UNPROTECTED_FILE_LIST%% | Same as the previous entry, but login is not required to download the files. To specify an individual upload field, use the field alias like so: %%tfa_###_UNPROTECTED_URL%% |
%%RESPONSE_ID%% | A unique identifier for the submitted response. |
%%REFERRER%% | The address of the page hosting the form (not the page used to reach the form). |
%%IP_ADDRESS%% | The IP address used to submit the form. |
Notifications - Attach Response PDF Setup
If you have an Essentials plan or above, you can attach a copy of the response as a PDF to your notification emails. To enable this feature, you will need to check the "Attach PDF of form response" option under "Attachments".
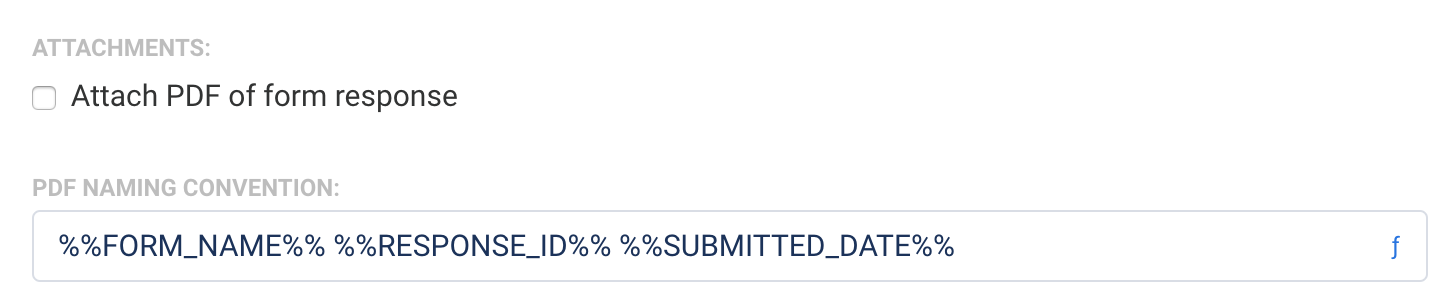
You can also change the name of the PDF by editing the "PDF Naming Convention" field. This field uses the aliases for the form name, the response ID, and the submitted date by default. If you would like to customize this, you can use aliases or text to define another naming convention.
- Currently, it is only possible to send a PDF as a Notification, not an Auto-Response.
- Team plan users and above can send PDFs of responses through multiple emails by using FormAssembly Workflow.
Auto-Responder Setup
The auto-responder can be used to automatically send customizable emails to form respondents, provided they enter their email addresses in the form. This can be particularly beneficial any time you would like an automatic message to be sent to respondents upon submission of a form.
Before you can set up the Auto-Responder, you'll need to make sure that you're capturing the respondent's email address. See the Email Collection Setup section above.
Once the Email Collection section is configured, you can enable your Auto-Responder.
- In the Auto-Responder section, set the Auto-Responder menu to enabled (choose text or HTML email).
- Enter the Sender Email address and Sender Name(e.g., your name and email).
- As an added security measure, when configuring a Sender Email, the email address entered requires verification before the Sender Email is updated. Emails will be sent from "no-reply@formassembly.com" until the new email address is verified.
- If an email has not been verified:
- a pending verification message appears under the changed field
- the email address entered receives an email with a link to complete the verification
- Note: The verification link expires after 24 hours.
- Email addresses are verified per FormAssembly instance.
- Restrictions
- A Basic plan user, or a legacy premier or professional user, will only be able to use email addresses verified through their specific user account.
- Sender fields are locked for Free Trial users. These users are only able to use their own account email address for Sender Email configurations.
- Team plans and higher may customize the Sender Name for emails, however, Basic and Essentials plans will always display a Sender Name of "FormAssembly Notification".
Enter the Reply-To Email address and Reply-To Name. These fields support aliases and formulas. Additionally, these fields are not subject to the email verification requirements of Sender addresses.
Enter the Email Subject and a message in the Email Content.
Customizing the Auto-Responder
In the Auto-Responder, you can use the following aliases:
%%FORM_NAME%% | The name of your form. |
|---|---|
%%SUBMITTED_DATE%% | The date and time when the response was submitted. |
%%RESPONSE%% | The data submitted with the form. You should not use this alias if your form collects sensitive information that should not be sent over an unsecured medium, such as email. |
%%FILE_LIST%% | The list of uploaded files (if any). You will need to log into FormAssembly to see the files. If you do not want to require the viewer to log in, you can use %%UNPROTECTED_FILE_LIST%% instead. |