Overview
SAML (Security Assertion Markup Language) can be used to secure access to your FormAssembly account and forms. There are two methods for using SAML with FormAssembly:
Single Sign-On: This will allow users to sign into their FormAssembly account using their SAML credentials.
Form by Form Authentication: By enabling this feature, you will be able to restrict access to your forms by only allowing users who can be authenticated by your SAML server to access a form.
Requirements
- FormAssembly Team plan or above
- SAML Metadata from your IdP
- Your FormAssembly username must match your SAML username
Single Sign-On (SSO)
(Replace "xxxxx" with your FormAssembly subdomain name)
- Entity ID: https://xxxxx.tfaforms.net/saml/metadata
- ACS URL: https://xxxxx.tfaforms.net/saml/index?acs
Form by Form Authentication
(Replace "xxxxx" with your FormAssembly subdomain name)
- Entity ID: https://xxxxx.tfaforms.net/authenticator_saml/metadata
- ACS URL: https://xxxxx.tfaforms.net/authenticator_saml/index?acs
Single Sign-On (SSO) Setup
- Navigate to the Admin Dashboard.
- Click Security from the left side menu.
- Scroll to the SAML section.
- Click Configure.
- If you're not logged in, you'll receive a notification saying, “You're not currently authenticated with your SAML Server.” Click OK on the notification and log in to your SAML Domain.
- Under Global Settings, select whether to use the following options:
- Strict Mode
- When enabled, SAML assertions are validated strictly through destination and signature validation. Enabling Strict Mode is advised.
- Debug Mode
- When enabled, detailed error messages are displayed. This should be disabled when in production for security.
- Strict Mode
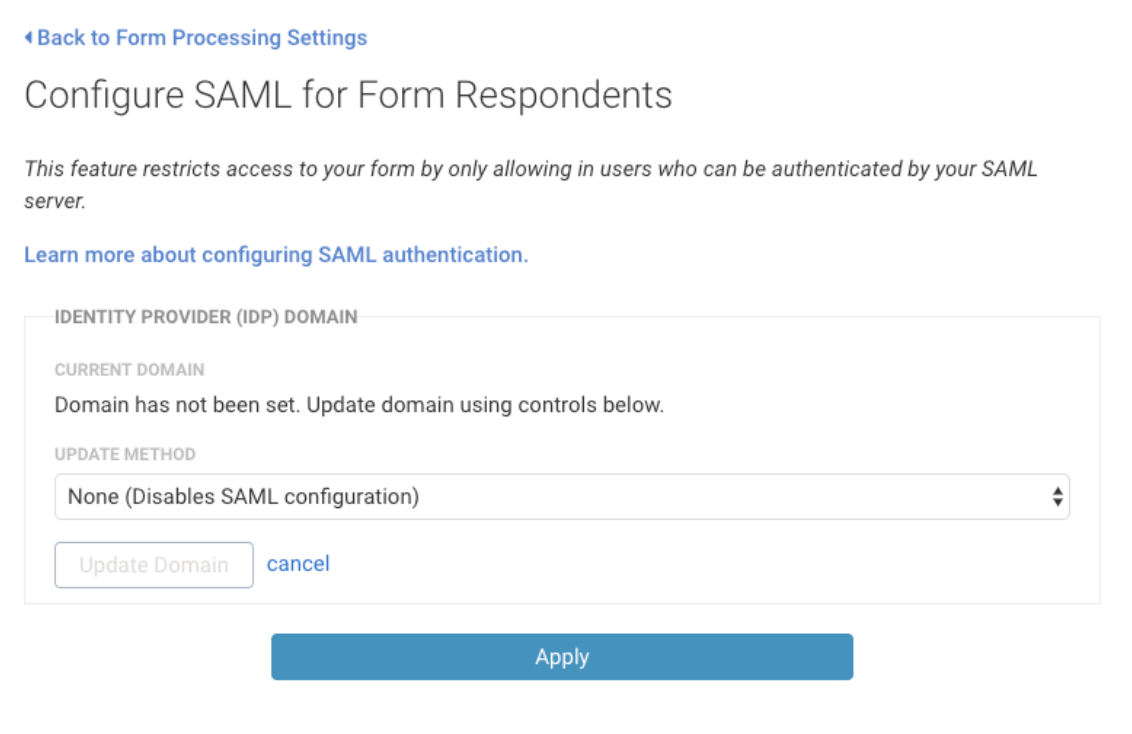
- Under Update Method, choose your metadata option.
- Metadata URL Endpoint
- This is provided by the Identity Provider.
- Enter your URL Endpoint.
- Select Update Domain.
- Metadata File
- This is provided by the Identity Provider.
- Upload your Metadata File.
- Select Update Domain.
- Manual (Advanced)
- Add SAML data manually.
- After entering your data, click Apply.
- Select Update Domain.
- Metadata URL Endpoint
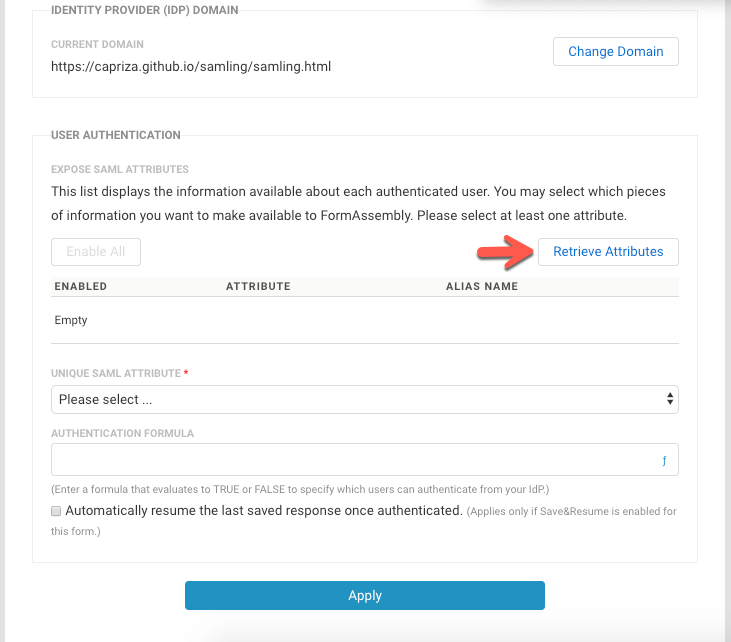
- After changes have been saved, your domain is set up, and more options are shown for updating.
- Click Retrieve Attributes.
- If you're not logged in, you'll receive a notification saying, “You're not currently authenticated with your SAML Server.” Click OK on the notification and log in to your SAML Domain.
- Your IdP attributes will be shown in the User Authentication table.
- These attributes will be disabled by default, so you can enable the attributes that you'd like to use.
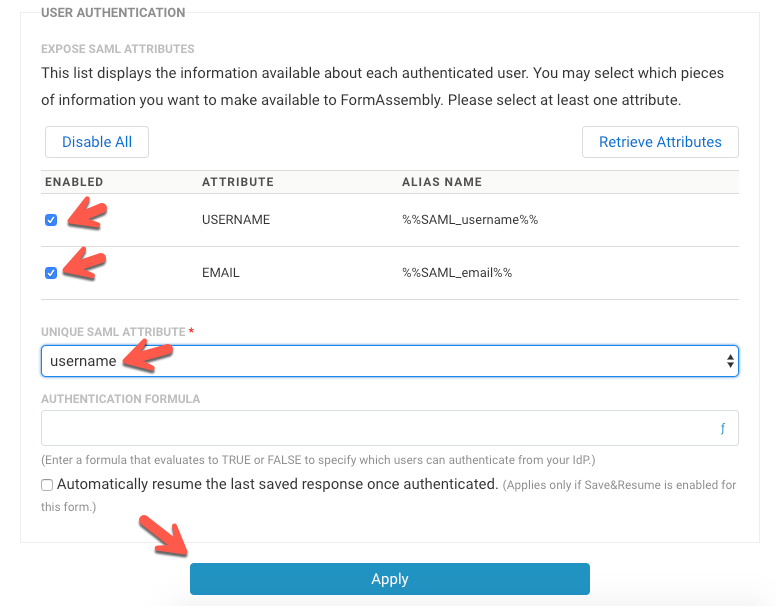
- Enable a Unique SAML Attribute from the table.
- If you do not select a unique SAML attribute, you'll receive a red error indicating your changes were not saved.
- Your unique SAML attribute must be enabled for SAML to be used.
- Enter an Authentication Formula, if needed.
- Click Apply to save your changes.
SAML Login Enforcement
Administrators can enforce a standardized login method for all users of the FormAssembly Instance or allow logins to be managed by user-level login preferences.
Login by Instance
- Locate the Instance Login Method section on the Security page in the Admin Dashboard.
- Select SAML from the dropdown.
- Select whether to allow administrators to override the SAML login method.
- Allowing an administrator to override the login method would enable an admin to quickly recover the instance in the case of the SAML provider outage.
- Click Save at the top of the page to save your settings.
Login by User
- Access your All Users list.
- Locate and edit the User(s) that need to use SAML
- Select SAML under the User Login Method of the Account section.
- Click Save User at the top of the page to save the change.
Form by Form Authentication Initial Setup
- Open the Processing Options for your form.
- From the Forms list, hover over Configure and select Processing.
- Choose Allow Responses from SAML Authenticated Users.
- Click Configure.
- Under Global Settings, select whether to use the following options:
- StrictMode
- When enabled, SAML assertions are validated strictly through destination and signature validation. Enabling Strict Mode is advised.
- DebugMode
- When enabled, detailed error messages are displayed. This should be disabled when in production for security.
- StrictMode
- Under Update Method, choose your metadata option.
- Metadata URL Endpoint
- This is provided by the Identity Provider.
- Enter your URL Endpoint.
- Select Update Domain.
- Metadata File
- This is provided by the Identity Provider.
- Upload your Metadata File.
- Select Update Domain.
- Copy from Form
- This is used to copy the SAML settings and setup from another form already using SAML Authentication in your instance.
- Enter the ID of a form that already has SAML Authentication set up.
- Select Update Domain.
- Manual (Advanced)
- Add SAML data manually.
- After entering your data manually, click Apply.
- Select Update Domain.
- Metadata URL Endpoint
- After changes have been saved, your domain is set up, and more options are shown for updating.
- Click Retrieve Attributes.
- If you're not logged in, you'll receive a notification saying, “You're not currently authenticated with your SAML Server.” Click OK on the notification and log in to your SAML Domain.
- Your IdP attributes will be shown in the User Authentication table. These attributes are disabled by default, so you can enable the attributes that you'd like to use.
- If you're not logged in, you'll receive a notification saying, “You're not currently authenticated with your SAML Server.” Click OK on the notification and log in to your SAML Domain.
- Enable a Unique SAML Attribute from the User Authentication table.
- If you do not select a unique SAML attribute dropdown, you'll receive a red error that your changes were not saved.
- Your unique SAML attribute must be enabled for SAML to be used.
- Enter an Authentication Formula, if needed.
- You can test your settings by viewing the form (which will now require a login).


Advanced Configuration of Metadata Fields
The following metadata fields may require additional consideration or special formatting:
NameIdFormat
The default value for this field is urn:oasis:names:tc:SAML:1.1:nameid-format:unspecified. If this field is left blank, the default value will be used.
The following formats are supported:
- urn:oasis:names:tc:SAML:1.1:nameid-format:emailAddress
- urn:oasis:names:tc:SAML:1.1:nameid-format:X509SubjectName
- urn:oasis:names:tc:SAML:1.1:nameid-format:WindowsDomainQualifiedName
- urn:oasis:names:tc:SAML:1.1:nameid-format:unspecified
- urn:oasis:names:tc:SAML:2.0:nameid-format:kerberos
- urn:oasis:names:tc:SAML:2.0:nameid-format:entity
- urn:oasis:names:tc:SAML:2.0:nameid-format:transient
- urn:oasis:names:tc:SAML:2.0:nameid-format:persistent
- urn:oasis:names:tc:SAML:2.0:nameid-format:encrypted
RequestedAuthNContext
The default value for this field is urn:oasis:names:tc:SAML:2.0:ac:classes:PasswordProtectedTransport. If this field is left blank, the default value will be used.
The following formats are supported (Multiple values may be entered separated by a comma ","):
- urn:oasis:names:tc:SAML:2.0:ac:classes:unspecified
- urn:oasis:names:tc:SAML:2.0:ac:classes:Password
- urn:oasis:names:tc:SAML:2.0:ac:classes:PasswordProtectedTransport
- urn:oasis:names:tc:SAML:2.0:ac:classes:X509
- urn:oasis:names:tc:SAML:2.0:ac:classes:Smartcard
- urn:oasis:names:tc:SAML:2.0:ac:classes:Kerberos
- urn:federation:authentication:windows
- urn:oasis:names:tc:SAML:2.0:ac:classes:TLSClient
SAML Configuration Alerts
If SAML configuration steps are needed, an alert banner will appear in the Forms List and the SAML setup page. Please review the alert and your SAML configuration.
SAML in Workflow
Forms configured with SAML can leverage their SAML settings within FormAssembly Workflows. Once SAML is set up on the form, using the same steps as detailed above, add the form to a Workflow.
SAML Prefill Connector Setup
- Ensure SAML Authentication is set up on the Processing page of your form. Follow the "Form by Form Authentication" steps above.
- To enable the SAML prefill connector, click Connectors on the form you'd like to set up.
- Drag the SAML Prefill Connector into the View section of the timeline
- Click Configure.
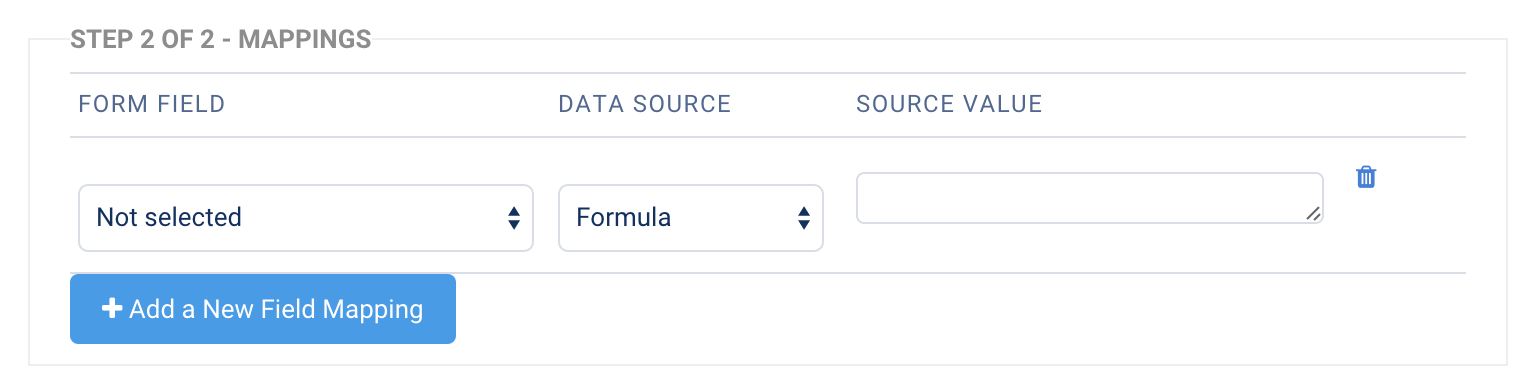
- Map the fields in your form to the SAML session attributes that you would like to fill those fields.
- When you're finished, click Apply.
- You're now ready to begin testing your SAML authentication and connector!
Updating Your SAML SSL Certificate
If you need to update your SAML SSL certificate, you will use the self-serve configuration steps above to do so.
- If you already have a SAML configuration set up in your FormAssembly account, you would update that configuration with your new metadata file with the new certificate, which you will import as part of the configuration.
- If you do not have a SAML configuration set up in your FormAssembly account, and your SAML configuration was originally set up by FormAssembly, you will need to follow the process in this document to set up a SAML configuration in your FormAssembly account to update your SAML SSL certificate.