Introduction
FormAssembly for AppExchange is an app that allows you to access your FormAssembly account from within Salesforce, without requiring a separate login (this is also called Single Sign-On or SSO). Additionally, the FormAssembly Lightning Component will be added to the Experience Builder, allowing you to easily embed FormAssembly forms into your Salesforce Experience pages.
Getting Started
Confirm that your FormAssembly username matches your Salesforce username.
To set up SSO, your usernames in both accounts must match. This is a requirement on both the FormAssembly and Salesforce sides of the setup. If your usernames do not match, you will need to change your FormAssembly username.
For Professional, Premier, and Basic users:
Please contact our support team and request that your username be changed to match.
For Essentials, Team, Enterprise, and Government users:
Please reach out to your account administrator and request that your username be changed to match.
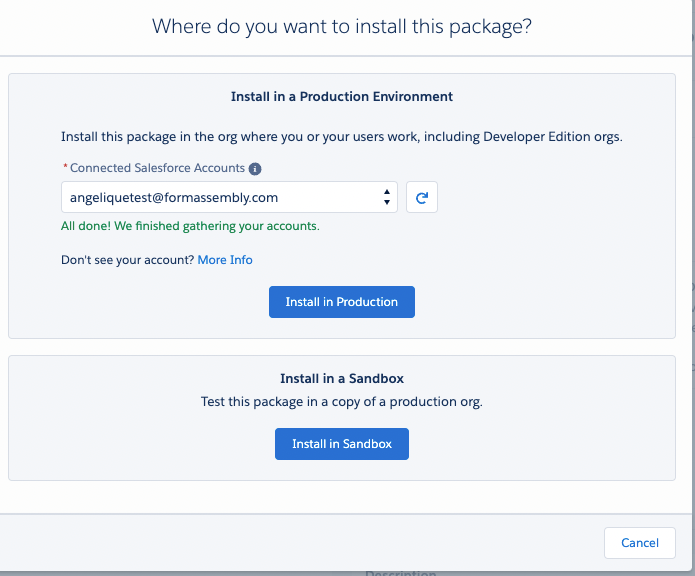
Install the FormAssembly app for AppExchange.
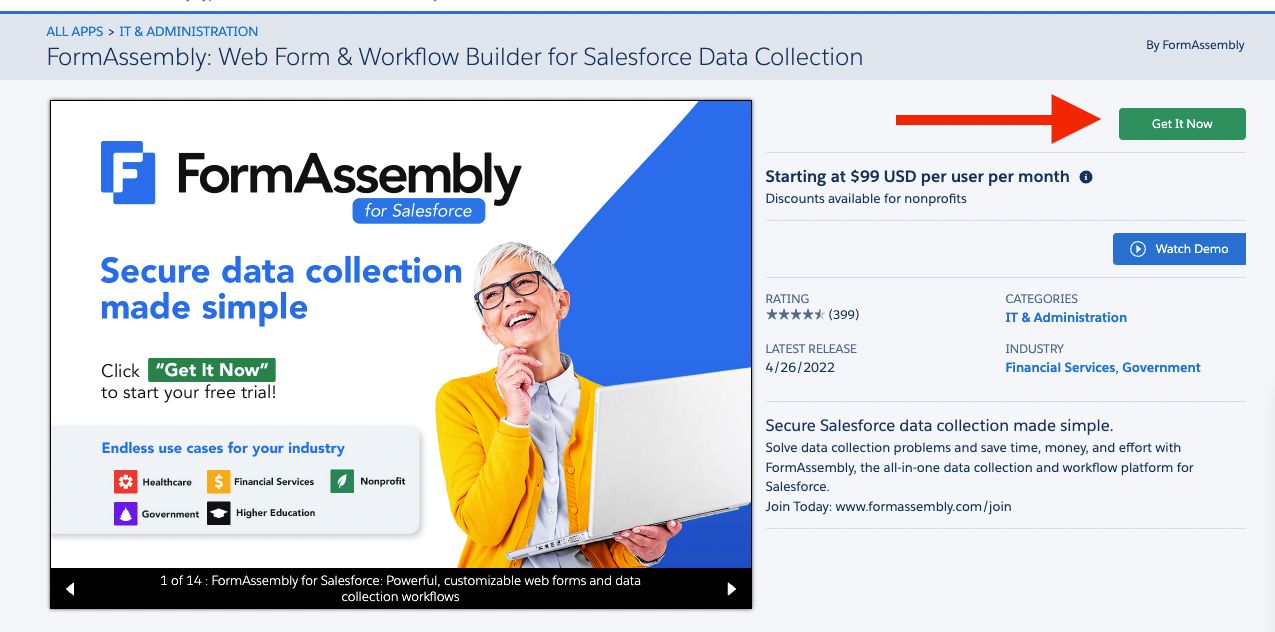
Install the most recent version of our AppExchange app here.
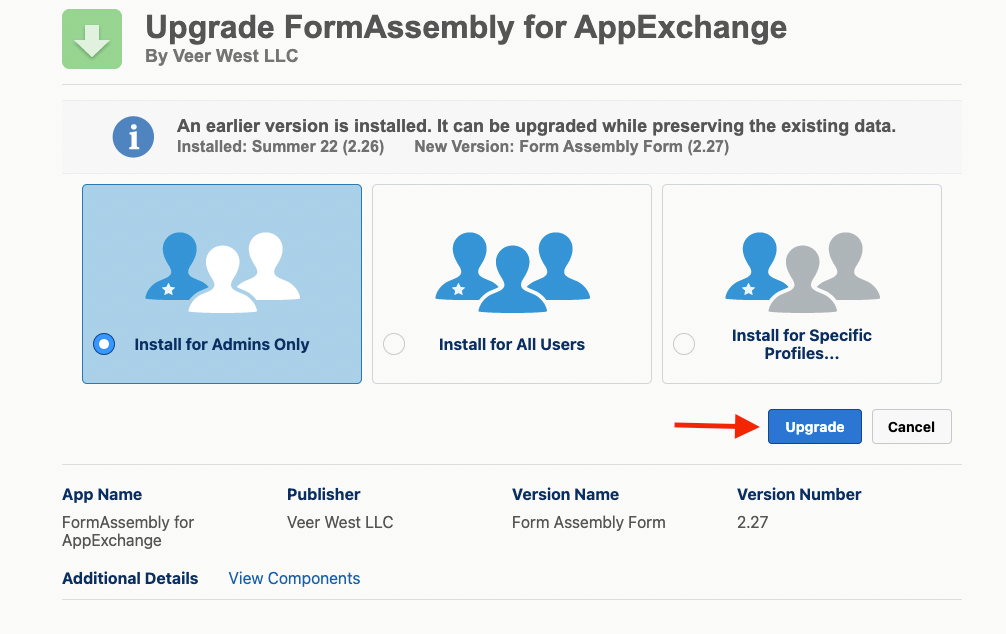
You will then select whether to install the app for admins, all users, or specific profiles.

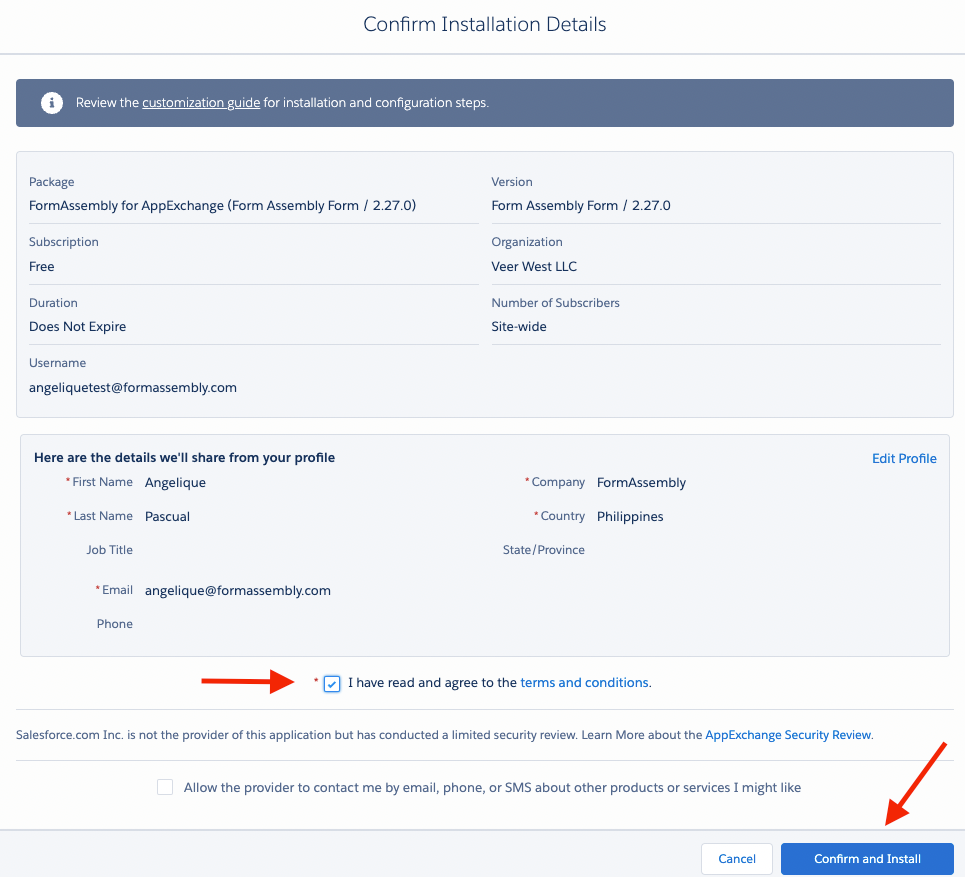
Continue the installation.
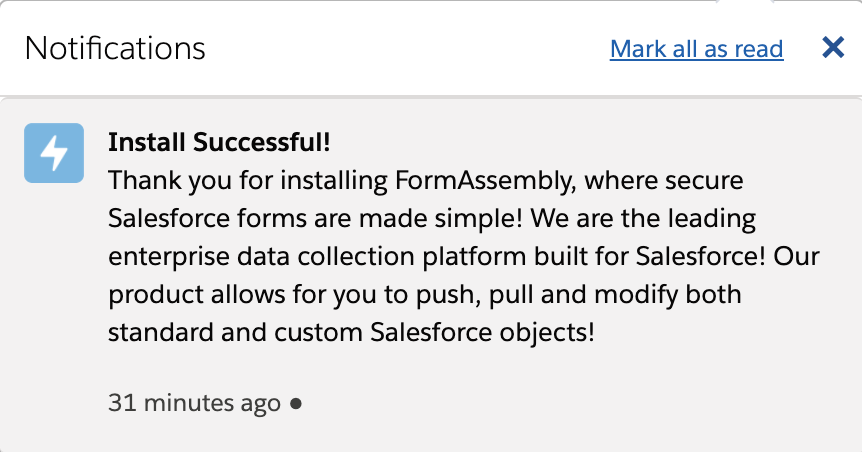
Once the installation completes, you will see a notification appear in Salesforce. If you do not see this notification, make sure that you are the system admin for your Salesforce account. Click on this notification to continue with the setup process.
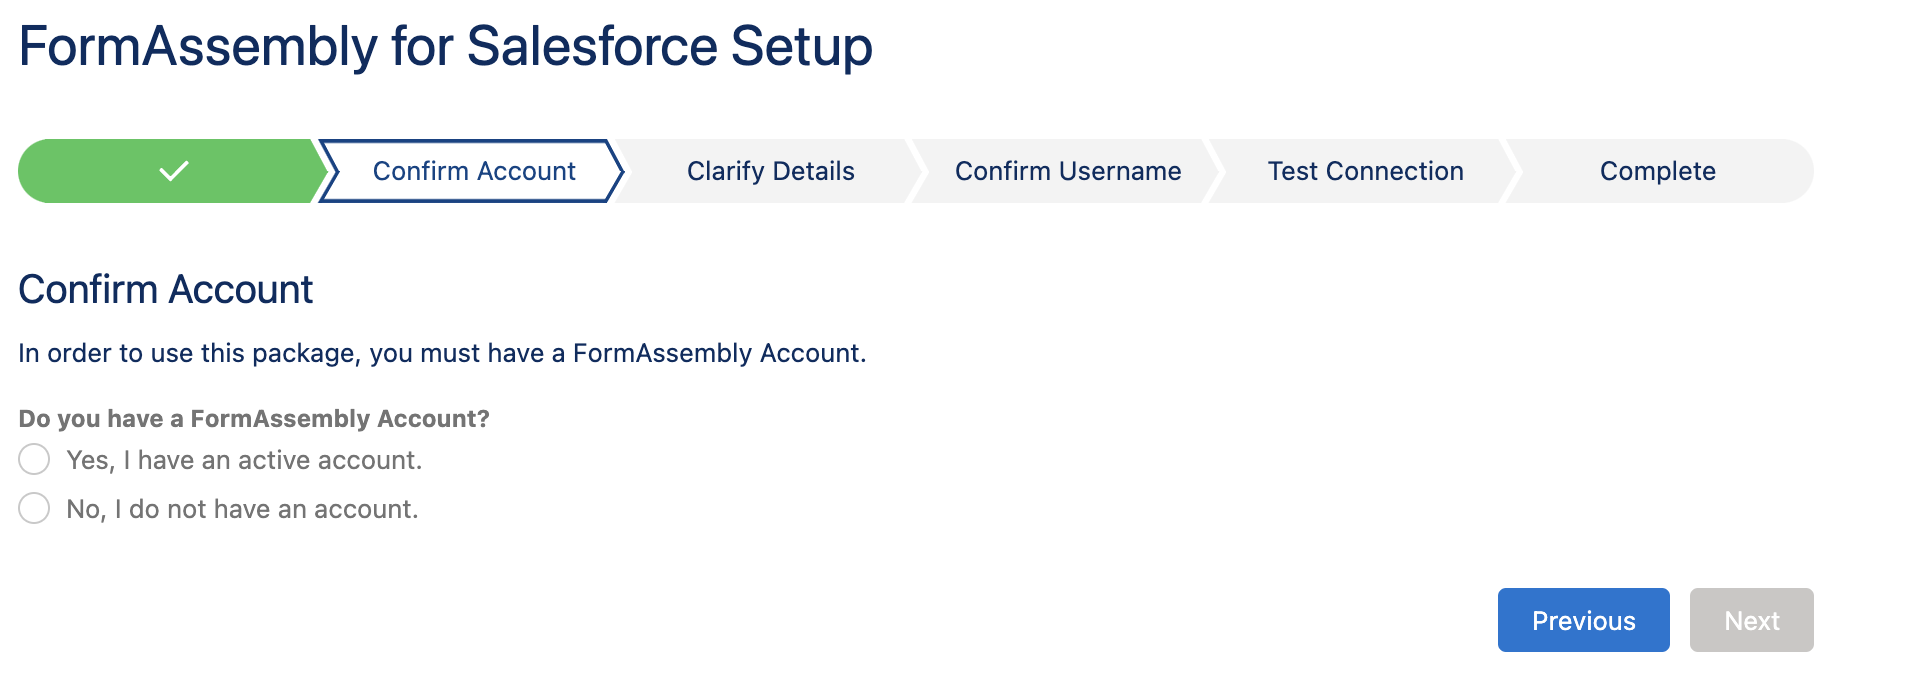
Now click Let's Get Started to begin the setup wizard. You will be taken through the following steps:
1. Confirm Account - Confirm that you have an active FormAssembly account that can be connected to Salesforce.
2. Clarify Details - Select your current FormAssembly plan from the list. This will be setting your instance for the app, so be sure to choose the correct plan. Note: This section displays our legacy plans. Basic users can select Professional, while Essentials and Team plans can select Enterprise. If you select Enterprise or Compliance Cloud, make sure your FormAssembly instance URL is entered exactly as shown in your browser's address bar.

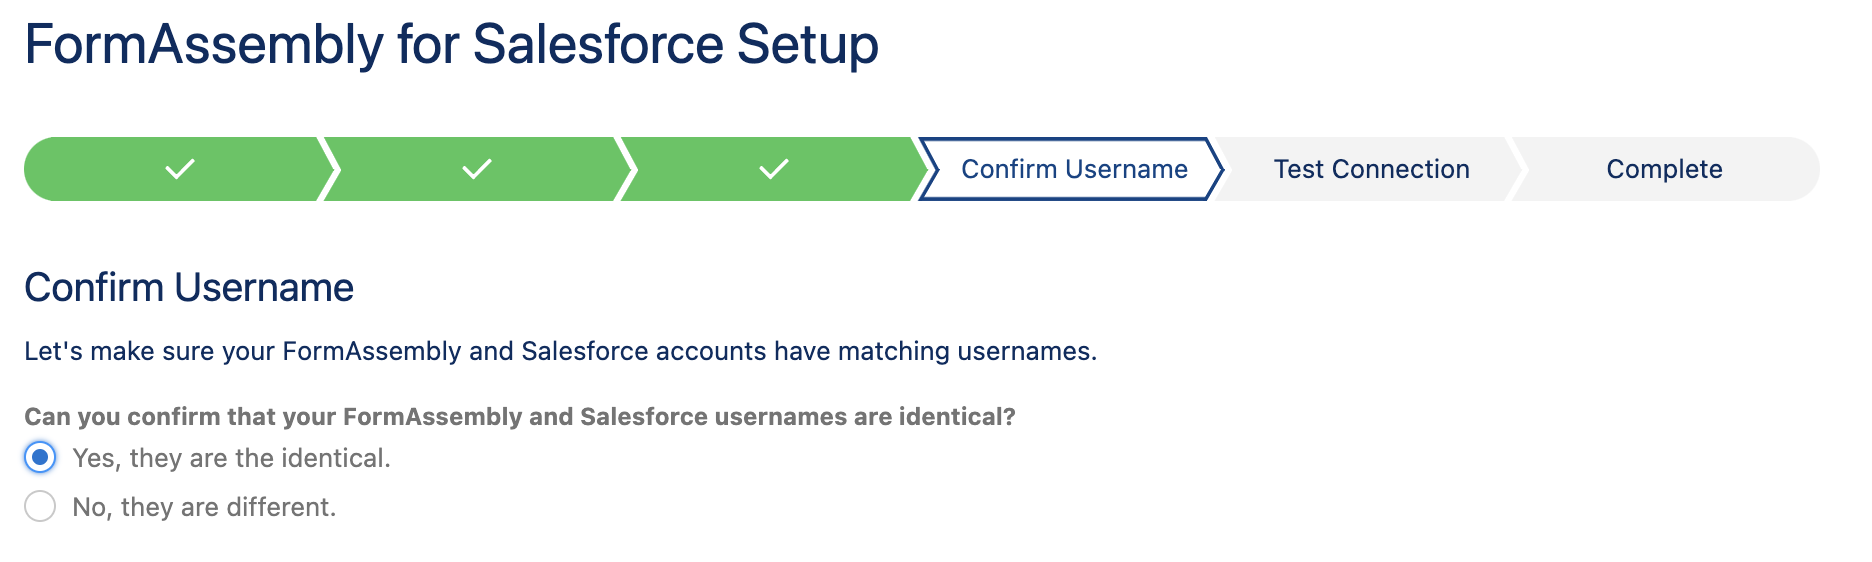
3. Confirm Username - Confirm your usernames match just as you did previously in this document.
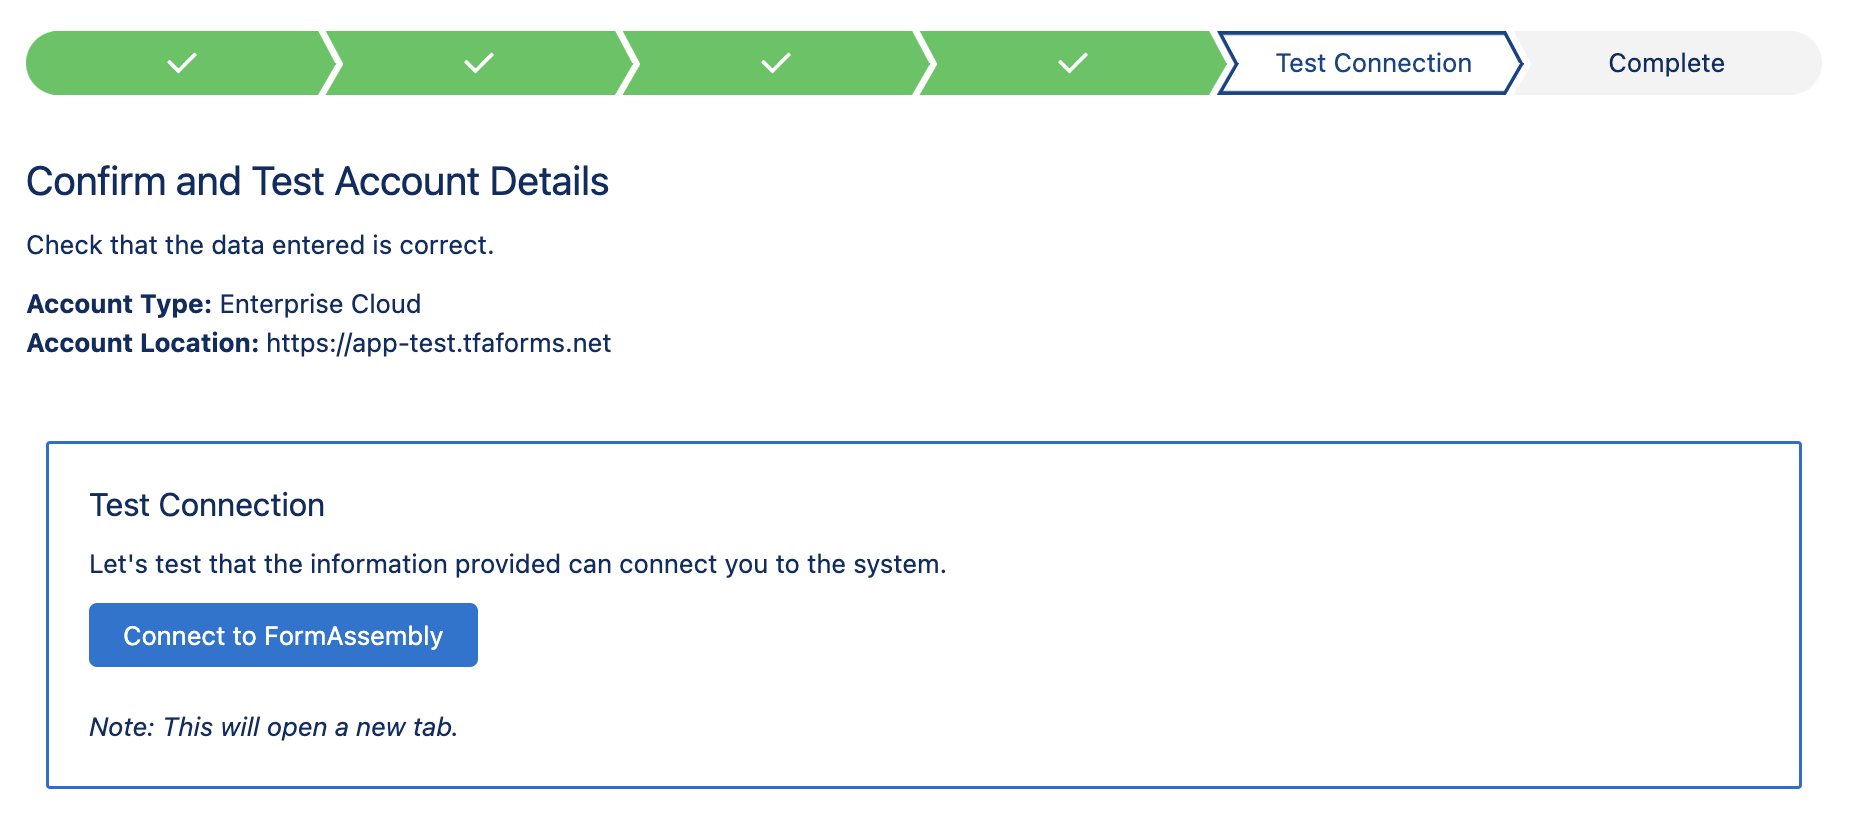
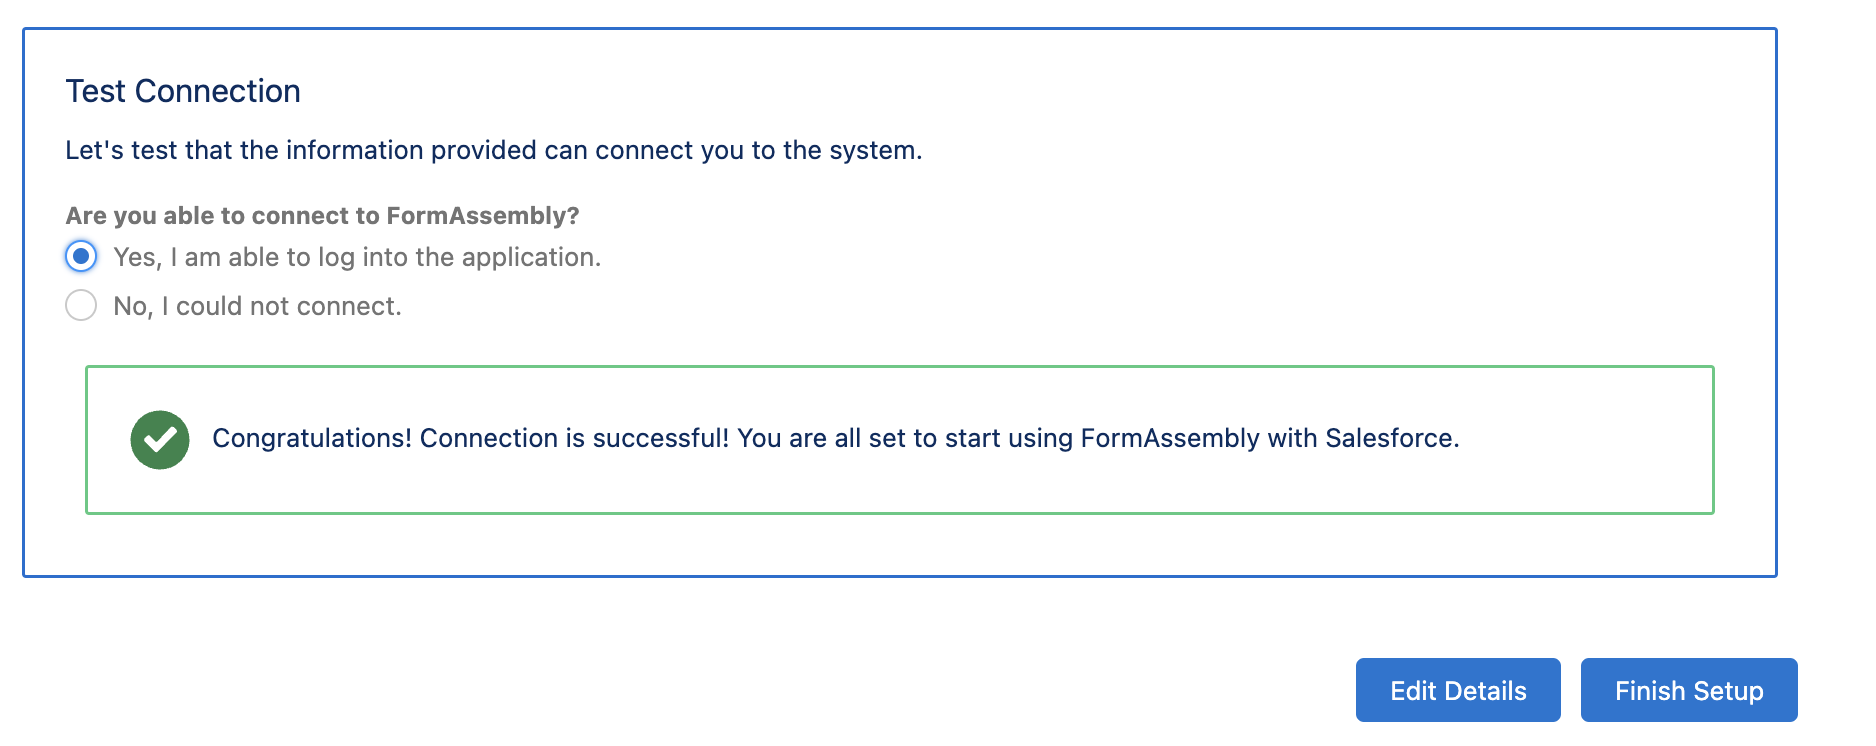
4. Test Connection - This will open a new tab where you can log into FormAssembly. This is being done to check your connection and settings. If you're unable to login, check again to make sure that your selected plan is correct and that your usernames match.
5. Finish Setup - Your setup is now complete! You should now be able to access your FormAssembly account inside Salesforce.
Do you need to set up additional Salesforce users or profiles that will be using the FormAssembly App?
If you are an Essentials and above user, these new profiles/users must all have their instance URL set to xxxxx.tfaforms.net with "xxxxx" being replaced by your instance URL. Once this step is done, complete the email verification process and you're all finished. You can now launch the FormAssembly app from the app launcher!

Using Single Sign-On Between Production and Sandbox
As noted above, SSO can only be used between a single Salesforce account and a single FormAssembly account, because the usernames must match.
Therefore, if you are planning on using SSO for both a sandbox instance of Salesforce and a production instance of Salesforce, you will need to request that your username be changed when switching between the two, in order for your FormAssembly and Salesforce username to match. Please note, that if you are an Essentials and above user, you have the capability to change your username from the admin dashboard.
Alternatively, you can log in to FormAssembly at app.formassembly.com or through your Essentials (and above) URL to avoid changing your username. You will have access to identical functionality by logging into the FormAssembly through the web compared to logging in through SSO in Salesforce.
Single Sign-On and SAML
SAML 2.0 is supported for Single Sign-On. You can follow the steps in this documentation when setting up SAML with Salesforce as the identity provider.
Updating the AppExchange App
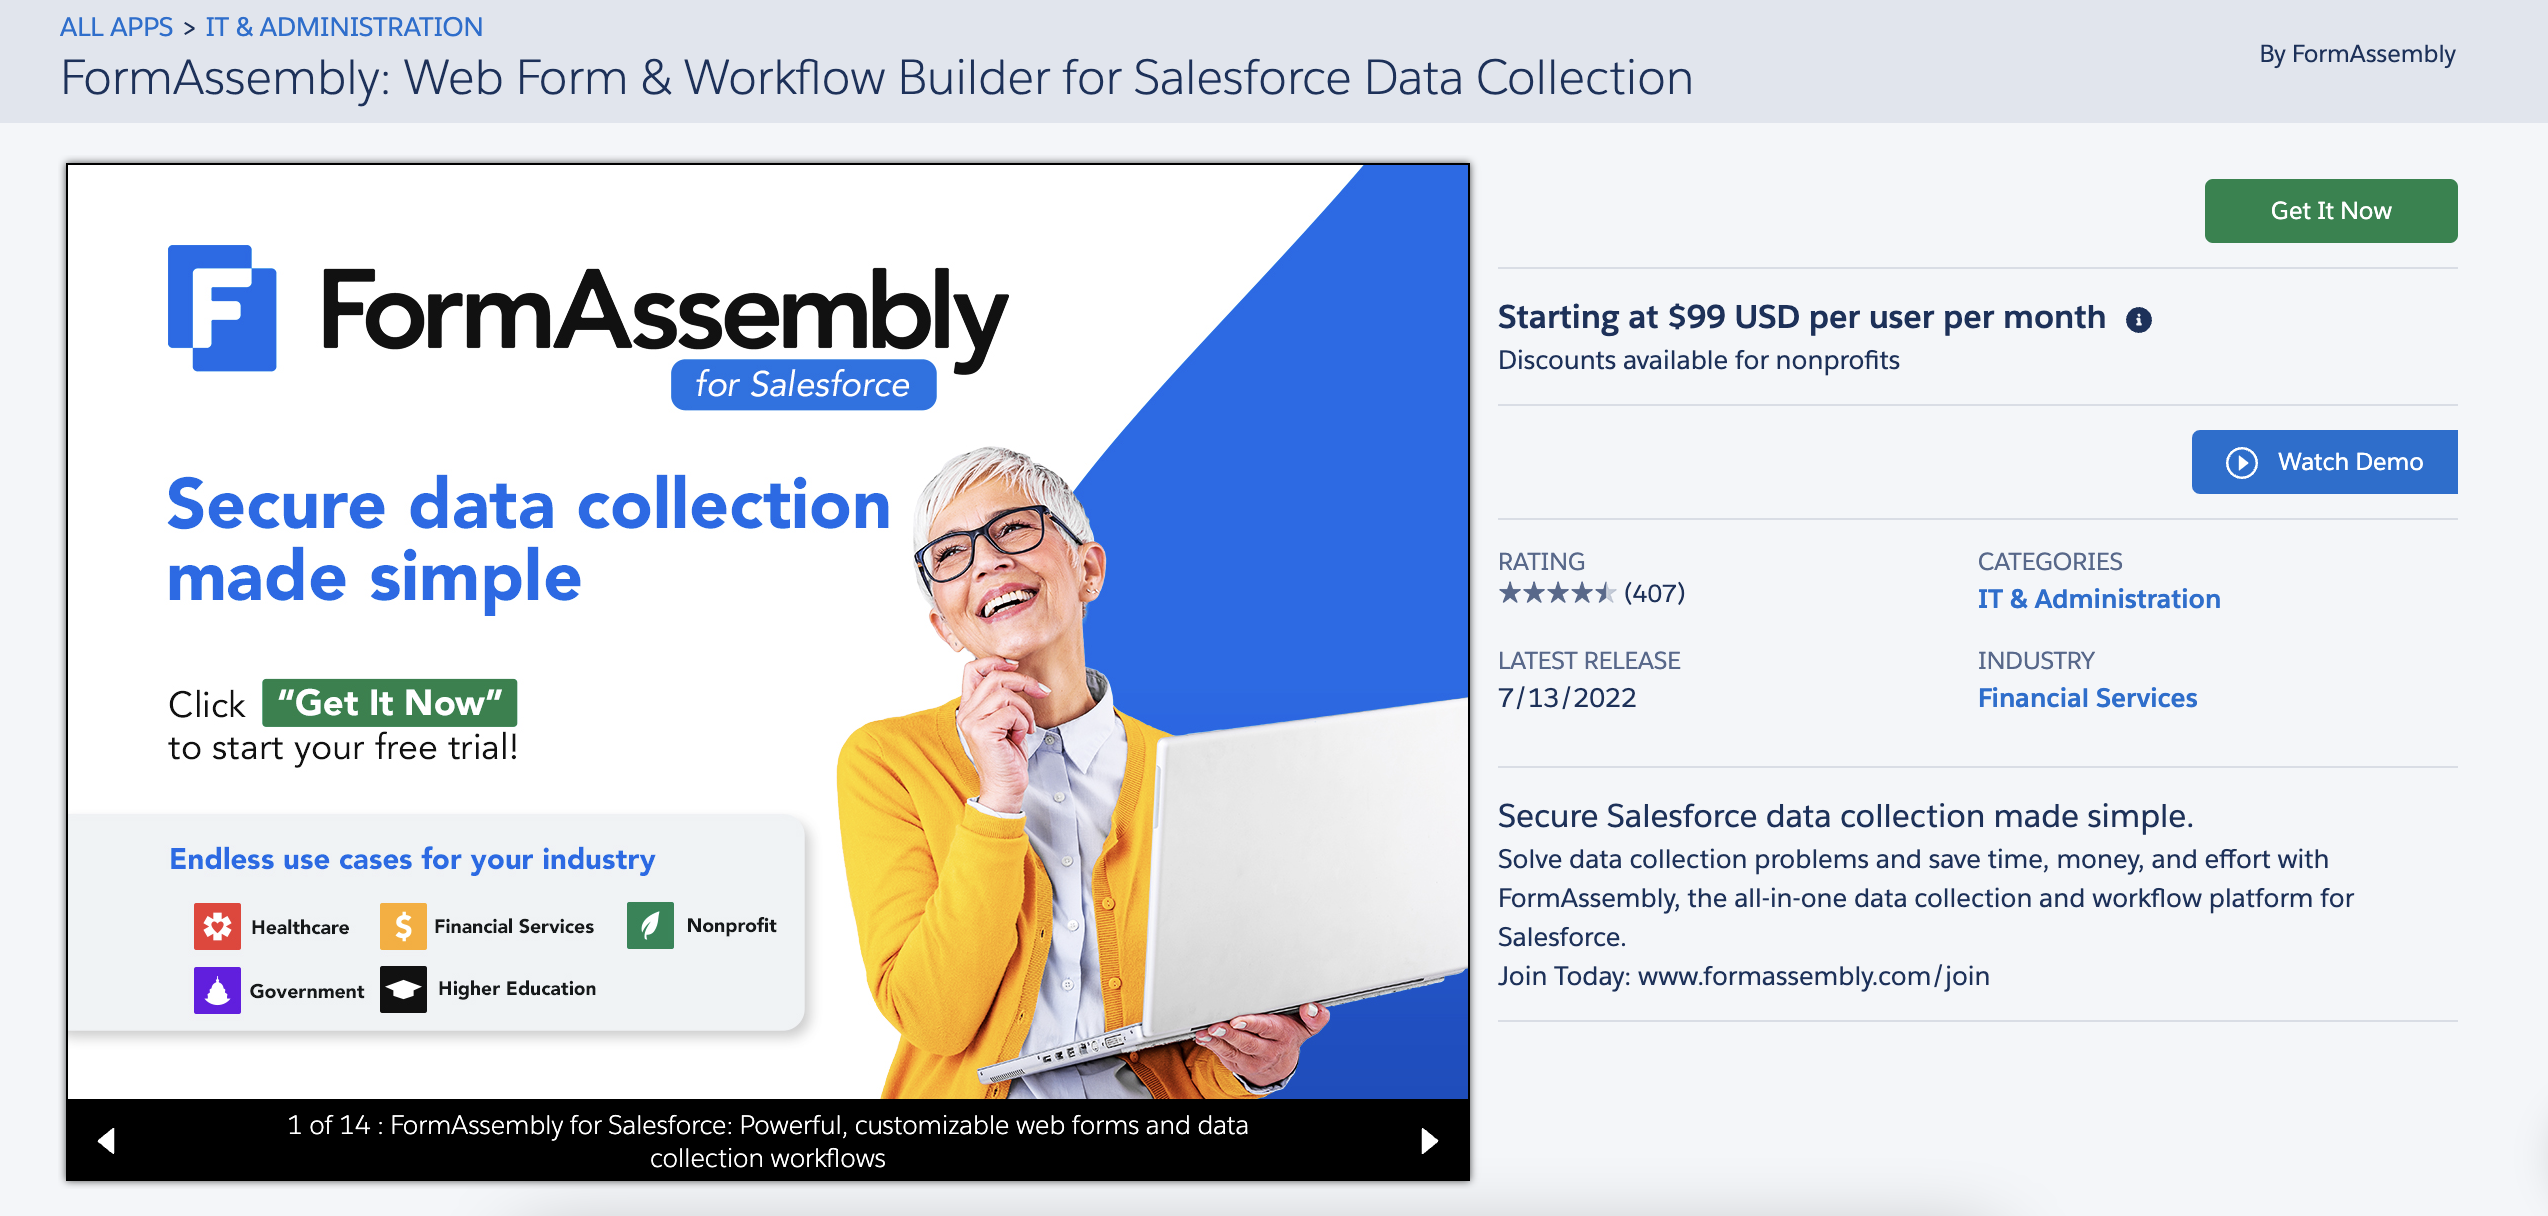
Access the FormAssembly for AppExchange package.
Click on the Get it Now button.
Choose whether to install the package in Production or in Sandbox.


Login to your Salesforce account.
Check the terms and conditions checkbox and click Confirm and Install.

Select the profile you would like to install the package for and click Upgrade.
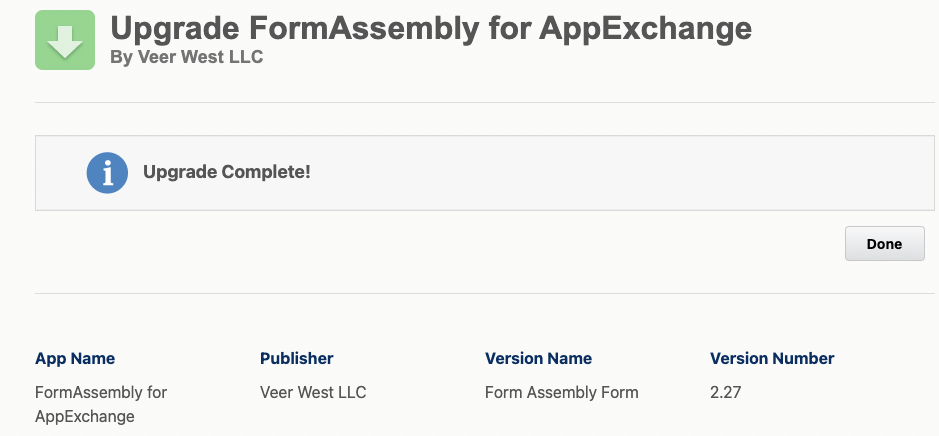
Wait for the upgrade to complete. You will receive a confirmation once done.