Introduction
By using our date validation feature, you can control the range of dates that a user may select in a field. Here are some examples of how this feature can be used:
- Select a date up to one month into the future
- Select a date up to two weeks before an event
- Select a date a month before or after a birthday
- Select a date between two given dates
Getting Started with Relative Dates
The date validation feature is designed to give you maximum control over the dates and date ranges that users can input into your form. You can access this feature as shown below by adding a text field to your form, selecting Options → Validation Rules, and changing the Expected Input Format to Date or Date with Calendar.
Each date field allows you to set the "from" and "to" date ranges for a field:
Validation Settings
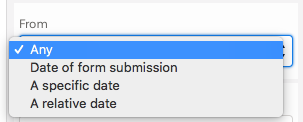
After you have selected the "Date" or "Date with Calendar" validation, you will need to setup your date range. Your basic options for this step are as follows:
- Any Date: This is the default and sets no limits on your field. The user can enter any valid date.
- Date of Form Submission: This will limit the range to the date the user submits the form.
- Specific Date: This will allow you to enter a specific, static date that will not change.
For an example of using the Specific Date, if you would like your respondents to only be able to enter a date between May 7th, 2018 and May 31st, 2018 then your setup would look like this:
Relative Dates
You can also select the Relative Date option for more advanced and customizable uses of this feature. With this option selected, you will be able to set a date range based on the value a user enters in an earlier date field.
For example, to set the "From" range to 10 days before the form submission, you would do this:

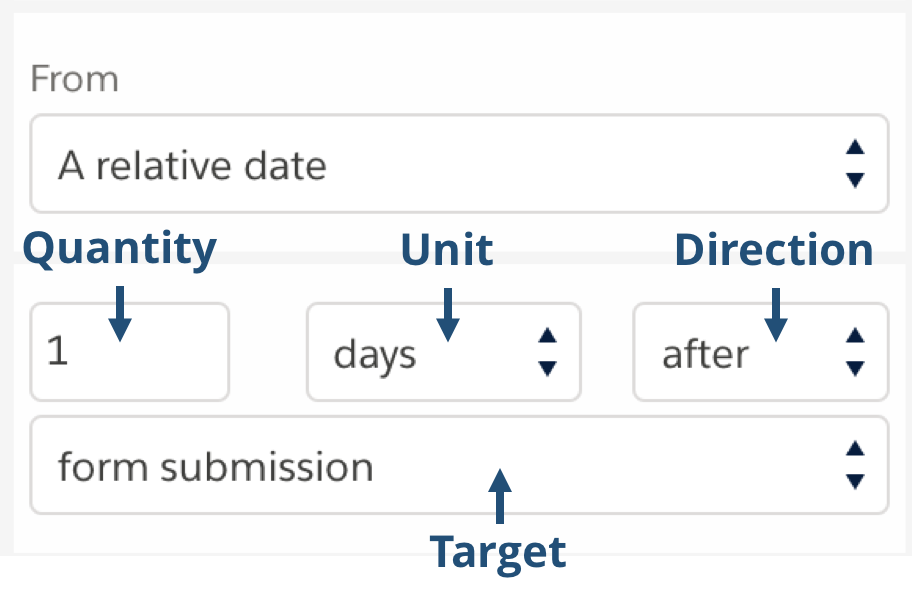
The Relative Date selection allows for a variety of options and configurations:
- Quantity: Allows you to set the number of days/months/years before or after another date.
- Unit: Allows you to set the unit length of time before or after another date field.
- Direction: Allows you to limit the data to before or after another date field.
- Target: Allows you to set a date to compare against. You are able to set your limit based on a date relative to the Form Submission or another date field higher up in your form.
Errors on the Form
The Relative Date Feature will also alert you to any invalid configurations so that your users will not be affected by misconfigurations.
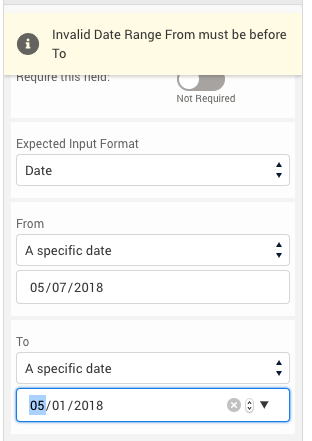
For example, if you attempt to configure an invalid date range, with the To date coming before the From date, or vice-versa, you will see a message like this letting you know that configuration is invalid:
Additionally, when using relative dates, you can only reference dates above your current field in the form. If you try to reorder your date fields so that a control field is moved below the dependent field it was linked to, you will also receive an error and be able to undo the move.
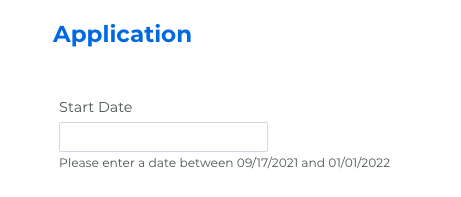
Finally, if a respondent tries to enter a date that is outside of the range you have set, they will see a warning similar to this one, letting them know that the date they have entered is invalid and they will need to correct it before the form can be submitted:

Hints and Tips
In order to make your form as user-friendly as possible, it is important to use clear field labels and hints, so that your users will know what date ranges you have set up. This will help reduce and eliminate the number of errors your users will see due to dates entered outside of the ranges you have configured.
Additional Tips:
- Place linked date fields close together on your form (on the same page, and right below one another).
- Use clear labels and hints so your users understand the date range you are asking for.
- Make sure your field label or hint mentions if the date is linked to another field.
Examples of Relative Dates
- Up to one month after form submission:

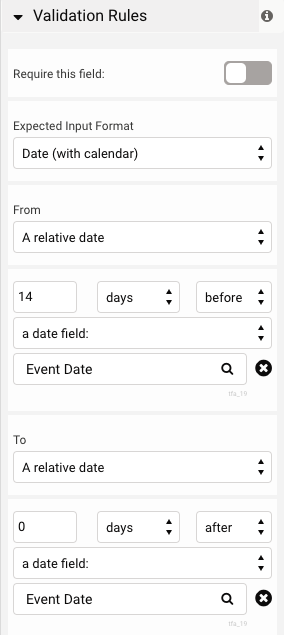
- Up to two weeks before an event:
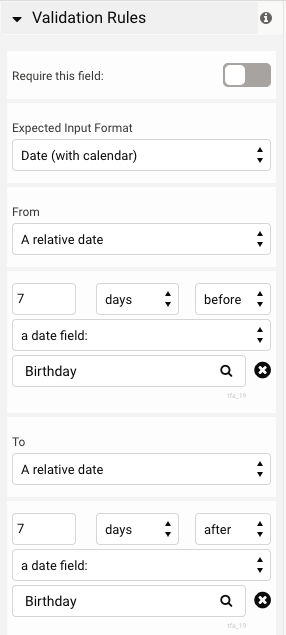
- Within a week of the respondent's birthday:
User Experience
Provided you have selected the Date (With Calendar) option for date validation users will be unable to select invalid dates. In other words, any dates that you have configured to be outside of the acceptable range will show up greyed-out within the calendar, and the user will be unable to click them:


Therefore, with a combination of clear field/hint labeling, and this interactivity of the pop-up calendar, you can design a form with little to no confusion for users on what date(s) are valid.