Overview
You can use the Theme Editor to customize the elements of your forms, but sometimes you may need to customize further than the Theme Editor will allow.
- The examples listed below are common examples that have been created by FormAssembly users. You may need to edit these examples to fit your form’s needs. Our support team does not provide custom code and cannot help edit, write, or design custom code for your forms.
- While FormAssembly does not have limits on the use of this feature, extensive use in combination with other, similar features may impact performance on respondent browsers and devices. Before you begin building advanced forms, we recommend reading through our Best Practices in Form Building document to learn more about our recommended planning and testing practices.
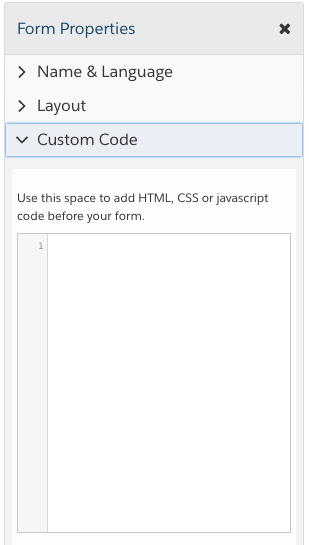
The Form Builder contains a Custom Code field where you may add HTML, CSS, or JavaScript code before your form. You must click Apply for your changes to take effect.
Here's how it works:
- First, either find the code sample you need in the listed examples below or have your own code snippet ready.
- In the Form Builder, click Properties, then Custom Code.
- Paste the code in the Custom Code field and click Apply.
- Save and test with the address found in the Publish tab of your form's options.
What is CSS?
CSS, short for "Cascading Style Sheets," is a markup language that you can use to style HTML elements. With CSS, you can customize the look and feel of a website from colors and fonts to alignment and sizes. You can even create responsive styling so that a website displays differently depending on the browser size or device.
And thanks to CSS, you can style your FormAssembly forms however you like!
Learn more about common CSS styles. There's also a wealth of free resources out there if you want to dive into CSS, such as Codecademy.
What's the difference between CSS and Theme Editor?
The Theme Editor gives you a ton of styling options for your form, fields, and buttons. But CSS is much more extensible and specific. You can get really granular in your level of styling. For example, you can target an individual field, rather than setting a global style across all fields.
Are there any limitations?
Yes, there are certain things you can't accomplish with CSS. For instance, you can't change the order of HTML elements with CSS. Instead, you can use JavaScript for even more customization and cool special effects.
You may also experience cross-browser compatibility issues with CSS3, the newest version of CSS. Older browsers won't support newer CSS features.
Test across browsers and devices to make sure your CSS works properly. Several services like SauceLabs help you test on all kinds of different browsers and platforms.
- This guide is meant to help you get started with adding custom CSS to your form. You can use the examples below to accomplish many basic CSS design changes.
- Our support team does not provide support for writing custom code to meet your specific needs beyond what is provided below. We highly recommend working with web developers who are comfortable with CSS when writing code that moves beyond what we provide in this guide.
- Code within the "Custom Code" section of your form will only run in Preview and View modes.
Requirement
- FormAssembly Essentials plan or above.
Add CSS
If you don't know how to write CSS or JavaScript code, no worries; we'll get you started.
First, whenever you add CSS, it needs to be enclosed within the following code:
<style type="text/css">

YOUR CSS STYLES GO HERE!

</style>
Sometimes it's helpful to add comments. Outside of script and style tags, you should use the HTML comment system:
<!-- Comments -->
Inside script and style tags, you should use C-style comments, like so:
<style type="text/css">

/* Comments */

</style>
Now, to start styling, you'll need a CSS selector and the properties of the selector you want to style. For example, let's say you want to style the background color of the whole form:
<style type="text/css">

.wForm form { background-color: #fff0ad; }

</style>
In the styling code example above, the components are the following:
- wForm
- The CSS selector for the whole form
- background-color
- The property you want to define (in this case, background color)
- #fff0ad;
- The color in hex code (in this case, a pale yellow)
The . in .wForm marks a class, while a # marks an id. Classes are selectors that can apply to multiple elements, while ids are for one specific element.
For instance, defining a style to h3 will apply to all instances of h3. But h3#tfa_0-T applies only to the form title, which has an id of tfa_0-T.
You can also combine multiple selectors if you're going to style them in the same way:
.wForm, h3.formTitle { margin-bottom: 20px; }CSS Samples
Need examples to kickstart your CSS? The code samples below cover the most common customization requests.
Change the Font
<style type="text/css">

 .wFormTitle, .wForm {
 	font-family: 'Lucida Sans Unicode', Lucida Grande, sans-serif;
        font-size: 16px;
 }

</style>
See also: List of fonts suitable for the web.
For more ideas, visit our blog Tutorial: Fun with Custom Fonts.
Style an Individual Element
You can style a specific element with CSS. Look up the FormAssembly ID (also known as field name or alias) for the element, then replace #element_id with the FormAssembly ID, e.g., #tfa_55.
You can also find more IDs in the HTML code of your form, or the Outline view (using Form Builder 5.0)
The below code will change the element's text (not the field label) color to blue and increase the font to 110% of its original size.
<style type="text/css">

#element_id {
color: blue;
font-size: 110%;
}

</style>
Click here for more information about styling an individual element and a video walkthrough.
Hide the Form Title
<style type="text/css">

.wFormContainer .wFormTitle {
display: none;
 }

</style>
Center the Form Title
<style type="text/css">

.wFormContainer .wFormTitle {
text-align: center;
 }

</style>
Center the Submit button
<style type="text/css">
.wForm .wfPagingButtons, .wForm .actions { width: 100% !important; text-align: center;
}
</style> Change the Error Message Color
<style type="text/css">

.wFormContainer .errMsg, .wForm form .errMsg {
     color: #eb0000;
}

</style>
Hide a Form Field
<style type="text/css">

#tfa_XX {
display: none;
 }

</style> Move the "Number of Characters Remaining" Text
<style type="text/css">

.wForm .lengthIndicator {
position: relative !important;
left: 0px !important;
 }

</style>
Remove the Background from Your Form's Theme
<style type="text/css">
 .wForm form, .wForm fieldset {
    background-image: none !important;
    background-color: transparent !important;
 }
</style>
Remove the Default Background on Hosted Forms
<style type="text/css">
.default { background: transparent; }
.default .wFormContainer { width:auto; }
</style>
Make the Background Image Fullscreen
<style type="text/css">
  .wFormWebPage{
    background-position: center;
    background-repeat: no-repeat;
    background-size: cover;
}
</style>
Center Previous and Next Buttons
<style type="text/css">
.wForm .wfPagingButtons, .wForm .actions {
    width: 100% !important;
    text-align: center;
}
</style>
Increase the Assistance Link Size
<style type="text/css">
.wFormContainer .supportInfo {
font-size: 20px;
}
</style>
Remove the Assistance Link
<style type="text/css">
.wFormContainer .supportInfo {
    display: none;
 }
</style>
Remove the Submit Button
<style>
input.primaryAction {
display: none;
}
</style>
Remove the Cancel Button
<style>
input.secondaryAction {
display: none;
}
</style>
Hide the "Add Another Response" Option and Remove Links on Specific Repeating Sections
<style type="text/css">
[id*="tfa_xx"].duplicateLink, [id*="tfa_xx"].removeLink {
display: none; !important
}
</style>
Move Characters Remaining to the Bottom and Left of the Field
<style>
.lengthIndicator {float:left !important;}
</style>
Increase the Size of a List Field
<style>
.wFormContainer .inputWrapper select[multiple] {height: 100px;}
</style>Remove Top and Bottom Padding from the Entire Form
<style>
.wForm {
padding: 0px 6px !important;
}
</style>
Remove the Margins Set on the Form Title
<style>
.wFormTitle {
margin: 0 !important;
}
</style>
Hide the Remove Link for a Repeatable Section
<style type="text/css">
.wForm a.removeLink {
    display: none;
 }
</style>
Hide the Add Link for a Repeatable Section
<style type="text/css">
.wForm a.duplicateLink {
    display: none;
 }
</style>
Hide the Please Select Text in a Dropdown Menu
If you would like to hide the "Please Select" text in a dropdown menu, this is possible, but you will first need to select a default value for the dropdown in the form builder. If no default value is selected it will not be possible to hide the "Please Select" text. Once you have selected a default value, you can use the following CSS code:
<style>
.wForm option[value=''] {
 display: none !important;
}
</style>
Center Save and Resume Link
Please use the following code to center the Save and Resume link on the page.
<style>
  .wForm .saveAndResume {
     text-align: center;
  }
</style>
Red Pop Up regarding JavaScript
If respondents have JavaScript disabled, they can bypass any required fields and submit a form. You can add a warning to your page on submit by adding this code to your form in the custom code section. It will pop up in red at the top of the form if a respondent doesn't have JavaScript enabled, and provide a link with directions on how to enable JavaScript:
<div style="color:red">
<noscript>For full functionality of this page it is necessary to <a href="http://www.enable-javascript.com/"> enable JavaScript.</a></noscript>
</div>
Hide the Submit Button if JavaScript is Disabled
<noscript>
<style type="text/css"> #submit_button {display:none; } </style>
<div style="color:red">
For full functionality of this page it is necessary to <a href="http://www.enable-javascript.com/">enable Javascript.</a>
</div>
</noscript>
Form Elements
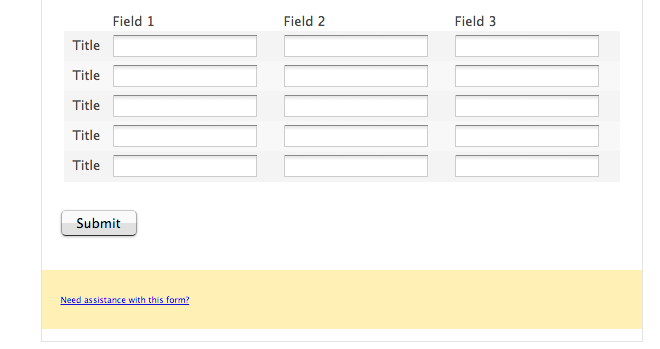
Below, you'll find a list of elements you can change with CSS, along with example screenshots of what they'd look like with { background-color: #fff0ad; } applied.
| Element | Code Snippet |
|---|---|
| Form Body | .wForm |
| Form Title | h3.wFormTitle
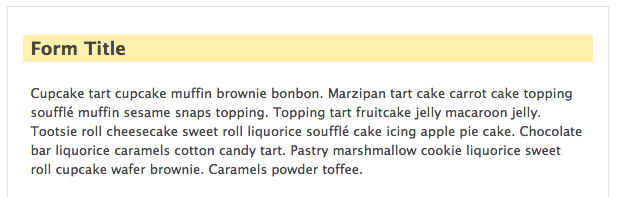
|
| Form Title (More specific, e.g., to add a border) | h3#tfa_0-T
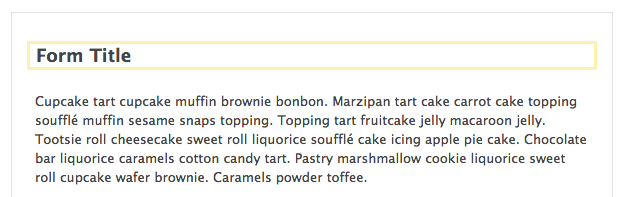
|
| Text/HTML Element | .htmlContent |
| Question Labels (Includes Likert Matrixes) | .wForm label, .wForm .label |
| Question Labels (Does NOT include Likert Matrixes) | .wForm .preField |
| Fieldset Question Labels (Does NOT include Likert Matrixes) | .wForm fieldset .preField |
| Question, Group, and Fieldset Labels (Does NOT include Likert Matrixes) | .wForm .labelsAbove .preField |
| Fieldsets (Does NOT include Groups) | .wForm fieldset
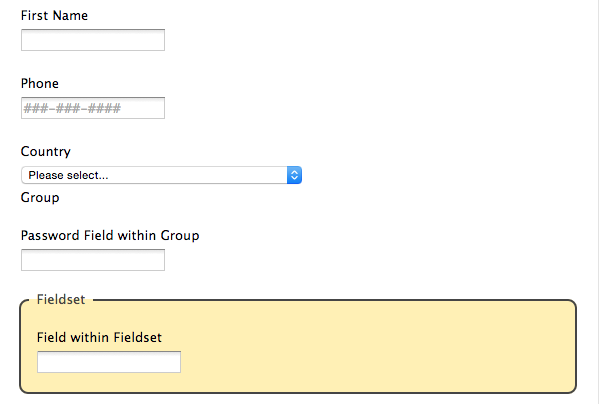
|
| Text Input Box | .wForm .oneField input |
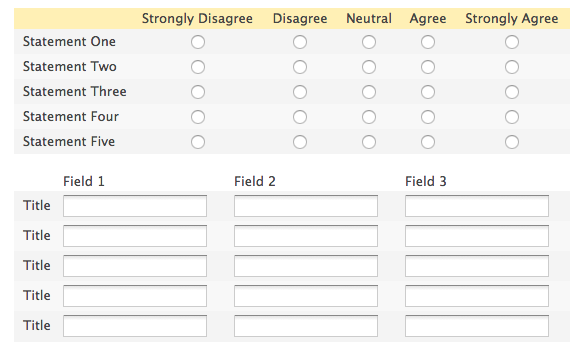
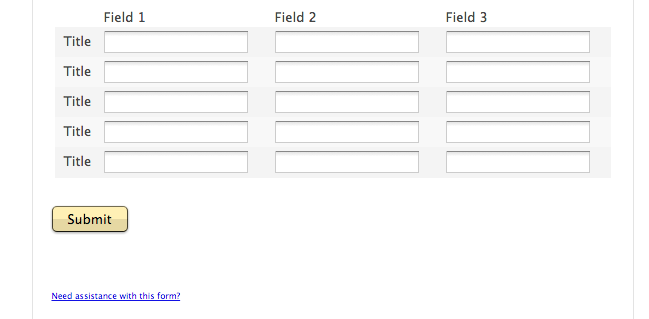
| Likert Matrix Questions | .wForm .matrixLayout |
| Likert Matrix Questions: Header Row | .wForm .matrixLayout tr.headerRow th
 |
| Likert Matrix Questions: First row and every other row | .wForm .alternate-0
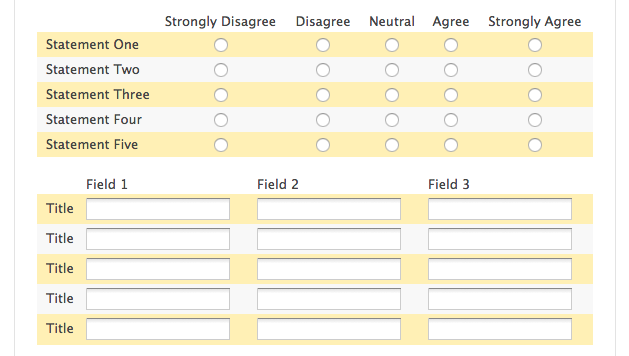 |
| Likert Matrix Questions: Second row and every other row | .wForm .alternate-1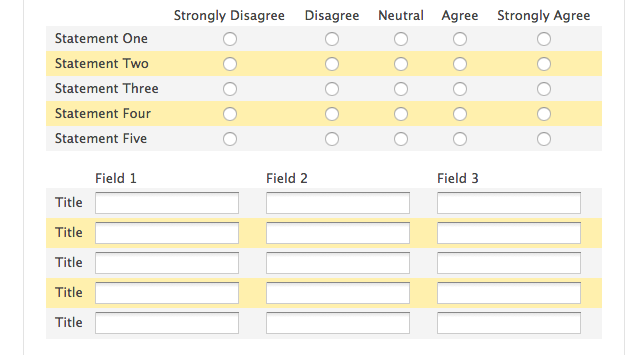
|
| Likert Matrix Questions: Header Column | .wForm .matrixLayout th.headerCol
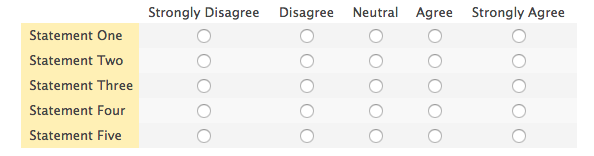 |
| Likert Matrix Questions: Header Column Labels | .wForm .matrixLayout .label |
| Submit/Next/Previous Button | .wForm .secondaryAction, .wForm .primaryAction, .wForm .wfPageNextButton, .wForm .wfPagePreviousButton

|
| Submit/Next/Previous Button (On Hover) | .wForm .primaryAction:hover, .wForm .secondaryAction:hover, .wForm .wfPagePreviousButton:hover, .wForm .wfPageNextButton:hover
|
| Inactive Hint | .field-hint-inactive .hint
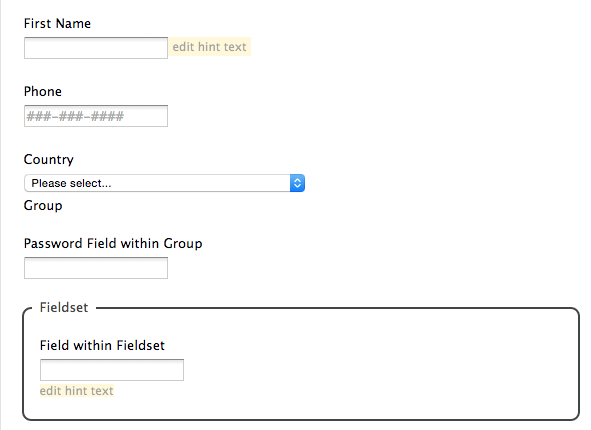
|
| Active Hint | .field-hint .hint
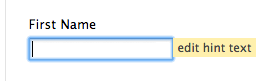
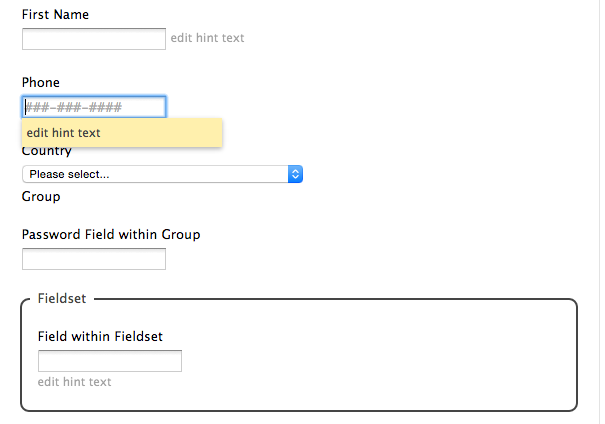
|
| "Need Assistance with this form?" Link | .wFormContainer .supportInfo
|