Tray.io Integration
This document covers how to send data from FormAssembly to Tray.io. Once data is sent to Tray.io it can be sent to another software application. For this example, we will be sending data from FormAssembly to Tray.io to Constant Contact.
Tray.io is compliant with SOC 2 Type 2, HIPAA, GDPR & CCPA - Please see the Data Protection article for more information on Tray.io security standards.
Requirements
- FormAssembly HTTPS Connector
- FormAssembly Essentials plan and higher, or legacy Professional and Premier plans
Step 1 - Configure Webhook Trigger
To begin, create a new workflow within tray.io, and select Webhook Trigger.
Once inside the Tray.io builder, configure the Webhook Trigger by doing the following:
- Click on the ellipsis, located in the upper right-hand corner.
- Select Settings.
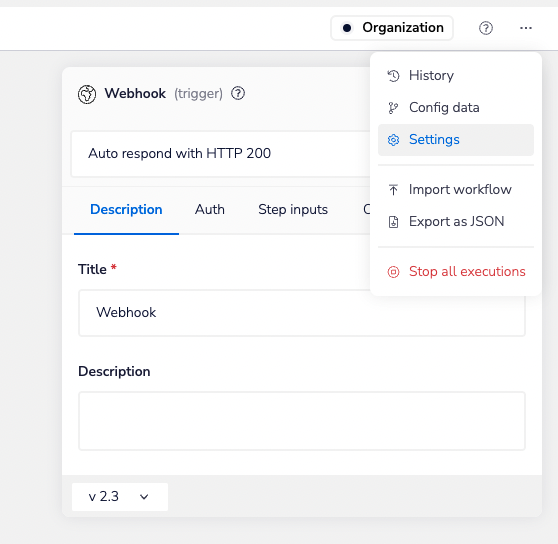
- Find and copy the Workflow Public URL.
- Paste this into your FormAssembly HTTPS Connector, where it asks for a Remote Script URL.
- Exit out of the settings pop-up.
- Go back to the ellipsis and click Config data.
- Add labels to all the information you want to send to Tray.io. The labels should match what is mapped within the HTTPS Connector.
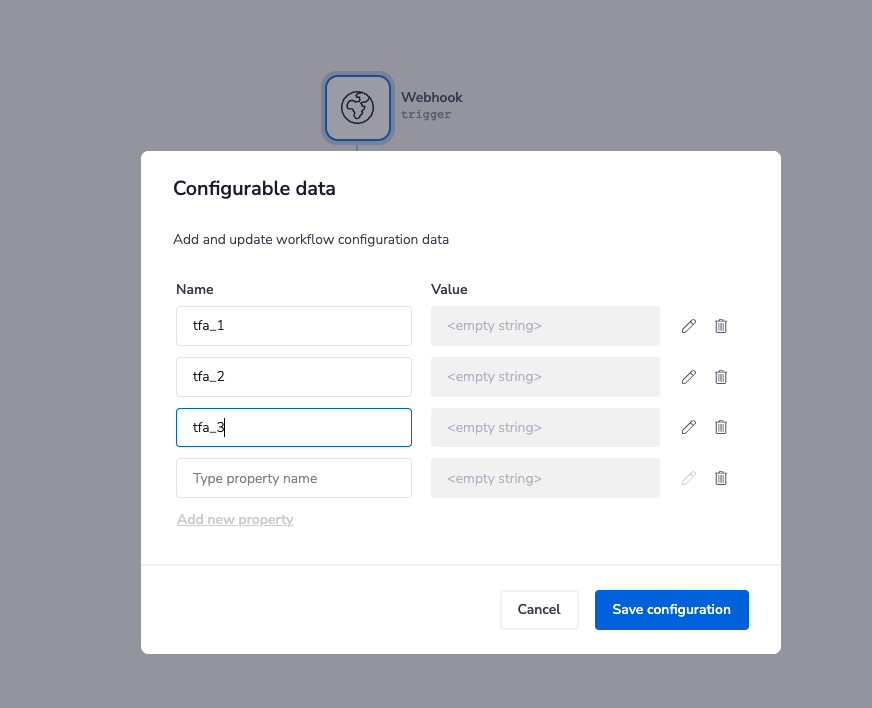
- Click Save configuration.
- Submit the FormAssembly form and check the logs in Tray.io to ensure the information flows through to Tray.io successfully.
- While in the logs, make sure to click the Use output option, located directly above the data shown in red.

Step 2 - Configure Constant Contact
- Click the (+) sign beneath the Webhook Trigger and select Service Connectors.
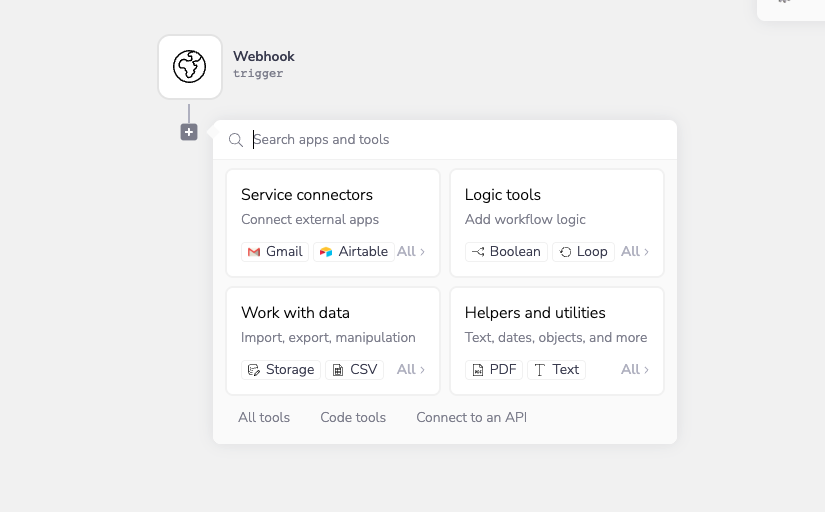
- Search for and select Constant Contact.
- A box should appear on the right-hand side, that has an Auth tab.
- Click New Authentication to connect to your Constant Contact account.
- Directly above the Auth tab, you should see a drop-down menu. Click and select what you would like Tray.io to do with this information upon sending it to Constant Contact. For example purposes, I have chosen to Create or Update Contact.
- To the right of Auth, select Step Inputs.
- Map each field by clicking the small circle to the left of the field and dragging it to the Webhook trigger.
- You should see a snake-like string appear.
- Continue to map each field.
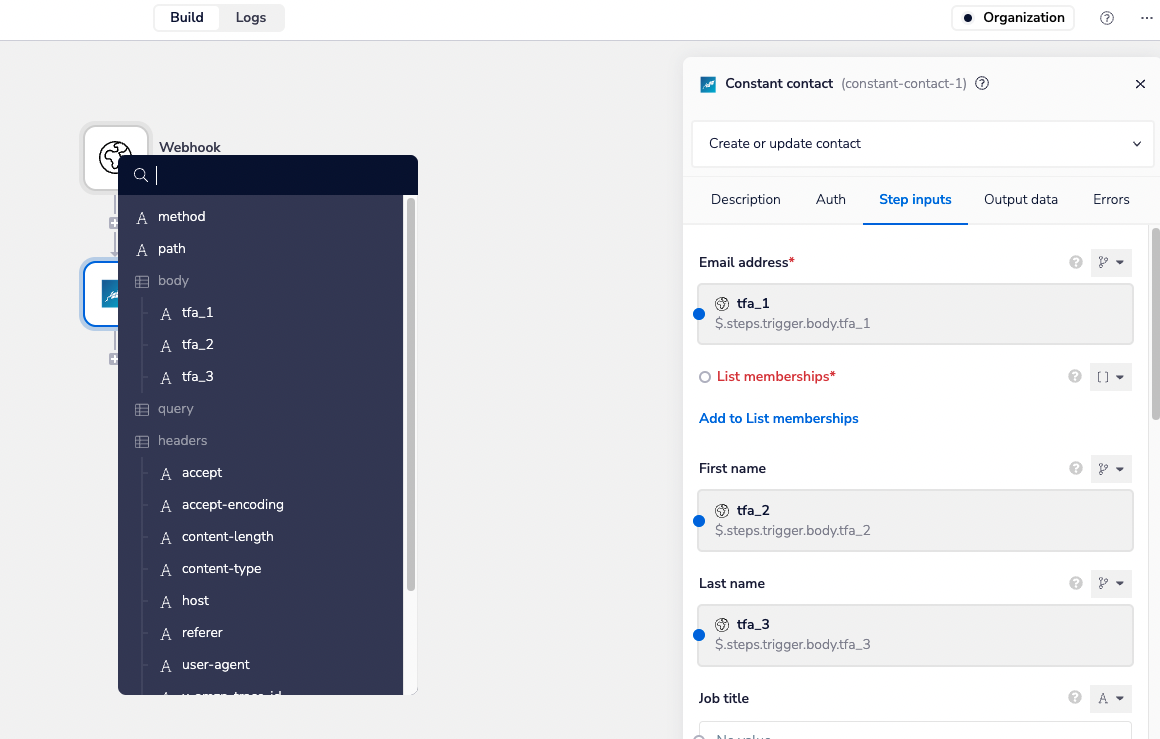
- Where it says List memberships, you will want to select Add to List memberships. Select which list the contact goes into.
Step 3 - Check that it works!
- Submit a new form response from FormAssembly.
- Within the logs of Tray.io, confirm that the information is flowing correctly and is successful.
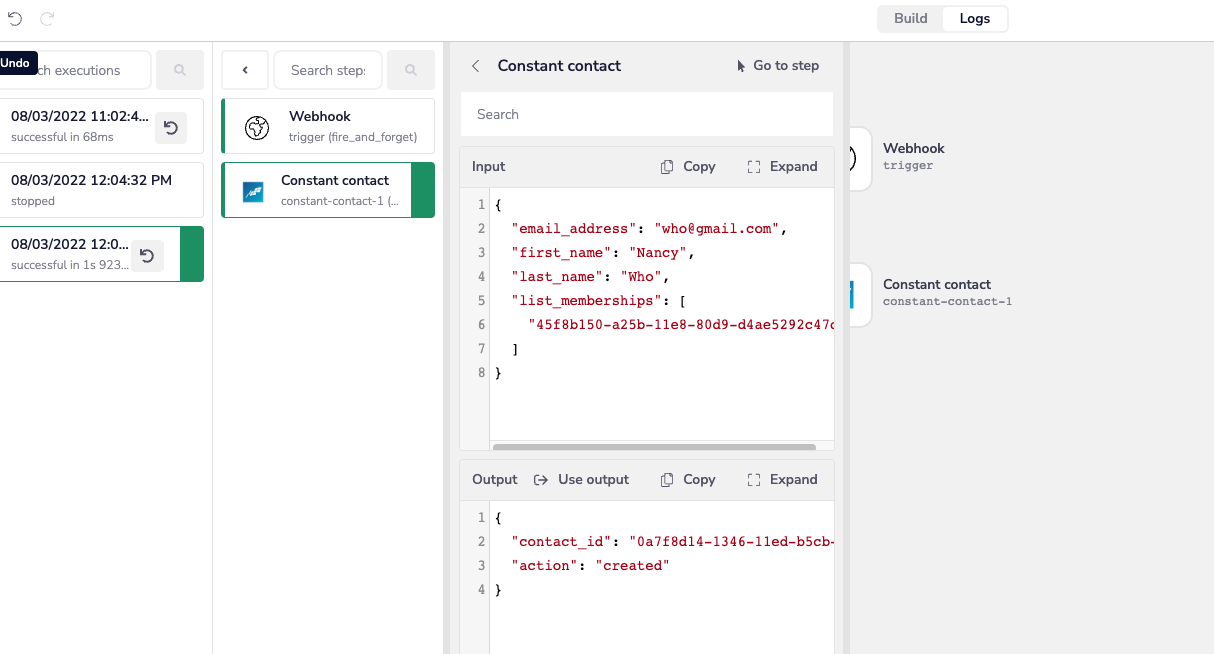
- Lastly, check Constant Contact to make sure the data is there!


