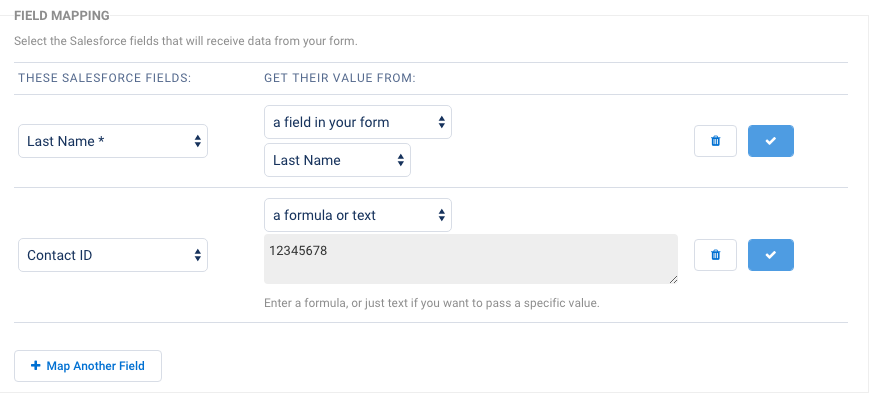
About Field Mapping
The purpose of the field mapping process is to describe what information should be sent and where it should be stored in Salesforce.
You must first select an object to work with before fields are available to map. All required fields for the object will be shown automatically.
Mapping Options
Here you have four choices: a field in your form, a formula or text, a lookup result, or the ID of an object above.
- A field in your form is the default selection, so if that's where the value should come from, select the form field from the list.
- Use the formula or text option if you have a formula that you'll use for the value, or if you want to submit a static value (for example, if you always want to use a certain Owner ID).
- The lookup option can only be used after you've created a lookup step in the connector.
- The ID option has to refer to an existing object, so it can't be used on the first object.
Map your form fields to Salesforce
- Select the Salesforce field from the These Salesforce Fields: list.
- Then, choose where the value will come from in the Get Their Value From: drop-down.
- Click OK.
- Map any additional fields by clicking the Map Another Field button. You'll notice that fields you've already mapped will be grayed out in the Salesforce field list.

Editing Field Mappings
To edit a field mapping you have already created, hover your mouse over the field you would like to edit and the Edit Mapping button will appear.

Navigating the Salesforce Submit Connector
When working with the Salesforce Submit Connector there are a few features to keep in mind that can help make your process easier.
Collapsing Connector Steps
If you find yourself working with multiple objects in your connector, it may be helpful to collapse certain steps that you are not working with currently in order to free up space on your screen.
This can be done by clicking the small triangle next to each connector step. To re-expand the step, click the triangle again.

Adding a Comment
Adding a comment to a step in a connector can be helpful. This could be a summary of the purpose of the step, a reminder about the mappings, or anything else you would like to note.
To add a comment to a step in the connector, hover your mouse over the triangle drop-down menu next to "Edit" and click "Add a Comment."
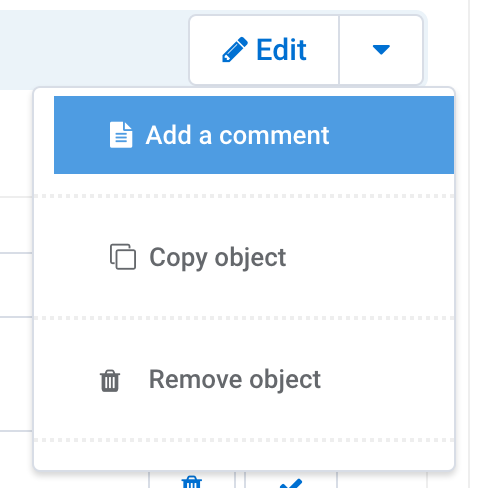
You'll then be able to add a comment at the top of the connector step to document your setup. You can also choose to delete the comment later if you'd like to by clicking the Delete Comment button at the top right.

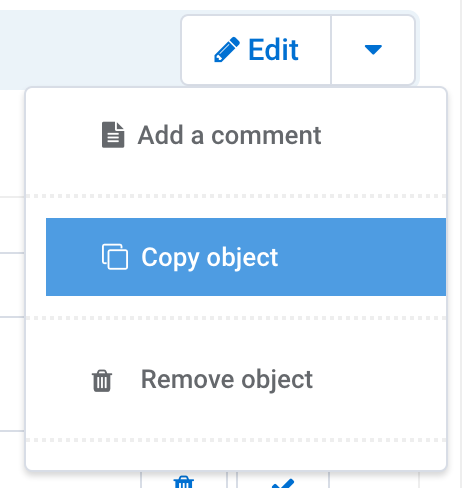
Copying an Object
You might also find it useful to make a copy of an object you have already created, to use the mappings you have previously set up, rather than starting from scratch.
To do this, hover your mouse over the drop-down menu next to "Edit" and select "Copy Object". A copy of the object will appear directly below the object you created. You can choose Reorder Objects at the bottom of the connector to change the order of steps after the new object has been created.
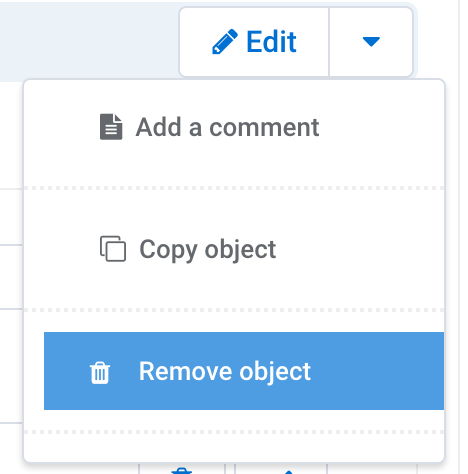
Removing an Object
If you ever need to remove an object in your connector, hover your mouse over the drop-down menu next to the "Edit" button and select Remove Object.
Accessing the Connector Logs
The Connector Logs can be an incredibly helpful tool for troubleshooting errors and monitoring how your connector is functioning. These logs can be accessed from the "Go To..." dropdown menu at the top right of the connector. This article provides additional details on using and reading the connector log.
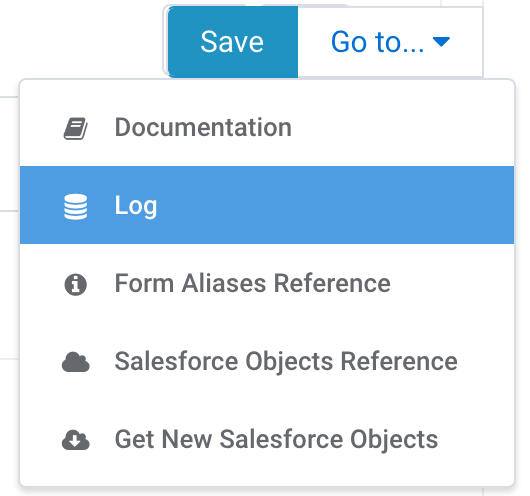
This link can also be used to view your Salesforce Objects, Get New Salesforce Objects (in case you've made any updates to your Salesforce records), view our documentation, and view the field aliases for the form.