FormAssembly connectors allow you to integrate your web forms with many other services. Each connector has different configuration steps, but we'll show you how to get started here.
Connectors
To find the Connectors page, hover over the Configure button of your form in the Forms List and select Connectors.
On the Connectors page, click the add link and choose the connector you'd like to configure. Each step of the connector represents a different stage of processing: Form Opened, Form Progress Saved, Form Submitted, or After Form Submitted. You will see 2 - 4 stages depending on your permissions and settings.

You will enable the connector from the connector's configuration page. Enabled connectors will show a green dot. Disabled connectors show a red dot.
Processing Stage
The processing stage determines how the form information is submitted to the other service. The Submit stage stops form submission if there are any errors and asks the respondent to correct the errors. Post-Submit does not alert the respondent to any errors.
Form Opened
The Open stage represents when the respondent is loading the form.
You can choose a prefilling connector for the Open stage if one is available to your FormAssembly instance.
Form Progress Saved
When a connector is in the Save stage, the connector will process when a form is saved to be resumed later.
The spreadsheet will only be updated when someone saves a form.
To see the Save stage, you will need to enable Save and Resume from the Processing options.
Form Submitted
In the Submit stage, FormAssembly waits for the complete execution of the connector before redirecting your user to the Thank You page. The results of the execution can impact or prevent the rest of the processing.
- Pro: If a connector error occurs, this stage gives an opportunity to the user to see the error message and possibly address it before submitting the data again.
- Pro: IDs of created records can be used in the email notifications and workflow settings using the object alias.
- Con: If the connector error cannot be addressed by the user (for instance, the password set in the connector has expired), the user will have to abandon the form and will never get to your "Thank You" page. (Note that the data submitted will not be lost. It is saved in the connector log, where you can review and resend it through the connector.)
In the image above, the Salesforce Connector will process in the Submit step.
After Form Submitted
In the After Form Submitted stage, the connector processing occurs after the user's submission is acknowledged. This means that the person will be redirected to your Thank You page, even if the connector fails to execute properly.
- Pro: The user experience is not impacted if the connector cannot process properly.
- Con: You'll need to review the errors in the connector log and resend the data through the connector yourself.
- Con: IDs of created records are not available to email notifications and workflows.
Move Connector
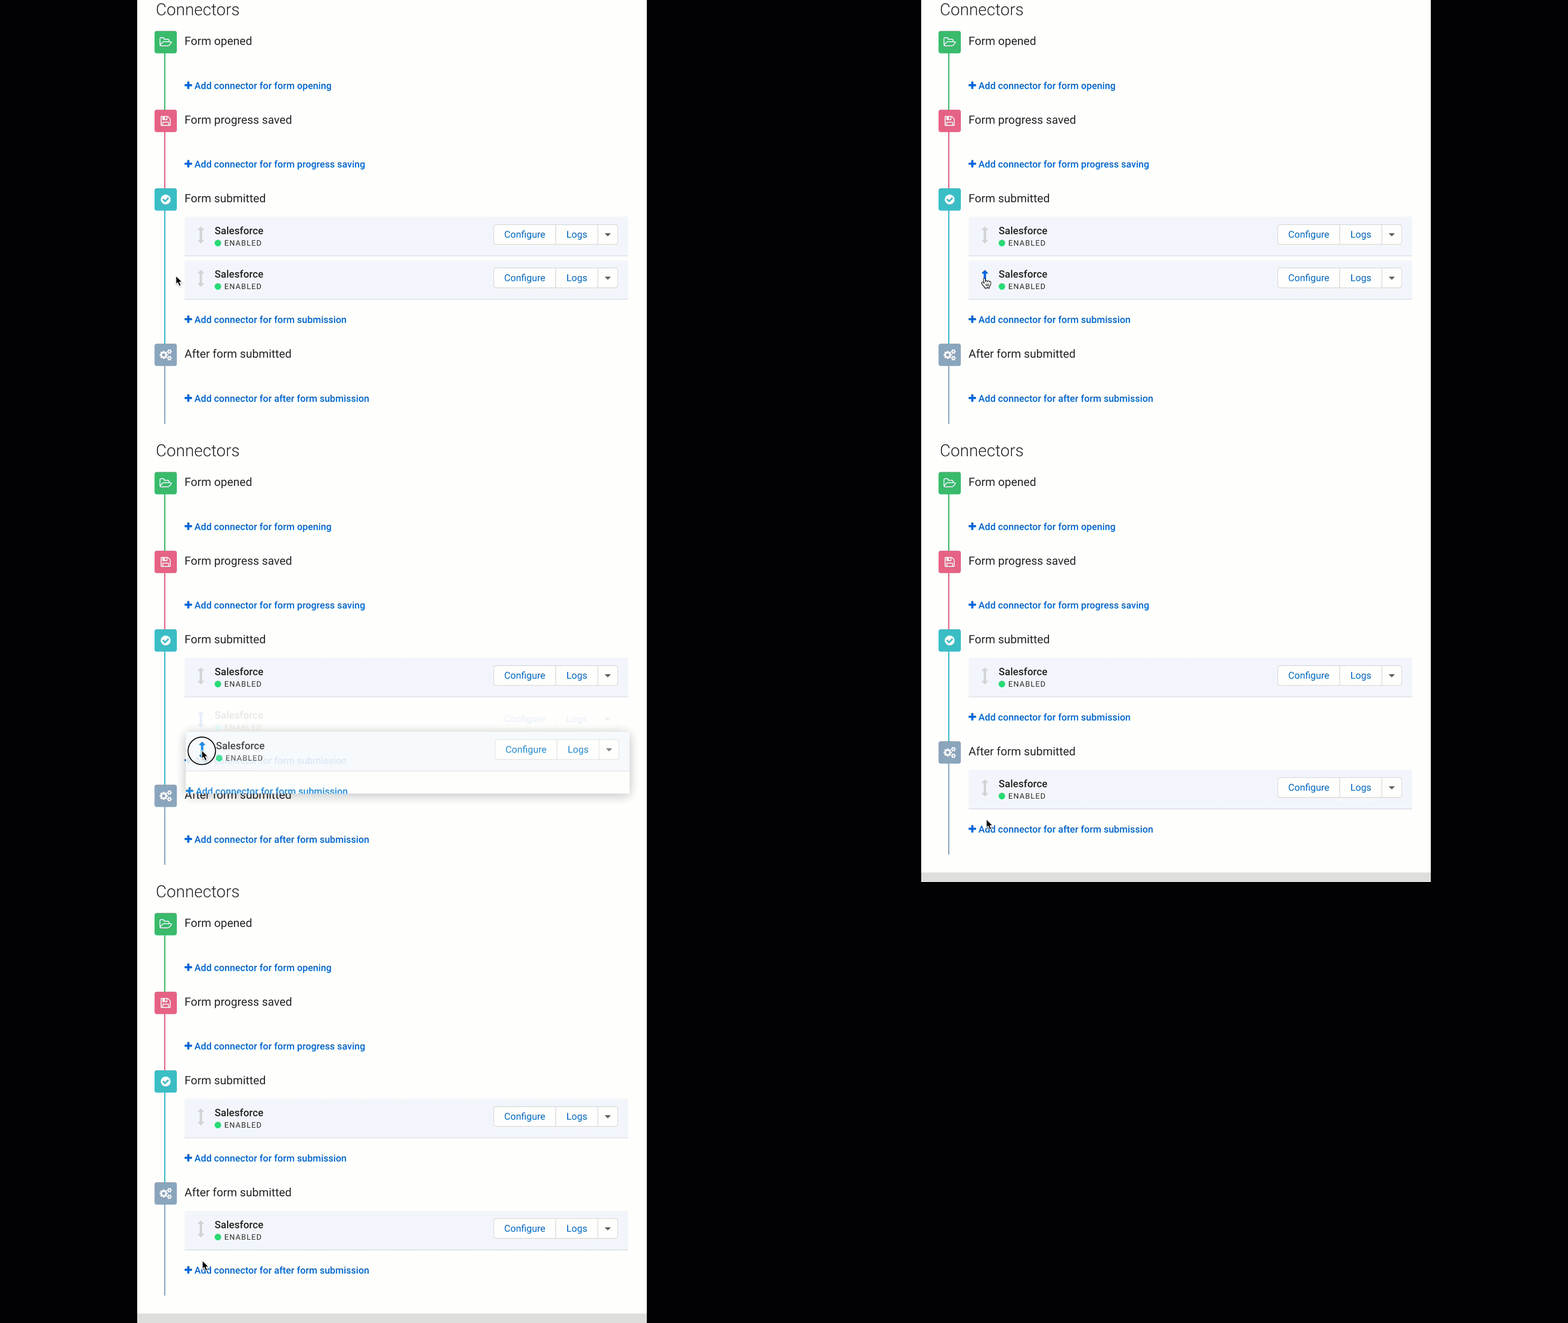
Within the Connectors page, you can move the connector, if applicable, from one stage to another by clicking and holding the dual arrows to the left of the connector and dragging it to another stage.

Authentication
Each connector has its own authentication and is addressed on the setup page.