Introduction
The Connector Step allows you to exchange data between forms in your workflow and external sources.
To add this step to your workflow, click the "Add Step" button on your Map and select Add a Connector from the dropdown menu. You can also hover over the space between Steps, and the "+" icon will appear.

You can edit or delete a connector by selecting it on the Map and opening the Properties panel with the configure (cog) icon.

When you add a connector to a workflow, it will run separately from your individual forms and form-level connectors. Form-level connectors will not run in a workflow, and workflow-level connectors will not run in forms. Additionally, any connectors you set up for a form in one workflow will not run in any other workflows that use the same form.
Rules for Adding Connectors to Workflows
The position of the connector matters.
- Prefill Connectors must be placed before a Form Step or another Prefill Connector.
- A Submit Connector can be placed anywhere in a workflow after the Start Workflow Step and will be tied to the form you set in the Configure tab.
- If a connector is tied to a form and then runs before the next Redirect Step (either a redirect or another form), it will notify respondents of any connector errors and will prevent submission if an error occurs. This is the same as the Form Submitted portion of the Connector Timeline seen at the form level.
- If a connector is tied to a form and runs after the next Redirect Step (either a redirect or another form), it will not notify respondents of any connector errors. This is the same as the After Form Submitted portion of the Connector Timeline seen at the form level.
Properties Panel Configuration
Adding a connector will automatically open the Properties panel so that you can configure the step. The Properties panel for this Step contains the following tabs (depending on the step): Description, Authorization, Configure, and Error Handling.
You can delete any step by opening the Properties panel for the step and clicking the red "Delete Step" button at the bottom.
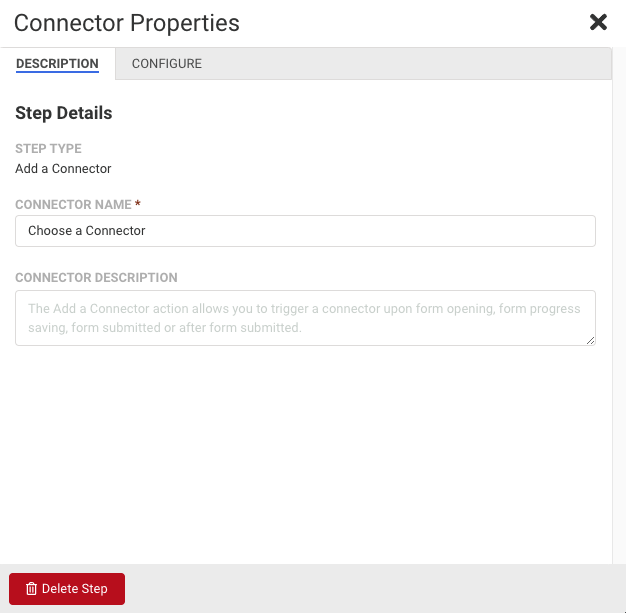
Description Tab
This tab handles the details of the step itself, such as the Step Name and Step Description.
- Step Name - This field allows you to give the step a custom name, which can help you differentiate between your steps. It has a default value of "Choose a Connector" until manually changed, or until a connector is selected in the Configure tab. If a connector is selected in the Configure tab, the default name will automatically change to match the connector.
- Step Description - You can use this field to add a description to your step.
Authorization Tab
Connectors that require authorization for use include an Authorization tab in the Properties panel.
The Authorization dropdown lists all saved authorizations from all workflows owned by your user account. Select an existing authorization from the list or scroll to the bottom to create a New Authorization.
Click Manage to view the External Authorizations page where an authorization can be revoked or reauthorized across all connectors.
Configure Tab
When you first open the Configure tab, you will see the fields Select Form Response Action and Select Connector, followed by a Configure Connector button. These two fields determine which form is collecting data for the connector, and which connector this step executes.
- Select Form Response Action
- This field contains a dropdown menu that lists:
- All Form Steps located above this step in the Workflow Map
- A Form Step, if it is located directly after this step (for Prefill Connectors)
- A Form Step, if this step is located immediately before another Prefill Connector, which is directly above the Form Step in question
- You can also use the type-ahead input to narrow down the list of available steps. The dropdown menu will list the Step Names, not the names of the forms, so please keep this in mind when setting any custom Step Names.
- This field contains a dropdown menu that lists:
- Select Connector
- This field is disabled until the Form Step has been selected in the field above. It contains a dropdown menu that shows all available connectors for this Step. The list of connectors will be affected by the placement of the step as well. For example, you will see a list of Prefill Connectors if this step is directly above a Form Step.

- Configure Connector
- This button is disabled until a connector has been selected in the above field. Clicking on this button will open a Connector Configuration page where you can set up your connector. This page uses the same configuration settings as the form-level Connector Configuration pages, so you can reference the related help documentation for each connector when configuring them.
Error Handling Tab
In Form-native Connector Steps
With this tab, you can set a custom error message that displays if an error occurs. The custom error message can be applied to any Prefill, Save, or On-Submit Connector.
For example, if an error occurs when sending form data to Salesforce on-submit, the error message from Salesforce is typically displayed to the respondent. These errors can confuse form respondents, so you can display a custom error message instead.

- Custom Message
- You can enter plain text (no HTML) into this text area to create your custom error message. The custom error message will be shown to the respondent if they encounter an error from the connector while responding to the form. The error will be styled according to the Form Theme's "Error Color" option.
- You can also choose to display the connector-generated error message below your custom error by checking the checkbox below the text area. This can be helpful when the generated error messages display useful information to the respondent, such as whether a credit card payment failed. This option is highly recommended for Payment Connectors.

In Workflow-native Connector Steps
By default, if the connector encounters an error, the workflow terminates. To override this behavior, you can configure the error to redirect the workflow to another step by selecting a step from the Upon Connector Error… dropdown menu. For more information about Workflow-native Connectors, please refer to this article.

Available Connectors
Many connectors are available for use both at the form-level and workflow-level. These shared connectors are as follows:
- Salesforce Prefill
- Salesforce Marketing Cloud Prefill
- FreshBooks
- Google Sheets
- Microsoft Excel
- HTTPS
- Salesforce
- Salesforce Marketing Cloud
- Authorize.net
- CyberSource
- iATS
- PayPal
- Stripe
Additionally, some connectors are strictly for use at the workflow level. For more information about Workflow-native Connectors, please refer to this article.
Prefill Connectors and Workflow
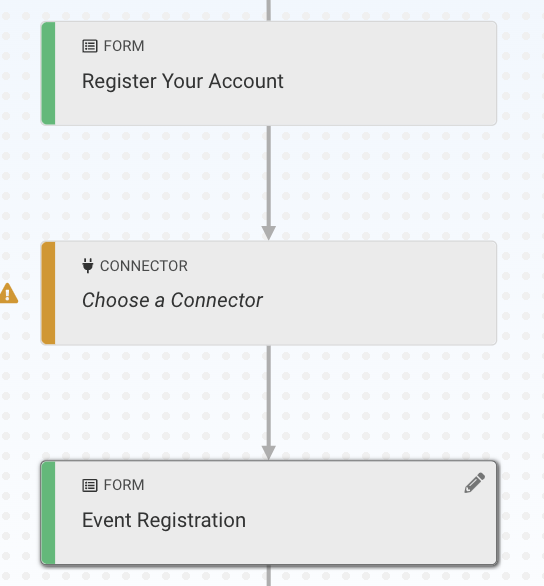
To prefill a form within a workflow, you'll first need to configure the Form Step that will be prefilled. This is because a Connector Step shows a different list of available connectors based on which Form Step it is referring to. To show Prefill Connectors, you'll need to reference a Form Step after the Connector Step in the Workflow Path.
Prefill Connectors can run in one of two locations within a workflow:
- You can run a prefill connector before a Form Step.
- You can run a prefill connector at the start of a workflow.
Follow the steps in the sections below to prefill one of these two locations.
Prefilling Within a Workflow
- Add a Form Step anywhere inside the workflow and configure the form that will be prefilled.
- Once the Form Step has been added and configured, hover over the space above the Step in your workflow. A "+" icon will appear to add a new step.

Click on the "+" icon and then select to add a new Connector Step.
- Under "Select a Form Response", choose the form that you will be prefilling.
- Under "Select Connector", choose the prefill connector that you would like to run.
- Click Configure Connector and set up your Prefill Connector.
- Authenticate your Prefill Connector first. Reference our help documentation if you need assistance authenticating a Prefill Connector.
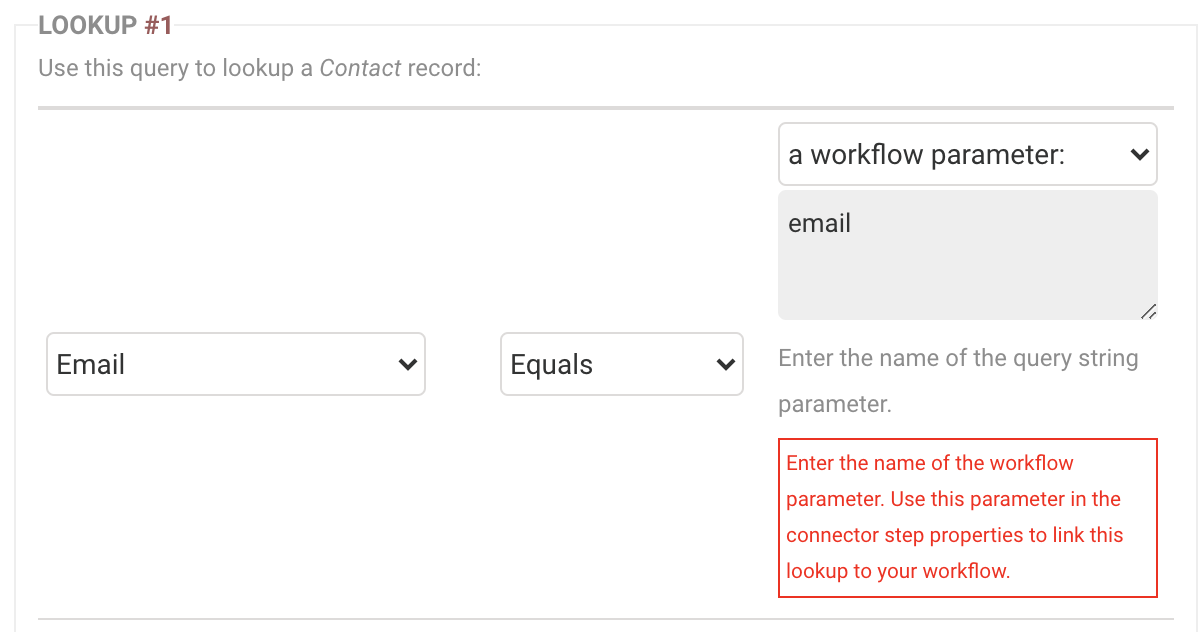
- Set up your Lookup.
- Set the Salesforce field you'll be searching for on the left
- Choose "Equals"
- Set the rightmost field to "a workflow parameter"
- For the parameter, use simple, case-sensitive text that does not contain numbers or special characters. If you've set up a Salesforce Prefill Connector before, this will function like an unsafe query parameter.
- Finish setting up your Prefill Connector and Save before closing the configuration window.
- Add your Workflow Parameters to the step.
- In the Connector Properties panel, open the Configure tab and scroll to the bottom.
- You'll see a section labeled Workflow Parameters.
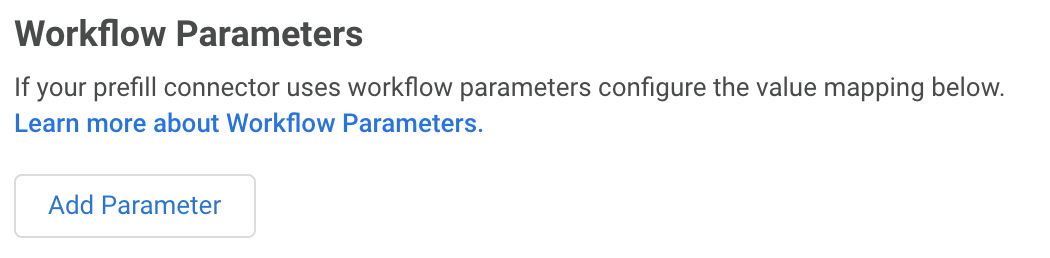
- Click Add Parameter.
- On the left, fill the Parameter box with the parameter that you set for your Prefill Connector Lookup (step 8).
- On the right, you can use the Formula Editor in the Value box to create a formula or select a field from a previous form. This value will be your search value. The Lookup will search Salesforce for records where the parameter field matches the search value. To learn more about prefilling with parameters, reference this help documentation.

- Add as many parameters as needed.
- Save your workflow to complete the setup.


Prefill When Workflow Starts
To add a Prefill Connector to the beginning of your workflow, you'll need to first add your starting form. Once your first Form Step has been added and configured, you can hover over the space above the Step. A "+" icon will appear to add a new step.
Click on the "+" icon and then select to add a new Connector Step.

When prefilling at the start of a workflow, you will need to append the prefill parameters to the end of your Workflow URL. You can follow the instructions here to build your prefilled link.
When starting a workflow with a Prefill Connector, use the traditional prefill parameters of formula, secure query, or unsafe query. Workflow Parameters will not work at the beginning of a workflow because there aren't any preceding steps to pull the information from.
Once you have built your prefilled link, you can configure the Prefill Connector as usual. Please follow the steps in the documents below as you configure your connectors:
Repeatable Fields
For spreadsheet connectors, like Google Sheets and Microsoft Excel, the connector will detect repeatable sections mapped in the Configuration tab of the Connector Properties.
When repeatable sections are detected, an option to further configure your spreadsheet's behavior will appear. Repeatable sections can be added to your spreadsheet as new rows or comma-separated values within a single cell. By default, each submission is contained within a single row, and each repeated section is contained within a single cell as comma-separated values. This behavior can be changed to create a new row each time the selected section is repeated.

Click the X to clear the default ‘Workflow’ selection, and choose a new option from the menu.

When a repeatable section is selected from the menu, for each instance the repeatable section is submitted, a new row will be created for the workflow response.
- Example:
- There is a patient intake form where all patient information is mapped to the Google Sheets Connector, with the repeatable section ‘Allergy Details’.
- If the repeatable section ‘Allergy Details’ is selected in the configuration, for each allergy submitted for a patient, a new row will be entered into the spreadsheet.
- The patient information accompanying each allergy submitted will be copied into the appropriate cells of each line.

Information is duplicated where necessary when a repeatable element other than ‘workflow’ is selected, so data can be sorted with ease within your spreadsheet application.