Overview
FormAssembly’s Single Sign-On (SSO) is a powerful tool to guard against unintended form access and reduce spam. Team plans and above can use FormAssembly’s Identity Provider Management capabilities to allow users to set up SSO for SAML once and use it for multiple forms, rather than on a form-by-form basis.
Setup
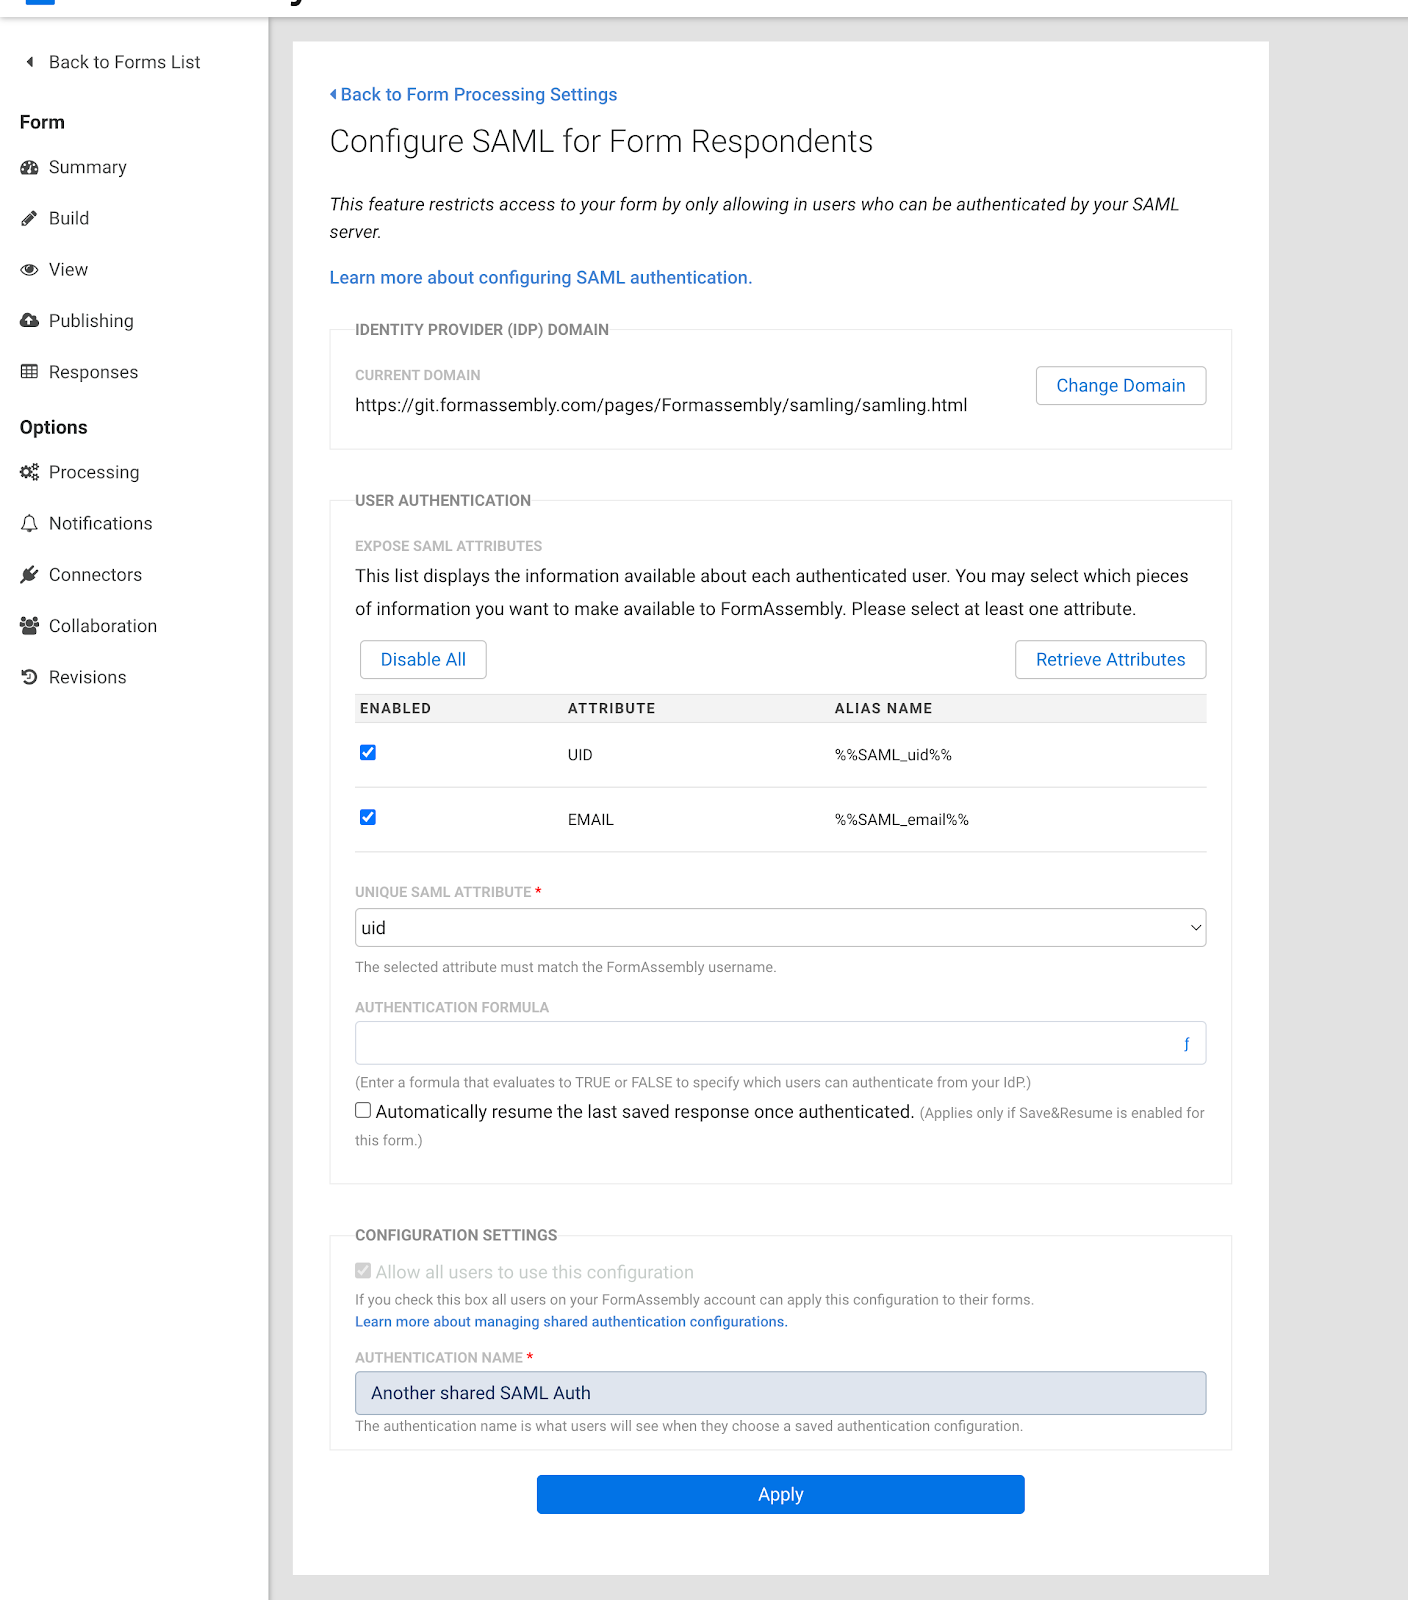
To begin, you will need to enable SAML authentication on the form’s Processing Options page. Refer to this help document for more information on setting up SAML authentication.
Once SAML authentication has been set up, users with the "Manage Form Identity Providers" permission can share their auth configuration with other users on the same FormAssembly instance. Once shared, there’s no need to configure authentication for each new form separately.
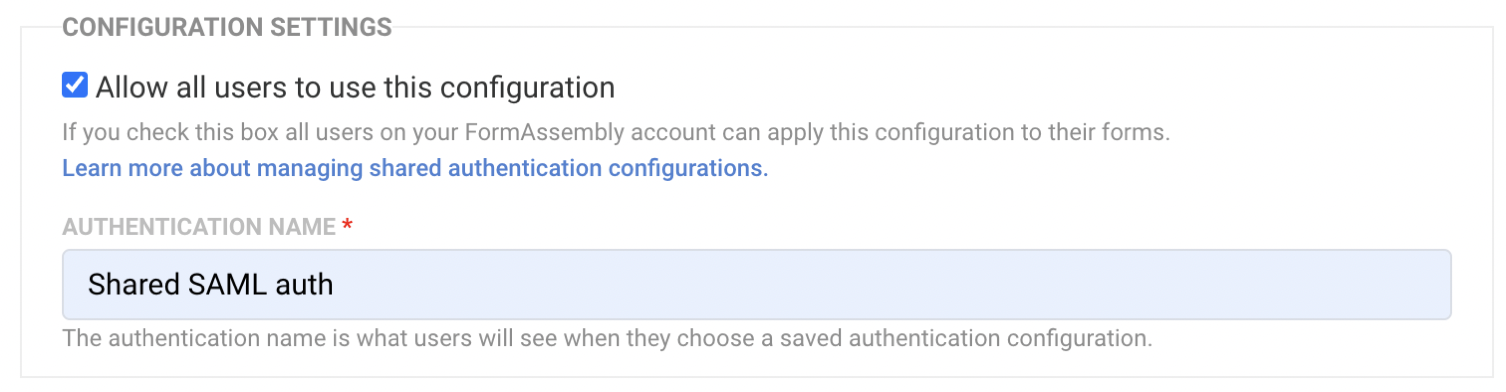
To share the configuration, check the "Allow all users to use this configuration" checkbox. You can also set an Authentication Name to differentiate between auth configurations.
Apply Configuration to Additional Forms
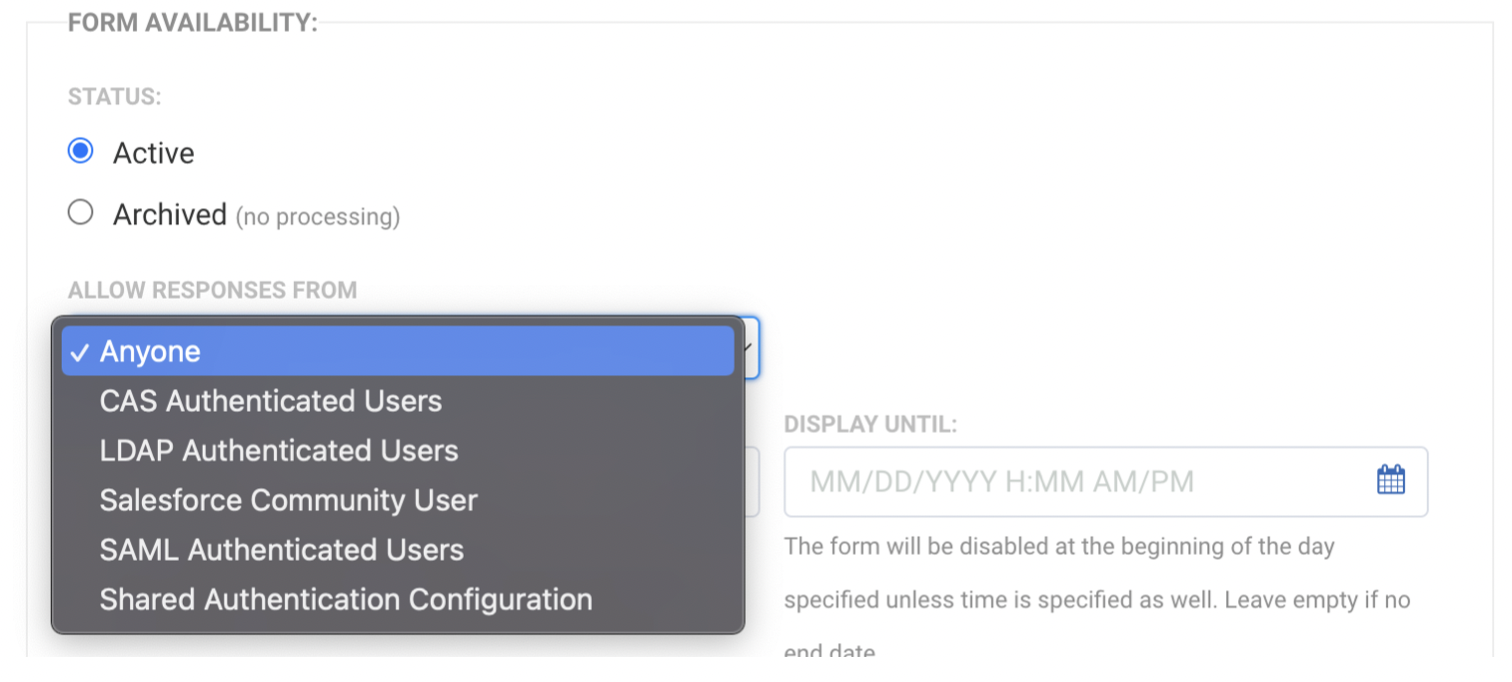
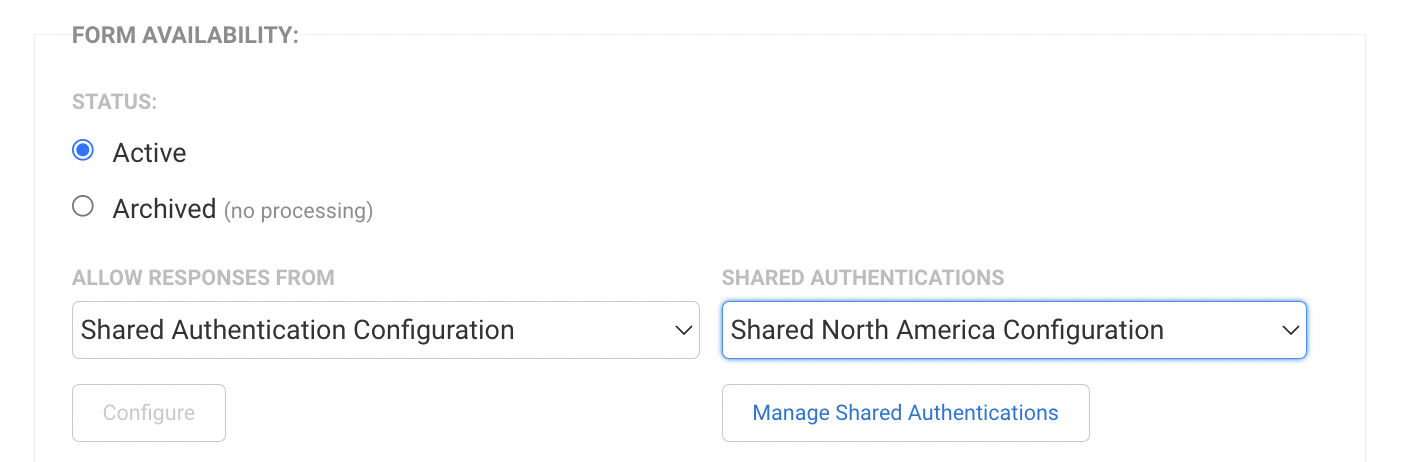
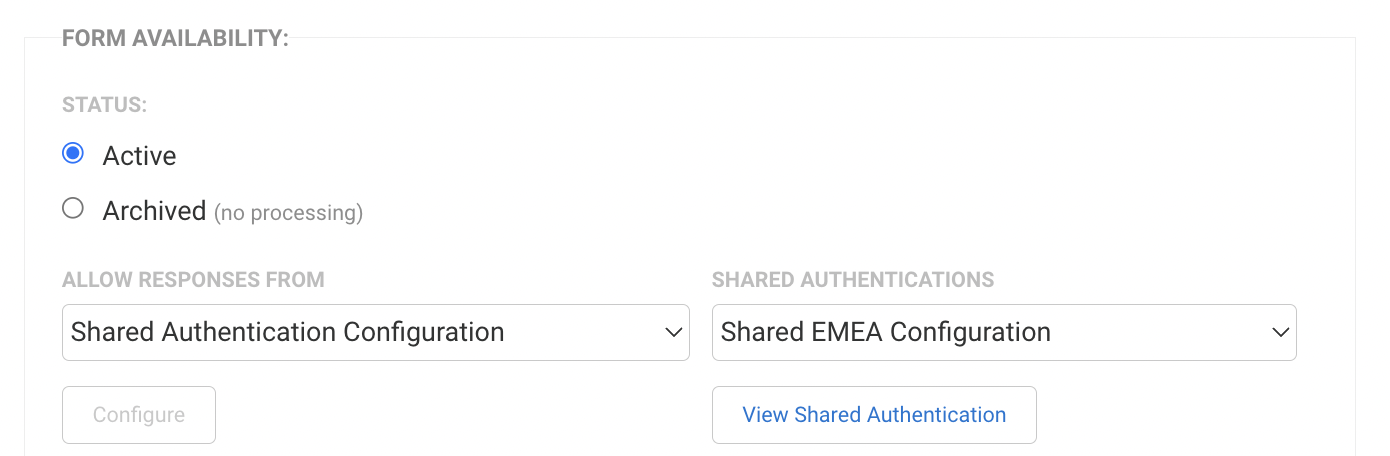
To add a shared authentication, open the Processing page for the form. Next, select "Shared Authentication Configuration" in the Form Availability section. This will cause a dedicated dropdown menu for shared authentications to appear.
Manage Shared Authentications

If a user is not permitted to manage shared authentications, the button beneath the Shared Authentications dropdown labeled “Manage Shared Authentications” will be replaced by a “View Shared Authentication” option.
This option will lead to a read-only configuration page of the shared authentication. This configuration page will include the alias names of the authenticated users.
However, if a user is permitted to manage shared authentications, clicking the “Manage Shared Authentications” button will navigate to a page with a tabulated list of shared authentications present on the instance.
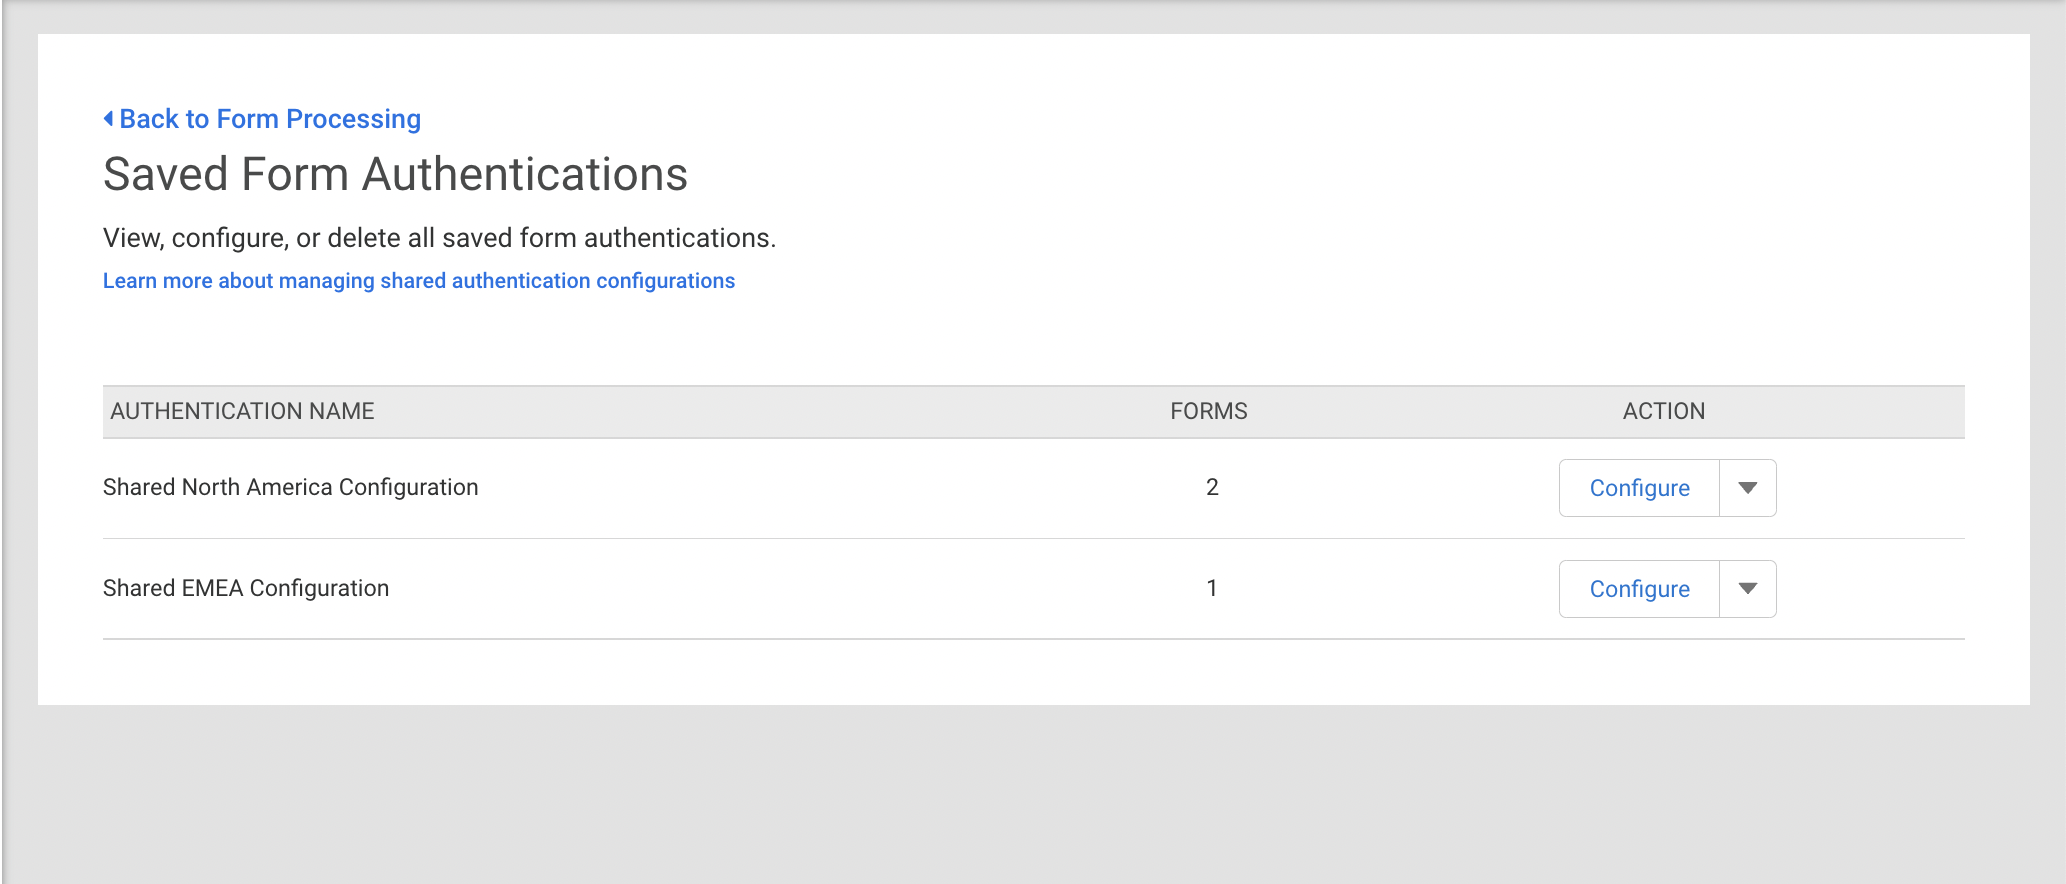
This table shows the name of the shared authentication, the number of forms using the authentication, a “Configure” button, and a “Delete” button within a dropdown for deleting the shared authentication.
Clicking the “Configure” button will bring up an editable configuration page for the shared authentication where the user can update authentication attributes.