Overview
If LDAP authentication is enabled for a form, only respondents in your LDAP (or Active) Directory can access the form. With this authentication and the LDAP Prefill Connector combined, you can also prefill the form with the authenticated respondent's information.
Requirements
You'll need a FormAssembly Team plan or above, an LDAP service, and a user entry from your LDAP directory.
First Steps
There are 2 parts to get started.
- You'll need your IT team to open the server to receive requests from the IP of your enterprise instance.
- We need the following code block filled out specific to your company and sent to our support team, then we can update your FormAssembly server with the details.
// LDAP connection template (skip if LDAP is not used)

var $ldap  = array(

'datasource' => 'ldap',

        'host' => 'localhost',

        'port' => 389,

        'basedn' => 'o=company',

        'login' => 'uid=admin,ou=system',

        'password' => 'password',

        'version' => 3,

        'primaryKey' => 'samaccountname', // use 'samaccountname' for Active Directory, try 'uid' otherwise.

        'mapping' => array('email' => 'mail', // Attribute mapping (change the LDAP attribute name if needed)

 'first_name' => 'givenname', // DATABASE COL => LDAP Attribute name

 'middle_name' => '',

 'last_name' => 'sn'),

'opt_referrals' => 0, // leave to 0 unless you're getting a LDAP #10 referral error (then set to 1).

'database' => '' // leave empty

);
Enable LDAP Authentication
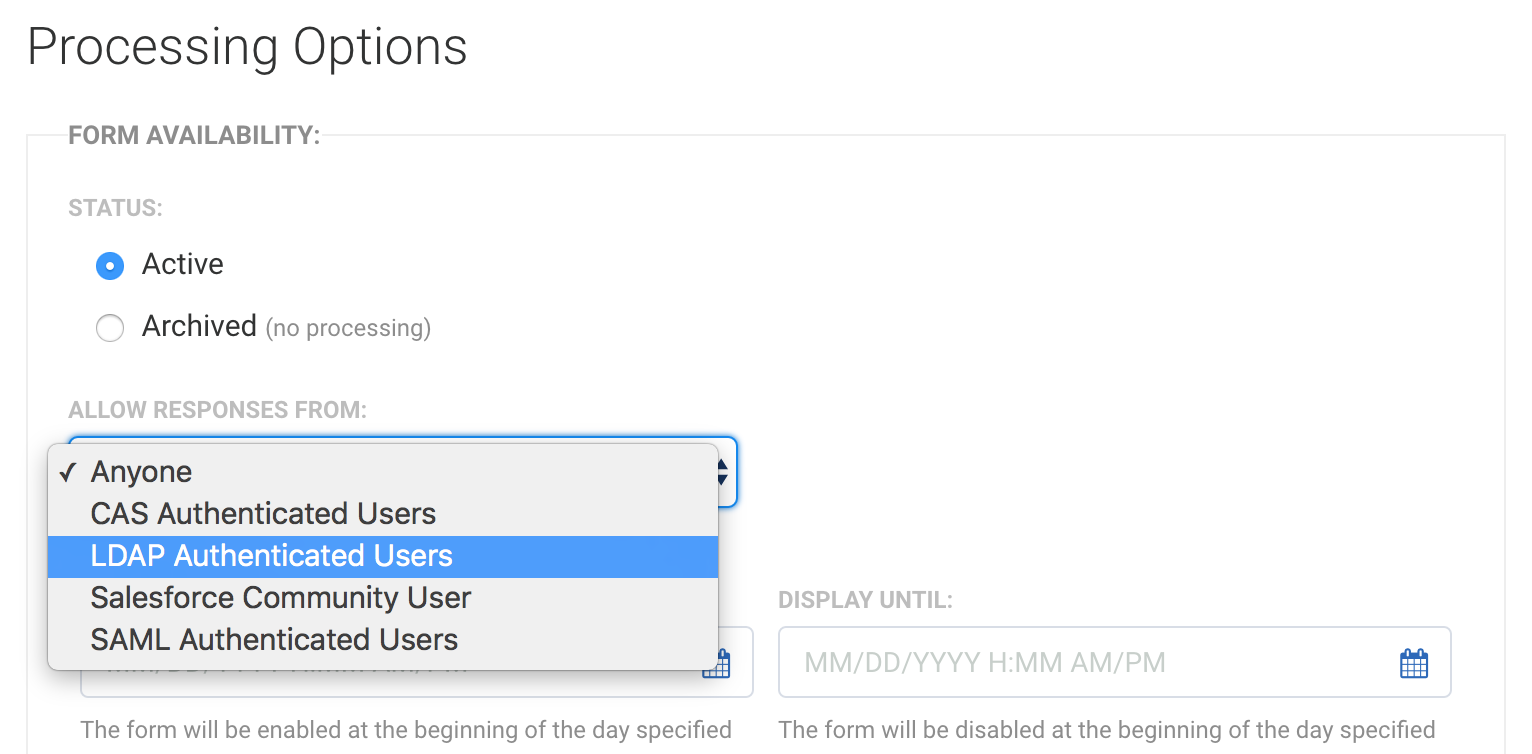
- Go to the Processing Options page for the form you would like to enable LDAP authentication.
- In the Allows Responses From: section, choose LDAP Authenticated Users.
- Click Configure.
Configure LDAP Authentication
1. Set Up an LDAP Connection
An LDAP connection needs to be defined in your FormAssembly instance in order for the LDAP authentication to work. If you haven't yet set up an LDAP connection, please contact FormAssembly Support with your details from the "First Steps" section above. If you've successfully configured an LDAP connection to work with your instance, the base DN of your LDAP connection will be displayed in the Authentication Scope section.
2. Set the Authentication Scope of the LDAP Query (Optional)
You can define the scope of the query for an LDAP search by adding a subtree of your base DN to the Authentication Scope field. This will limit the search for entries to a specific subtree of your base DN. Setting the scope may require advanced knowledge of your LDAP service's structure.
3. Test Connection
To enable attributes and form aliases for the LDAP Prefill Connector, a test connection to an LDAP user entry must be made.
Enter the Username and Password of a user. Click the Test button.
If the test is successful, the Select LDAP Attributes section will display the attributes of that user entry. You'll then be able to use those attributes in the LDAP Prefill Connector.
4. Select LDAP Attributes
Now, to enable an attribute, check the Enabled checkbox for the attribute. The alias for the attribute value is displayed next to the checkbox.
5. Auto-Resume
Check the box in your connector to enable auto-resume. Authenticated users who save their response will be able to automatically resume their response the next time they log in. (Users who saved more than one response before auto-resume is enabled will still be able to pick which response to resume.)
Or, leave the box unchecked to disable the auto-resume.
When you're done, click the Apply button to save your settings.
LDAP in Workflow
Forms configured with LDAP Authentication can leverage their LDAP settings within FormAssembly Workflows. Once LDAP is set up on the form, using the same steps as detailed above, add the form to a Workflow.