
With FormAssembly's Salesforce Marketing Cloud Connector, you can create subscribers, assign subscribers to lists, and send information to your custom data extensions.
Requirements
You must have the FormAssembly Salesforce Add-on enabled for your account.
Connector Timeline
To begin using the connector, select the form you would like to use, go to the connectors page, and select the Salesforce Marketing Cloud connector for the Form Submitted or After Form Submitted section of the timeline:
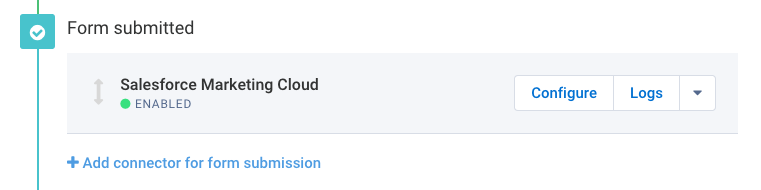
Make sure the connector is enabled, and click Configure to begin configuring the connector.
Manually Connecting to Salesforce Marketing Cloud
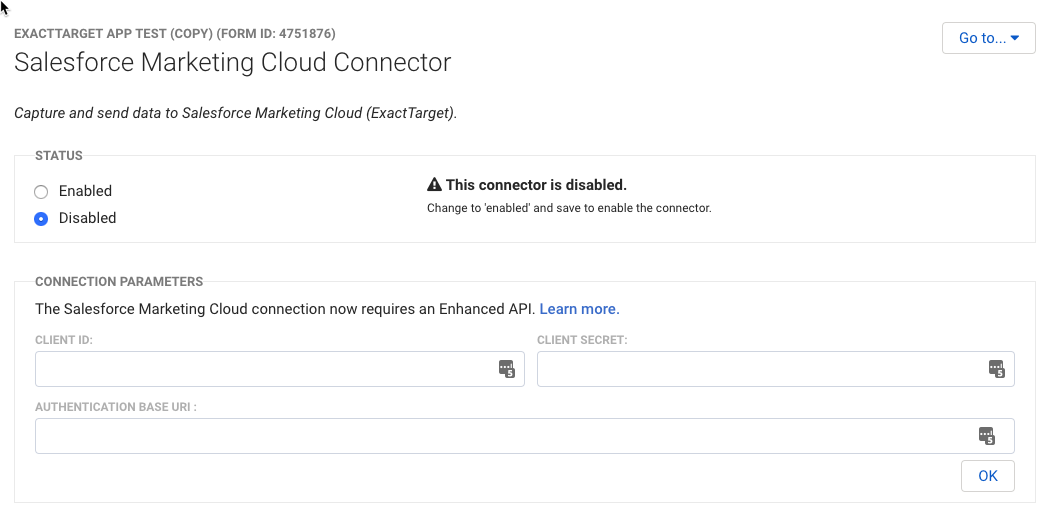
To manually connect to Salesforce Marketing Cloud you will need a "Client ID", "Client Secret", and "Authentication Base URI." To acquire these credentials, log in to the Salesforce Marketing Cloud.
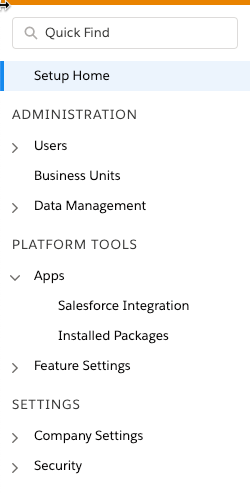
1. Once you have logged in to the Dashboard, in the upper right drop-down arrow next to the logged-in user, navigate to Settings -> Setup
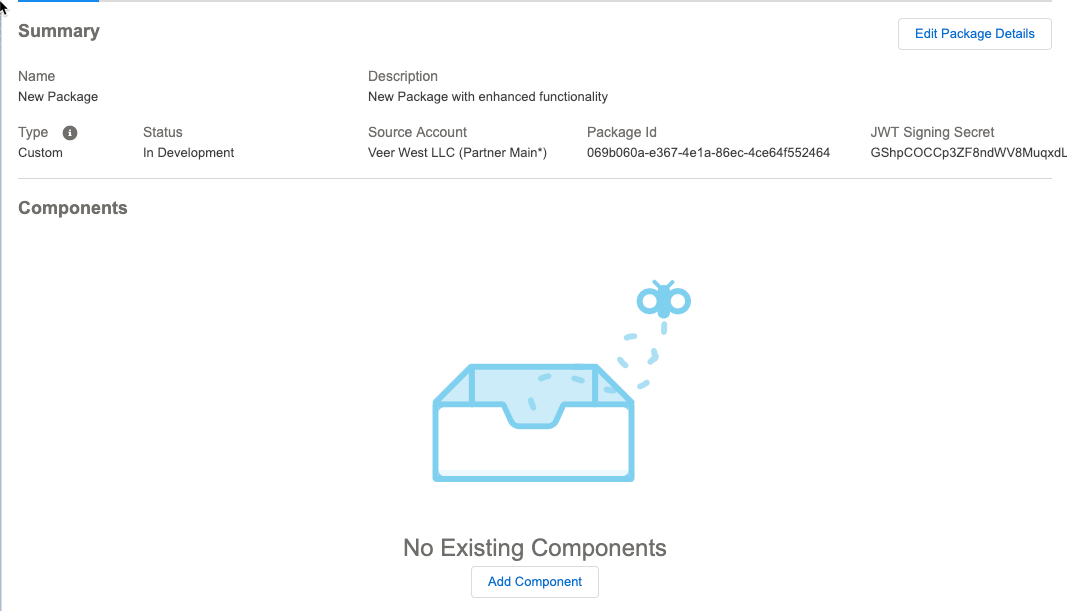
2. On the left menu under Apps, click Installed Packages, and then click the New button to the upper right.
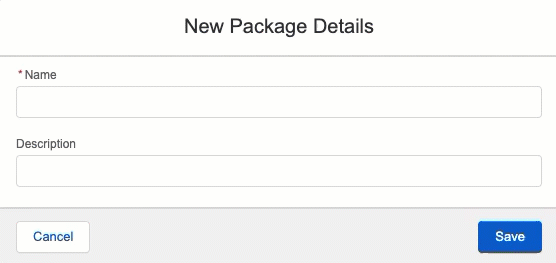
3. Name and save your package.
4. Click "Add Component" under the No Existing Components message.
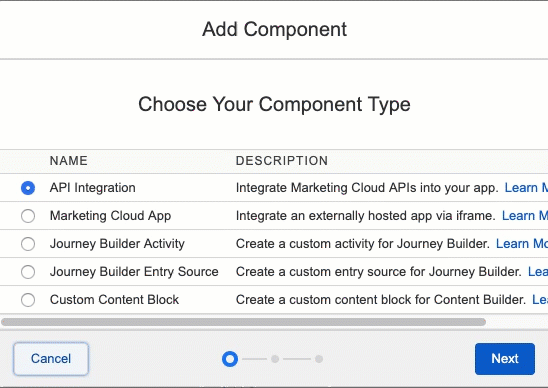
5. Choose API Integration for the Component Type, click Next, and choose Server to Server for the Integration Type.
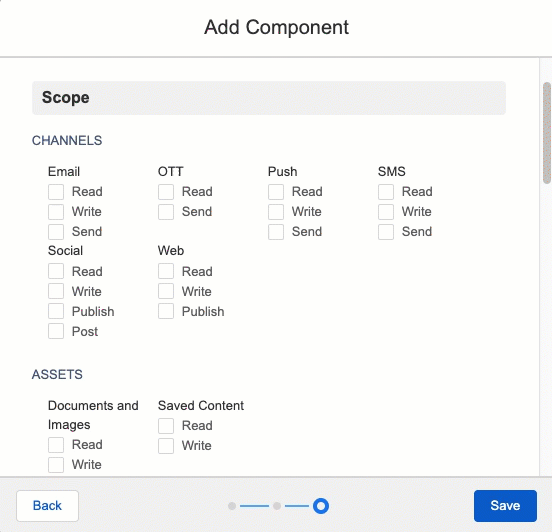
6. On the next screen, you give Read and Write permission to "Lists and Subscribers" and Audiences (located under Contacts), and Data Extensions and File Locations (located under Data). Click Save.
You should now be able to see your Client ID, Client Secret, and Authentication Base URI under the API Integration section:
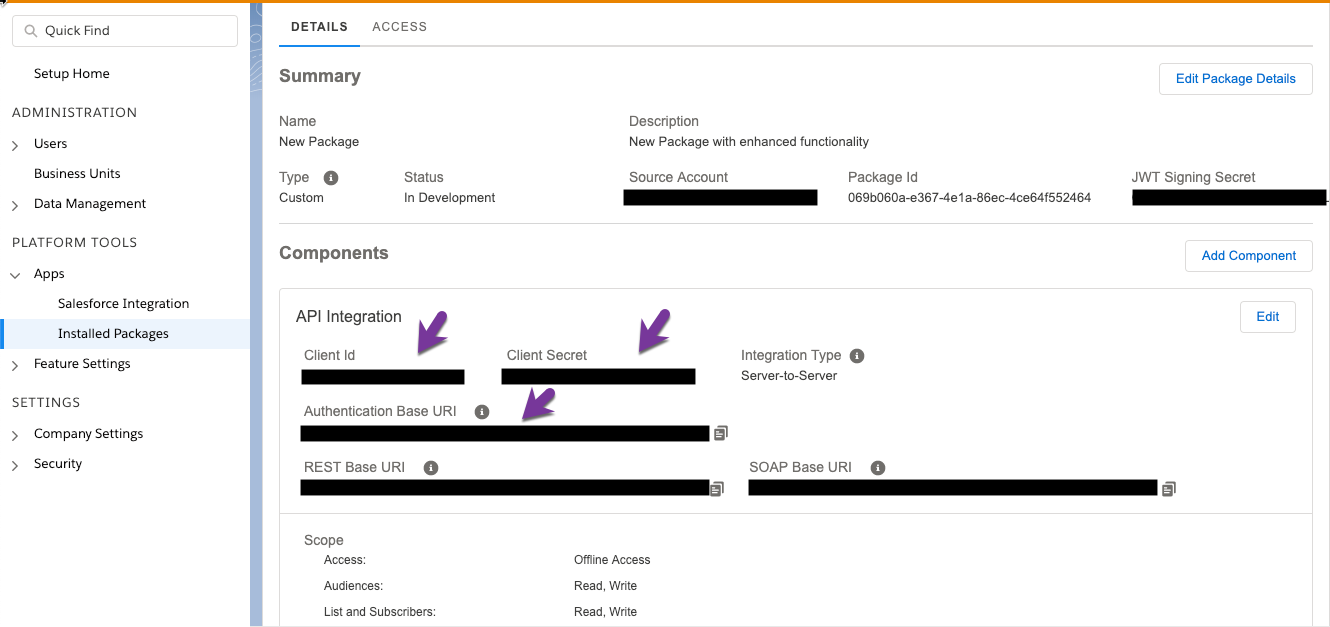
Copy and paste those three values into your Salesforce Marketing Cloud connector parameters in FormAssembly, click Check, make sure the connector is enabled, and you'll be ready to go!
Configuring the Connector
Now that you have made the connection between FormAssembly and ExactTarget, you're ready to begin configuring your connector.
You can start by clicking on Add your first object and choosing whether you'll be creating or updating a record in ExactTarget. You can also select if you'll be working with a subscriber or a custom data extension.

Subscribing and Unsubscribing from Lists
If you're working with a subscriber, you can choose which (if any) list you would like to subscribe them to or unsubscribe them from. It is important to note that lists are only available for subscribers, and not for data extensions.
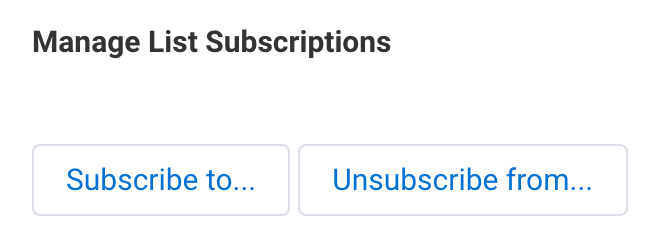
Subscribe or unsubscribe your respondents to a single or multiple lists based on their selection in the form, or based on other criteria that you decide.
- Click on "Subscribe to..." or "Unsubscribe from...", depending on which you would like to set up.
- Select the list that you will be subscribing them to or unsubscribing them from, and determine what criteria should be used to trigger that event.
In the example below, the user would be subscribed to the "Veer West List" when "Weekly" is selected in a radio button field:
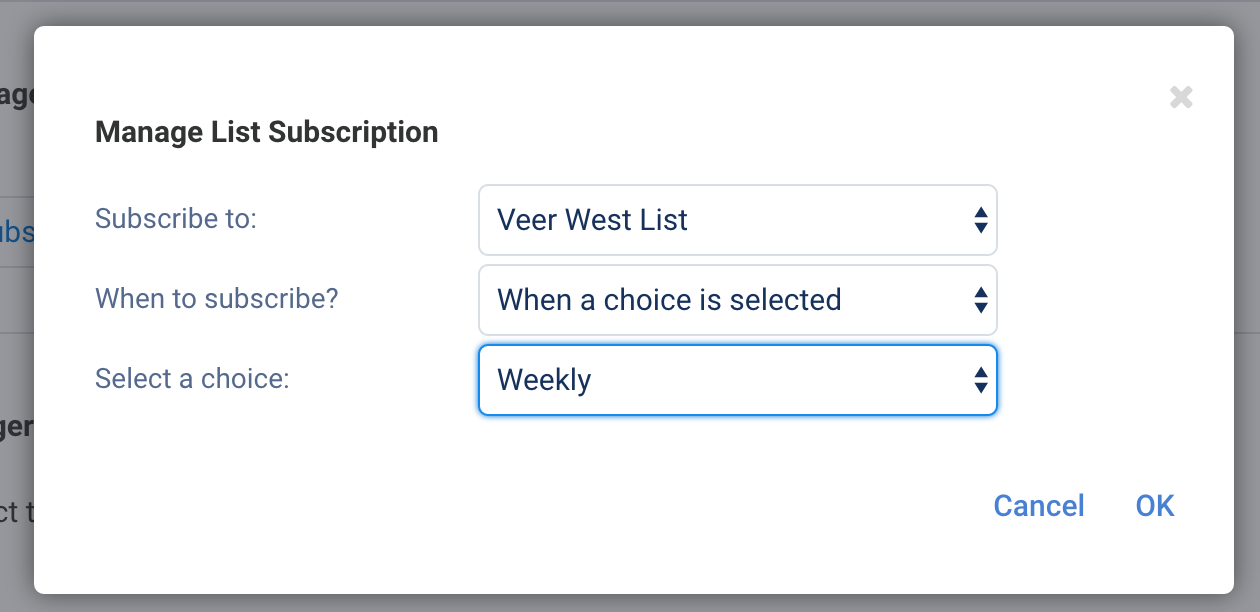
You can choose to set up subscribers when a particular choice in your form is or is not selected, and you can also use our formula editor to set up more complex subscription rules.
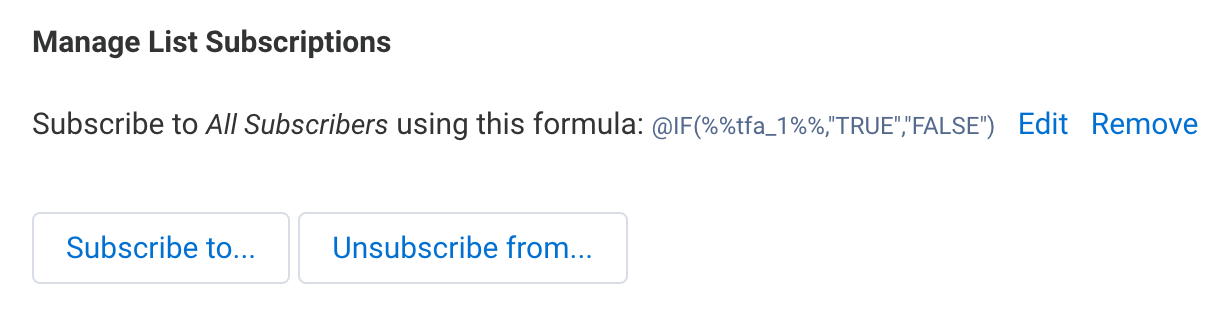
To set up multiple subscription or unsubscription rules, click the "Subscribe to..." or "Unsubscribe from..." button again, and set up as many rules as you would like.
Field Mapping
Finally, you'll need to map your fields from FormAssembly to ExactTarget so the connector knows what information to send and where to send it. Select the FormAssembly fields on the left and the ExactTarget fields on the right. You can also insert text and formulas here if you would like to.
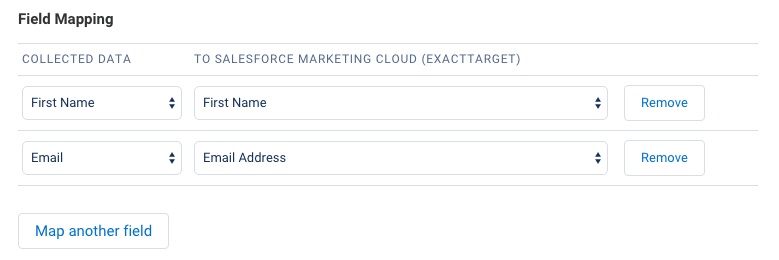
When you've finished mapping all your fields, click save and you're ready to begin testing!
Updating a Record
If you want to update a subscriber or custom data extension, or add a subscriber to a second list, you will choose the Update option.
Once you have selected "Update" you will see that you need to set up how the connector will find your existing record under the "Matching with" section. From here, you can choose what field(s) from ExactTarget will match with fields in your form. It is recommended that you use a field that will be unique for each record, such as the email address.
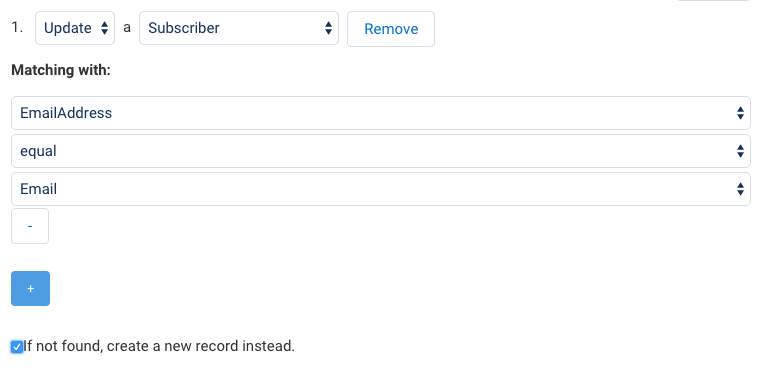
After setting up your lookup, map any additional fields you would like to.
This is also how you would add a subscriber to additional lists, by selecting which list you would like them to be on. Adding a new list in an update will not change any lists they are currently on, it will only add them to the new list.