With FormAssembly's Authorize.net integration, you can accept credit card and eCheck.net payments with your form. This means secure transactions in just one step. The credit card information gets sent directly to Authorize.net, and only the transaction receipt is stored on FormAssembly.
We also recommend reading more about how you can use reCAPTCHA to prevent spam submissions.
Sensitive Data Notice
Credit Card Numbers and CVV Codes must be marked as Sensitive Data. Please click here to read more about these fields.
Requirements
You'll need the following:
- FormAssembly's Payment Connector Add-on
- Authorize.net Merchant Accounts
- Sandbox account for testing (Sign up here)
- Your sandbox account has two settings:
- LIVE: While set to LIVE, your account will process LIVE transactions. You can use the LIVE setting with test card numbers.
- TEST: Setting to TEST allows you to confirm your connection to the payment gateway. Transactions submitted while set to TEST are NOT actually processed. Authorize.net recommends you always test using LIVE mode, not TEST mode. Reference for testing here.
- Your sandbox account has two settings:
- Production account for live credit card payments (Sign up here)
- Use the FormAssembly connector without the sandbox mode checkbox
- Sandbox account for testing (Sign up here)
- Authorize.net eCheck Requirements
- Approval to use eCheck.net (Apply at Authorize.net and read the eCheck.net User Guide)
- A bank account in the United States
- You can process one-time and/or recurring transactions with one connector in the submit position of the connector timeline.
- Recurring transactions are not authorized for the full amount on submission. This means these transactions will show under your Automated Recurring Billing (ARB) section of Authorize.net. You will see an initial transaction for a $0.05 temporary hold, which will be sent to ensure that the card used is a valid one, but it will not show a settlement date (meaning that the $0.05 charge will not be captured). This hold is placed on the card by Authorize.net, and there is no way to turn this feature off.
Required Fields
As you build your form, make sure you collect the following information:
- Billing first and last name
- Billing organization name
- Billing email address
- Billing phone number
- Billing postal address
- Shipping name, company, and postal address
If collecting credit card payments:
- Credit card number
- Credit card expiration date (month and year)
- CVV
If collecting eCheck payments:
- Routing/ABA number
- Account Number
- Account Type (Checking, Savings, or Business Checking)
- Bank Name
- Account Holder
If collecting one-time payments:
- Billable items and amounts
- Define quantities if applicable
If collecting recurring payments:
- Recurring amount
- Recurring period (Monthly, Quarterly, Yearly)
- Start date
- Number of Payments if there is an end date
Configuration Steps
To begin, add the Authorize.net connector to your connector timeline and click on "configure." Then, follow the steps below.
Please note, it is currently only possible to enable a single Authorize.net connector on each form's connector timeline. Enabling more than one Authorize.net connector will likely cause errors.
1. Account Settings

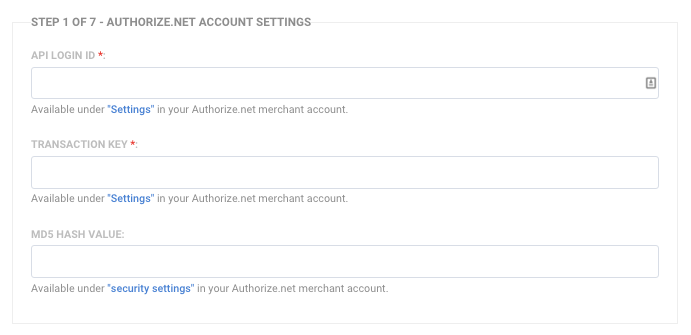
Enter the API Login ID and Transaction Key, which you can find under Settings in your Authorize.net account.
MD5 Hash value - this field is not required. You can find information on using this field here: MD5 Hash
2. Payment Options
Select the payment options you would like to offer on your form: Credit Card and/or eCheck
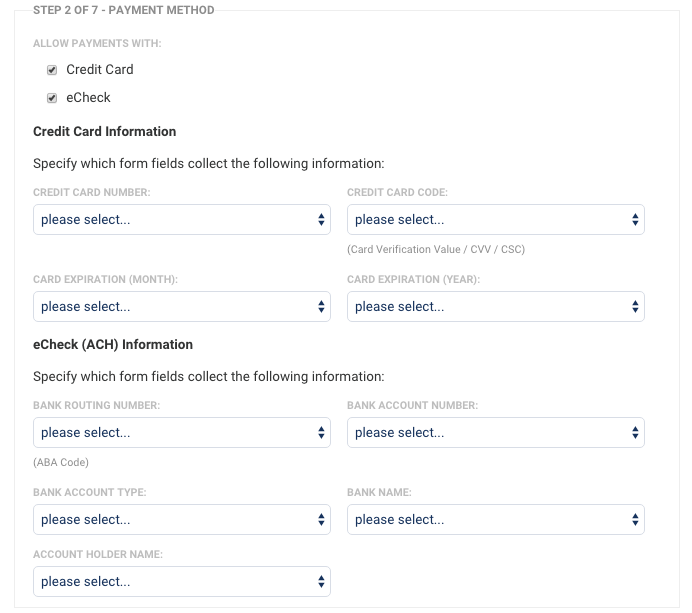
If you are accepting both methods of payment from Authorize.net:
- In the Form Builder, create a section dedicated to each payment type in your form. Make each section conditional on a payment method radio field.
- Mark the credit card option as the default choice in the field's Default Value settings.
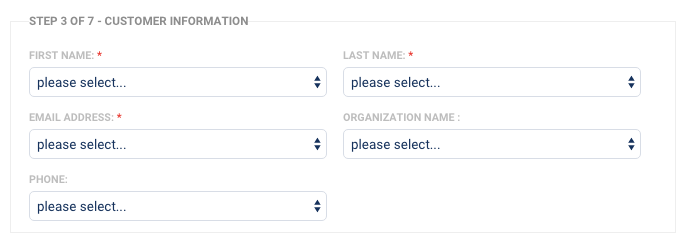
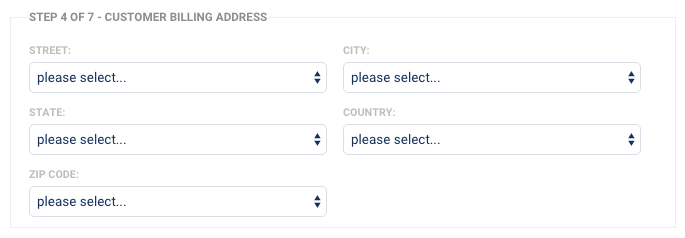
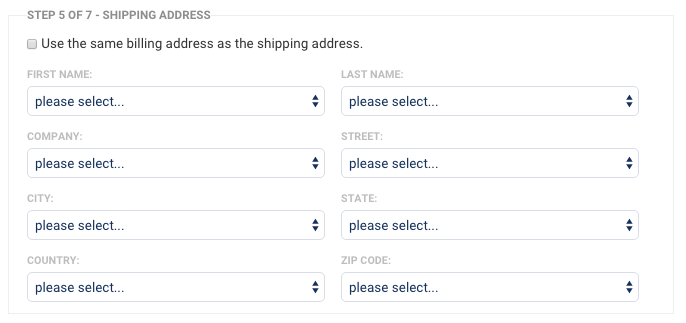
3-5. Customer Details
For the customer's personal information and the billing/shipping address, match your form fields to the payment information required by Authorize.net.
Check the checkbox if the billing address will be the same as the shipping address. If the shipping information may not be the same, you will need to collect the shipping information in the form and map accordingly in the connector.
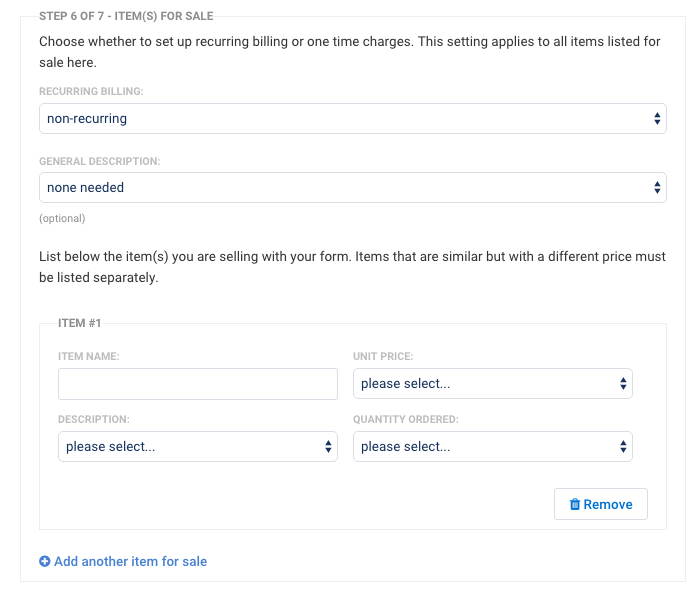
6. Item(s) for Sale
Recurring Billing:
With Recurring Billing, you can create either one-time transactions or recurring payments.
You will use a Recurring Billing option when you need to collect both one-time and recurring payments in the same form.
Non-Recurring Billing - for a one-time transaction.
Fields: General Description (optional)
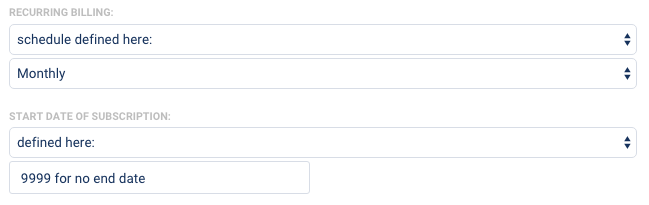
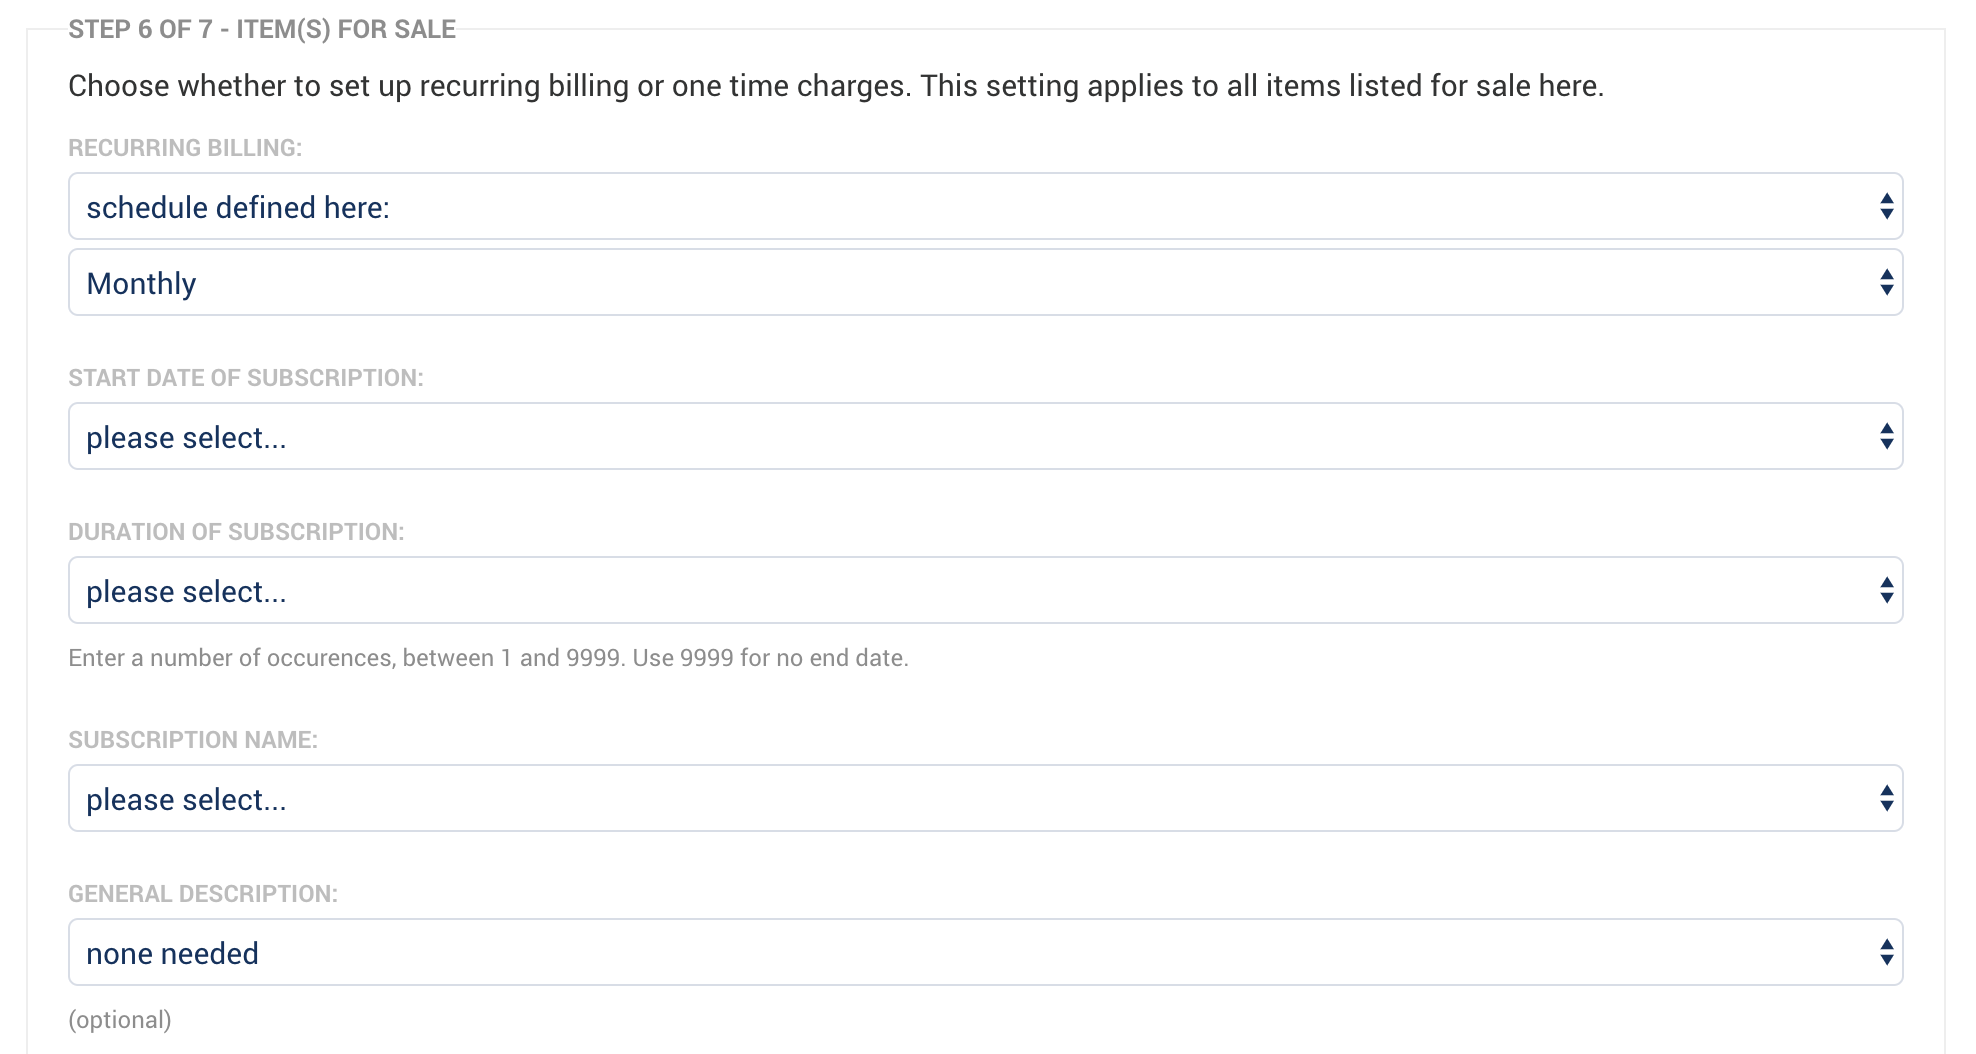
Recurring Billing - for recurring payments
Schedule defined here: Define the recurring payment interval/frequency here in the connector. You can select either Monthly, Quarterly, or Yearly. Use this when all payments on the form will have the same interval/frequency.
Fields: Start Date, Duration/Number of Occurrences, Subscription Name, General Description (optional)
In the form: When defining the recurring interval/frequency on your form, you will need to specify either Monthly, Quarterly, or Yearly in the connector to correspond to your form fields. Use this when you want to provide the option on the form for the respondent to choose the interval/frequency.
Fields: Start Date, Duration/Number of Occurrences, Subscription Name, General Description (optional)
Start Date Notes:
- If you run into errors setting a Start Date, you will need to make sure that the Start Date is greater than or equal to the current date and time.
- Authorize.net's validation checks against Mountain Time (GMT-6) so an error might occur if you try to submit a subscription from a time zone in which the resulting date is different.
- Finally, if the start date for your subscription is the 31st, and the interval is monthly, the billing date will be the last day of every month, even if that month does not have 31 days.
Duration Notes:
- The duration defines the length of the subscription/number of payments. The recurring billing field or interval defines the interval/frequency of the payments (currently you can select Monthly, Quarterly, and Yearly).
- For the "Duration of subscription", you will be asked to enter a number between 1 and 9999 payments. Use 9999 if you would like the recurring payments to have no end date.
- If you have chosen to define the number of payments within the form, you will be asked to select the particular field in your form where those aspects are defined.
- Examples:
- Monthly interval/frequency with a duration of 6. This will create a recurring subscription that will charge every 1 month for 6 payments.
- Quarterly interval/frequency with a duration of 5. This will create a recurring subscription that will charge every 3 months for 5 payments.
- Yearly interval/frequency with a duration of 2. This will create a recurring subscription that will charge every 12 months for 2 payments.
- Examples:
If you are working with repeated fields in your form, you can read more about how those can be used when processing payments.
Items:
Next, list the item(s) you are selling with your form. Items that are similar but with a different price must be listed separately. The setup depends on how you've built your form.
7. Sandbox Mode
When Sandbox Mode is enabled, Authorize.net will record transactions without processing credit card charges. That means you can test your form without charging a credit card.
Enable the Sandbox Mode checkbox under the following conditions:
- Test with your Authorize.net Sandbox account in Live Mode with the Sandbox Mode checkbox checked in FormAssembly. There is no reason to place your Sandbox account into Test Mode.
- Test with your Authorize.net Production account in Test Mode with the Sandbox Mode checkbox checked in FormAssembly. The option for Test Mode in an Authorize.net Production account is on the Settings page and allows you to test connecting to the Production environment. Transactions that are run in the Production environment in Test Mode are not stored anywhere and will return a transaction ID of zero. There will be no history of them. When running test transactions, you may need to turn off the fraud filter within Authorize.net in order to avoid potential issues.
Enable the Connector
Time to try it out! Ensure the setting at the top of the connector is Enabled and click Apply at the bottom. You're good to go!
Send Invoices
FormAssembly will not trigger Authorize.net's email receipt to be sent out to the customer. To send out a receipt, you will have to set up the Auto-Responder for your form.
In order to send your users a copy of their response, you can use FormAssembly's Auto-Responder feature to send a copy of every submission automatically. You can customize the Auto-Responder to include details from the entire form or only information related to the transaction.
Common Errors
This Form Was Not Submitted over an Encrypted Connection
If you are seeing this error, it means your form needs the SSL option enabled. You may do this through the Display Options tab.
The Merchant Login ID or Password is Invalid
If you are seeing this error, it means that you are not properly connected to the Authorize.net account, or the account is suspended or in test mode. The info you are sending to Authorize.net is not able to make it there for one of the above reasons. Check your API Login ID and Transaction Key, and update if necessary. Then try testing your configuration again.
You should log back into the connector and then try testing your configuration again. Also, if you are running in Sandbox mode, make sure that option is checked.

No Transaction ID or Credit Card Number Available
If you are seeing this error, it means that the credit card field has been left blank and needs to be filled in.
Line Item 1 Invalid Error
If you are seeing this error, it is due to empty fields in the connector where a value is needed. To resolve this issue, change those value fields from null to 0.00, save your connector, and test again.
AVS Mismatch
If you are seeing this error, it is due to a mismatch between the zip code entered by the respondent and the zip code associated with the credit card.
Authorize.net Fraud Filters
If you have enabled fraud filters on your Authorize.net account, then you may see error messages that read, "Your order has been received. Thank you for your business!"
In these cases, the payment has either been rejected or held as a result of Authorize.net's fraud filters. In cases where the payments have been held, you may need to verify the status of those payments within Authorize.net to see if they have been flagged or approved.
Set Up One-time and Recurring Payments in a Single Form
With the Authorize.net connector, you can enable a single FormAssembly form to collect both one-time and recurring payments within a single connector, depending on a user's response. You can learn more in this help document.
Please note, it is not currently possible to configure 2 separate Authorize.net connectors within a single form's timeline.
Set Up Future Payments
To set a payment for the future, you will need to mark it as a recurring payment. You can then set the payment date as a specific date or as a set number of days in the future (for example, "+31 days").
If you choose to set the number of recurring payments to "1" then this charge will only occur once on the date you specify. However, you can also set recurring payments to occur at regular intervals starting at a future date.
Sending Authorize.net Data to Salesforce
If you would like to send your Authorize.net Subscription ID or Transaction ID to Salesforce, you can map the following aliases in your connector:
- %%AUTHORIZE_DOT_NET_SUBSCRIPTION_ID%%
- %%AUTHORIZE_DOT_NET_TRANSACTION_ID%%
However, if you attempt to map the Subscription ID or Transaction ID form fields directly in the connector they will not go through. You must use the above aliases. This is because the values are added to the formula context from the Authorize.net connector but the actual field values are not yet filled by the time that the Salesforce connector runs.
When the Authorize.net connector is run, an initial $0.05 temporary hold will be sent to ensure that the card used is a valid one. This hold is placed on the card by Authorize.net, and there is no way to turn this feature off.
When setting up recurring transactions, there is no actual charge coming from FormAssembly, so there is no transaction ID available other than the one that is used to create the $0.05 temporary hold. However, there is a different alias for the subscription ID, which is the value that can be sent over to Salesforce for tracking your record.
Finally, if there are cases in your Salesforce connector where you would like certain steps to be skipped if an Authorize.net transaction is not executed, you can use the following skip-if formula:
@IF(%%AUTHORIZE_DOT_NET_TRANSACTION_ID%%="","TRUE","FALSE”).
You can read more about skipping steps if certain values are blank here.