What is the Forms List?
The Forms Page is the screen you see directly after logging into FormAssembly. From this page, you can create, clone or edit forms, view responses, build workflows, and more.
This page also contains the Forms List. This is a list of all of the forms in your account:

Creating New Forms

When you click "New Form", you will have several options to choose from. For your first form, you can dive into one of our templates, use our Salesforce Import tool** to quickly build a form with objects and fields from Salesforce, or use our AI agent to convert a PDF of a form into a FormAssembly form. Click Blank Form to create a form from scratch or even clone a previously created form.
** Depending on Salesforce plan or permissions.

Organize Your Forms
The easiest way to keep your forms organized is to use Tags and Descriptions with your forms.
You can add tags to each of your forms to make it easier to find the form you're looking for by using the filtering options at the top of your Form List. You can also add a short description to each form.
Adding Tags & Descriptions
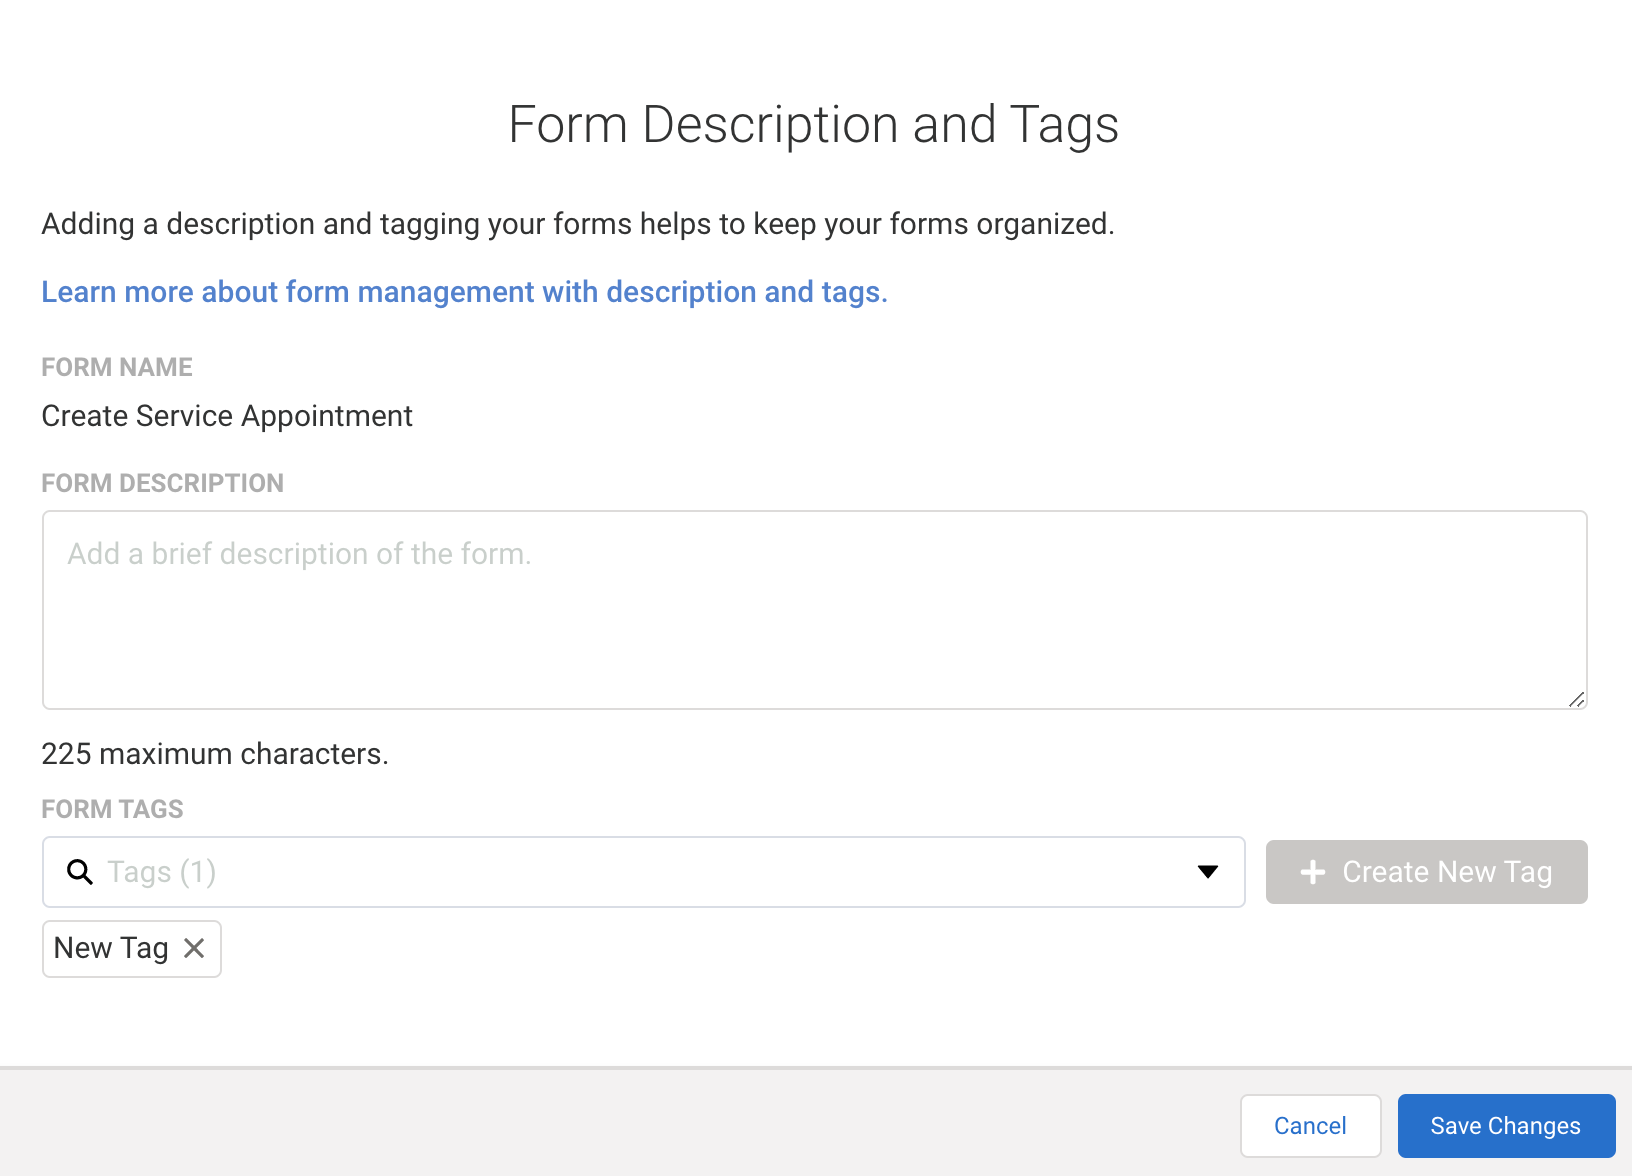
To add a tag to your form, click the Edit Descriptions and Tags link.

After clicking the link, you'll be able to add in single or multiple tags as well as a description for your form.
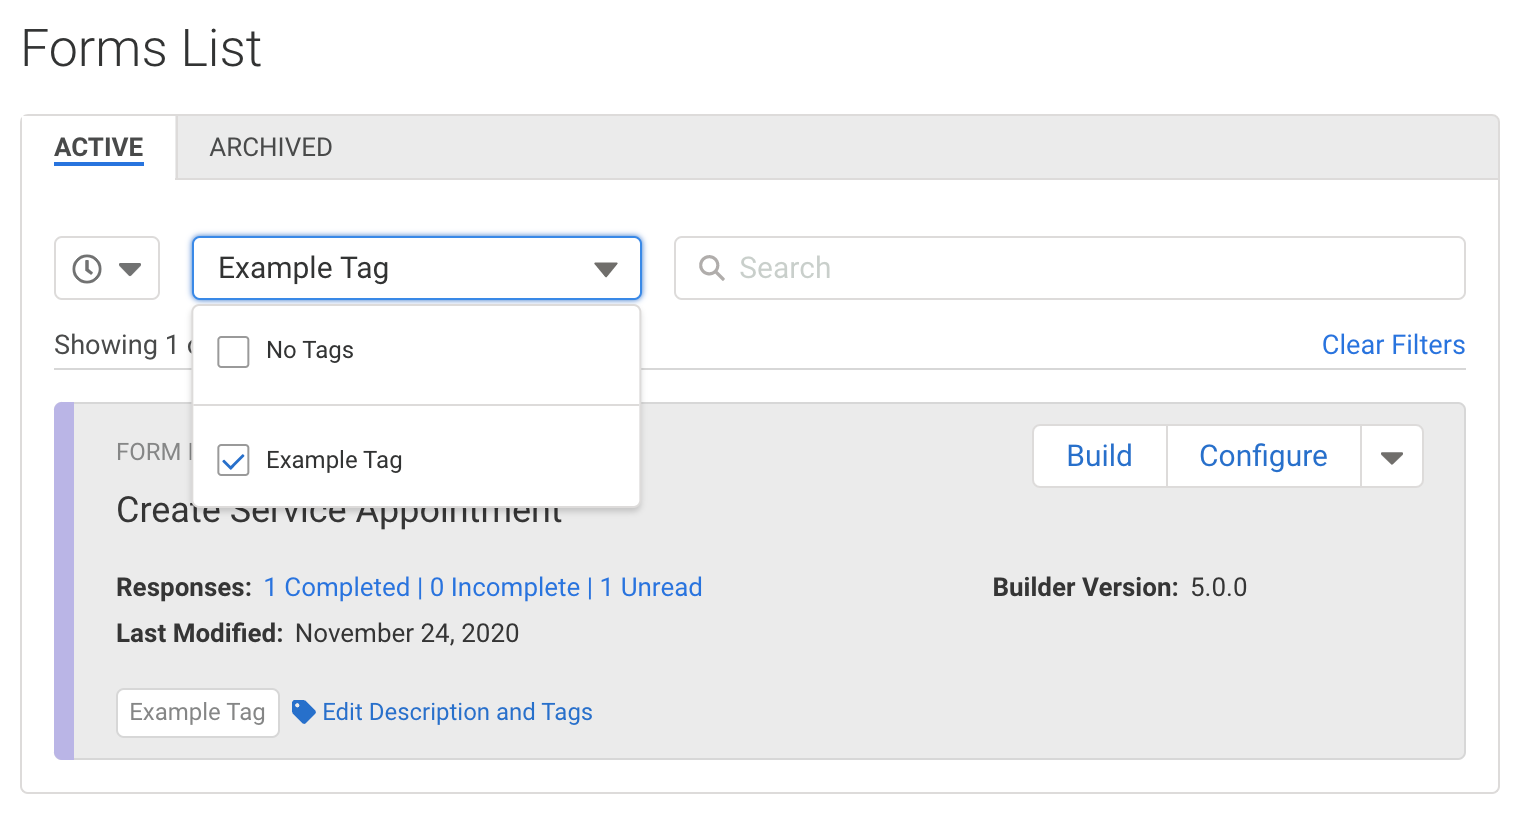
Searching Tags
After you've added tags to your form, you can search for your tags using the Tags search box at the top of the Form List page. Additionally, you can use the search bar at the top right to find specific tags as well.
Sort & Filter
You can sort forms alphabetically, by last modified, by most recent responses, by the number of responses, and by tag. You can also use the search bar to find forms based on their Title or Form ID.

Managing Forms
Build
On the images above, you can see that each form has its own "Build" button. A quick click takes you straight to the Form Builder for the specified form.
Configure
Set which dates your forms are active, who gets email notifications, configure connectors, and more from the Configure button. Here's more on configuring your forms.

More
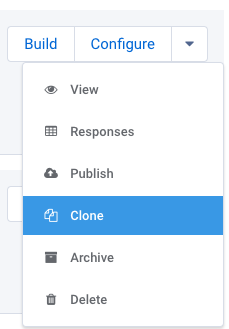
To see more, you can expand the additional options menu to the right of the "Configure" button. This menu contains the following options.

- Click View to see the live version of your form.
- Responses will take you to the My Responses page for the form.
- The Publishing page covers which publishing options are available for the form.
- Click Clone to create an exact copy of a form (including connectors). You can read more about cloning your forms below.
- Archiving a form will make it no longer public, but you can still access it.
- Deleting the form will erase it completely.
Cloning Forms
As we mentioned above, cloning a form creates an exact copy of the form, including any connectors. This can be helpful for troubleshooting or for starting your building process by using an already existing form as a template. It is important to note that no responses will be copied over to the cloned form. Additionally, notification and processing settings will also not be copied over and you will need to reauthenticate your connectors in the clone.
To clone your forms:
- Hover your mouse over the down arrow next to configure beside the form you want to clone, and click "Clone".
- The Form Builder will automatically open with the clone inside the canvas. However, this is only a preview. In order to fully create the clone, you will need to click the "Save" button before you go any further.
- The clone will automatically be renamed to "[title of original form] + (copy)". You can leave the name as-is, or you can change the name to differentiate it from the original form.
- After you have clicked Save, you'll now have a clone!

Form Name Notes
Form Names have a maximum character length of 255 characters for alpha/numeric characters. However, when you add special characters, the Form Name deviates from the maximum length of 255 due to width considerations in order to display the whole value fully on the Forms List page. Because of this, when using special characters, there may be fewer than 255 characters appearing in the Forms List.